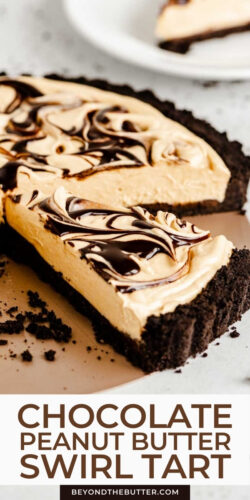
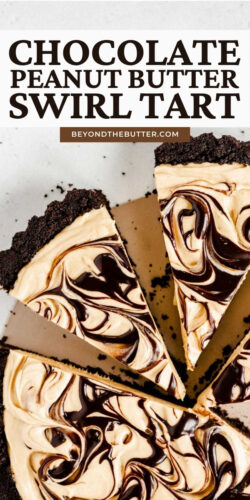
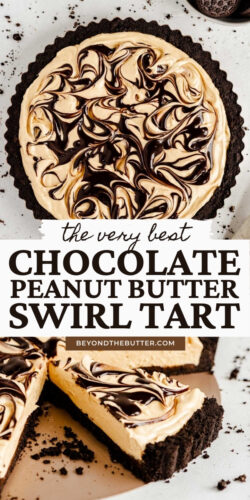
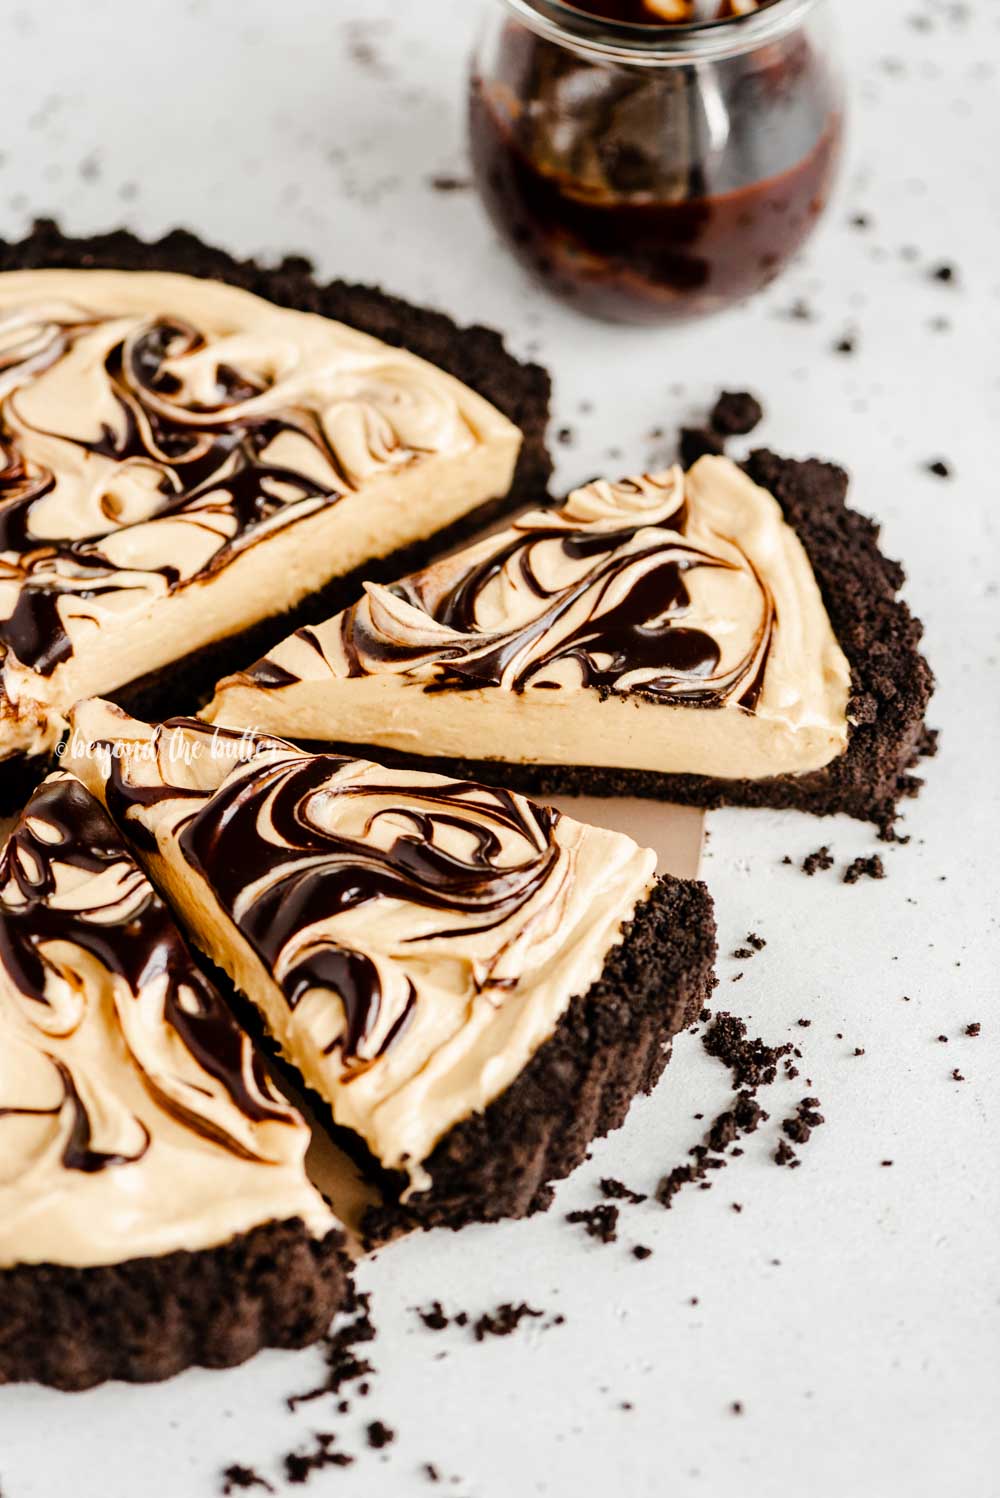
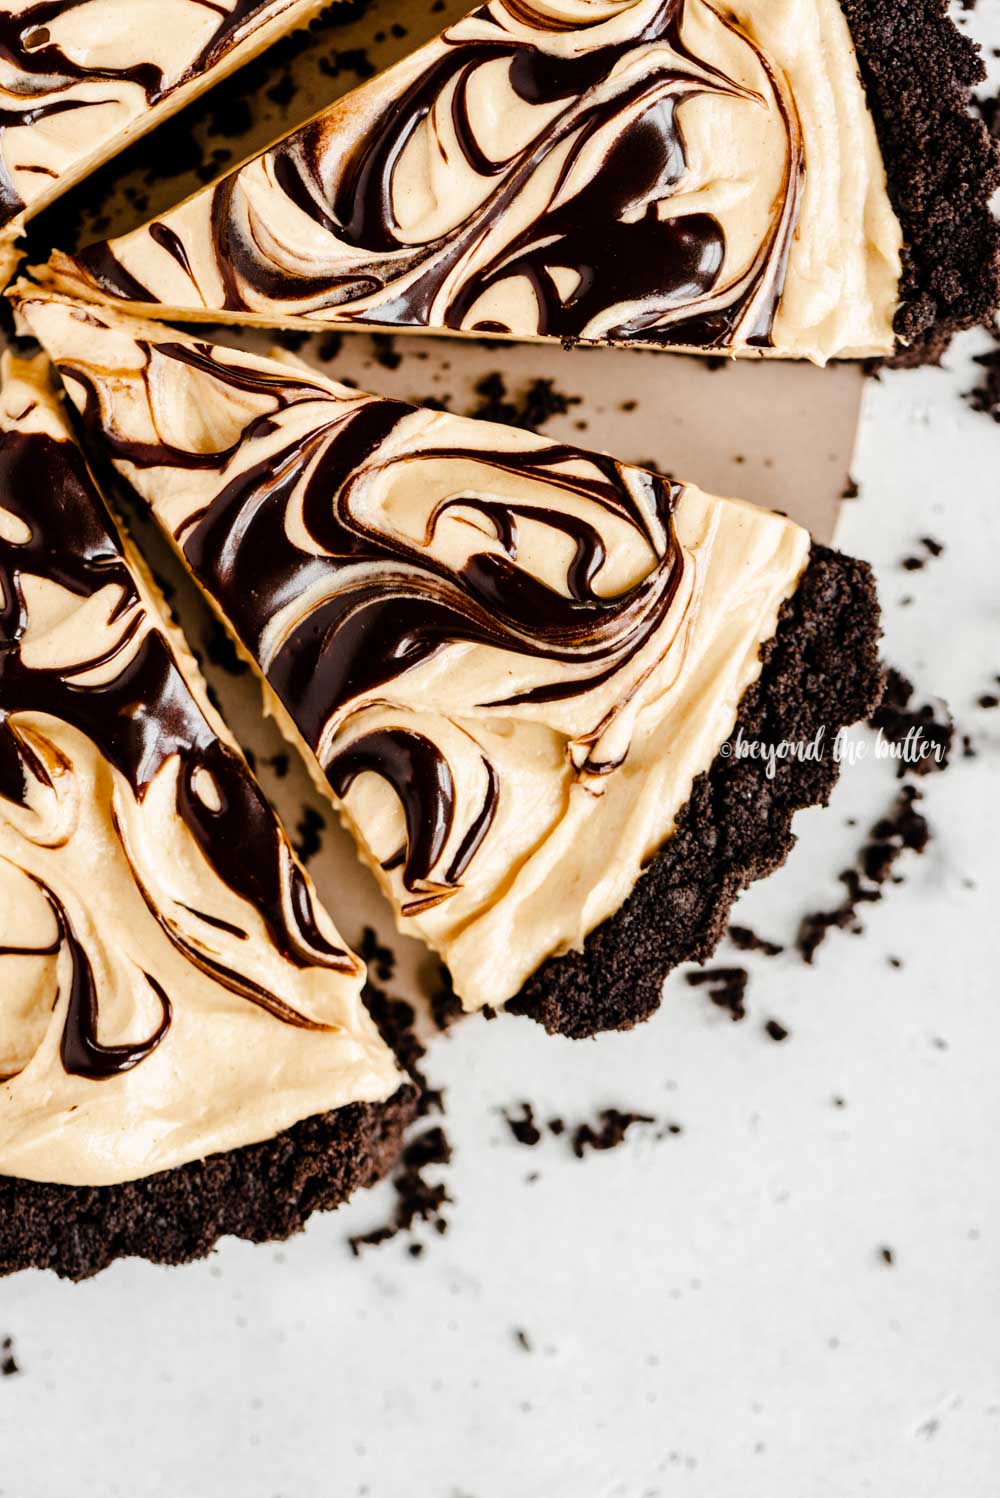
This Chocolate Peanut Butter Swirl Tart is inspired by my late Grammy's chocolate covered peanut butter eggs recipe. It's a no-bake dessert recipe that combines a buttery, chocolate sandwich cookie crust, a layer of chocolate ganache, and a light and creamy peanut butter filling topped with a hot fudge swirl! It's seriously indulgent and perfect for when you need an easy, go-to dessert made with commonly used grocery staples!
This chocolate peanut butter swirl tart is sponsored by ALDI USA. All thoughts and opinions are 100% my own. Thank you for continuing to support the brands that help to make Beyond the Butter™ possible!
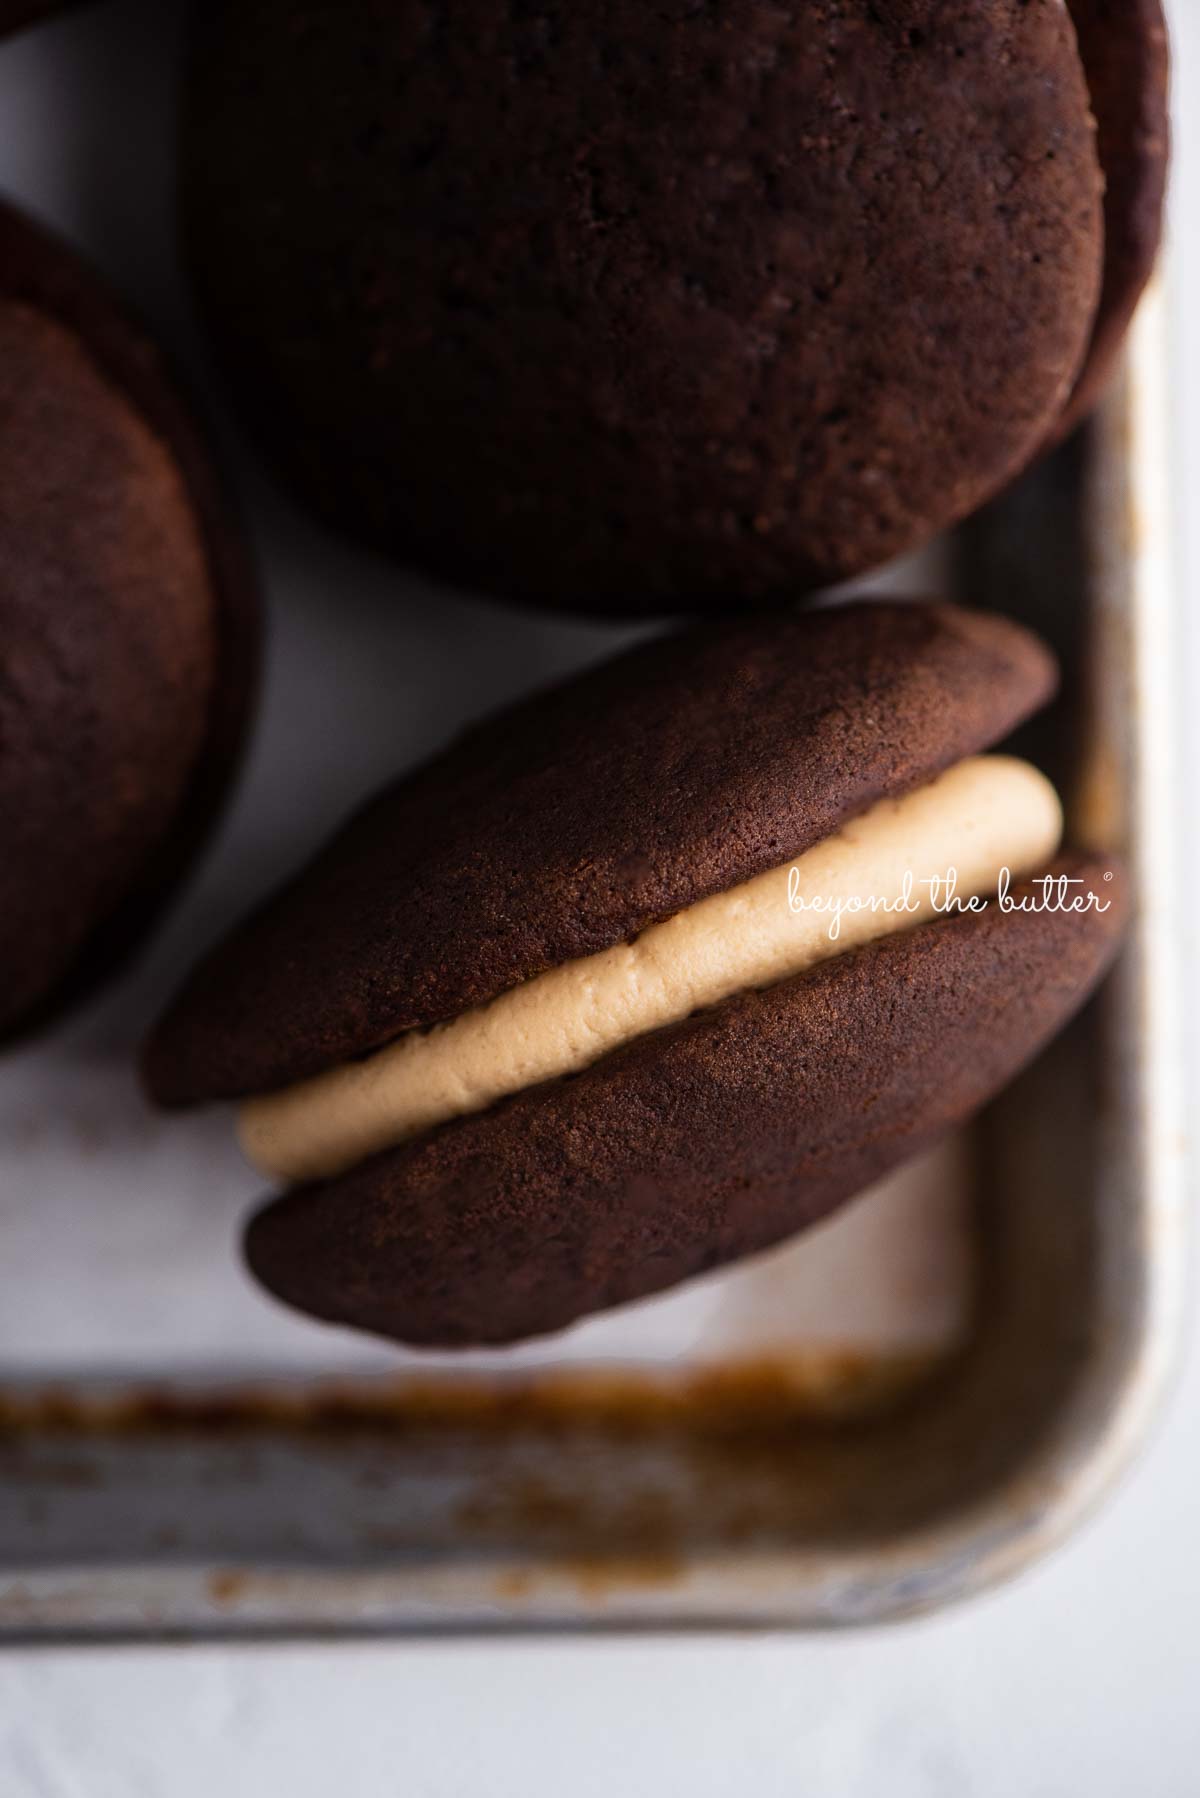
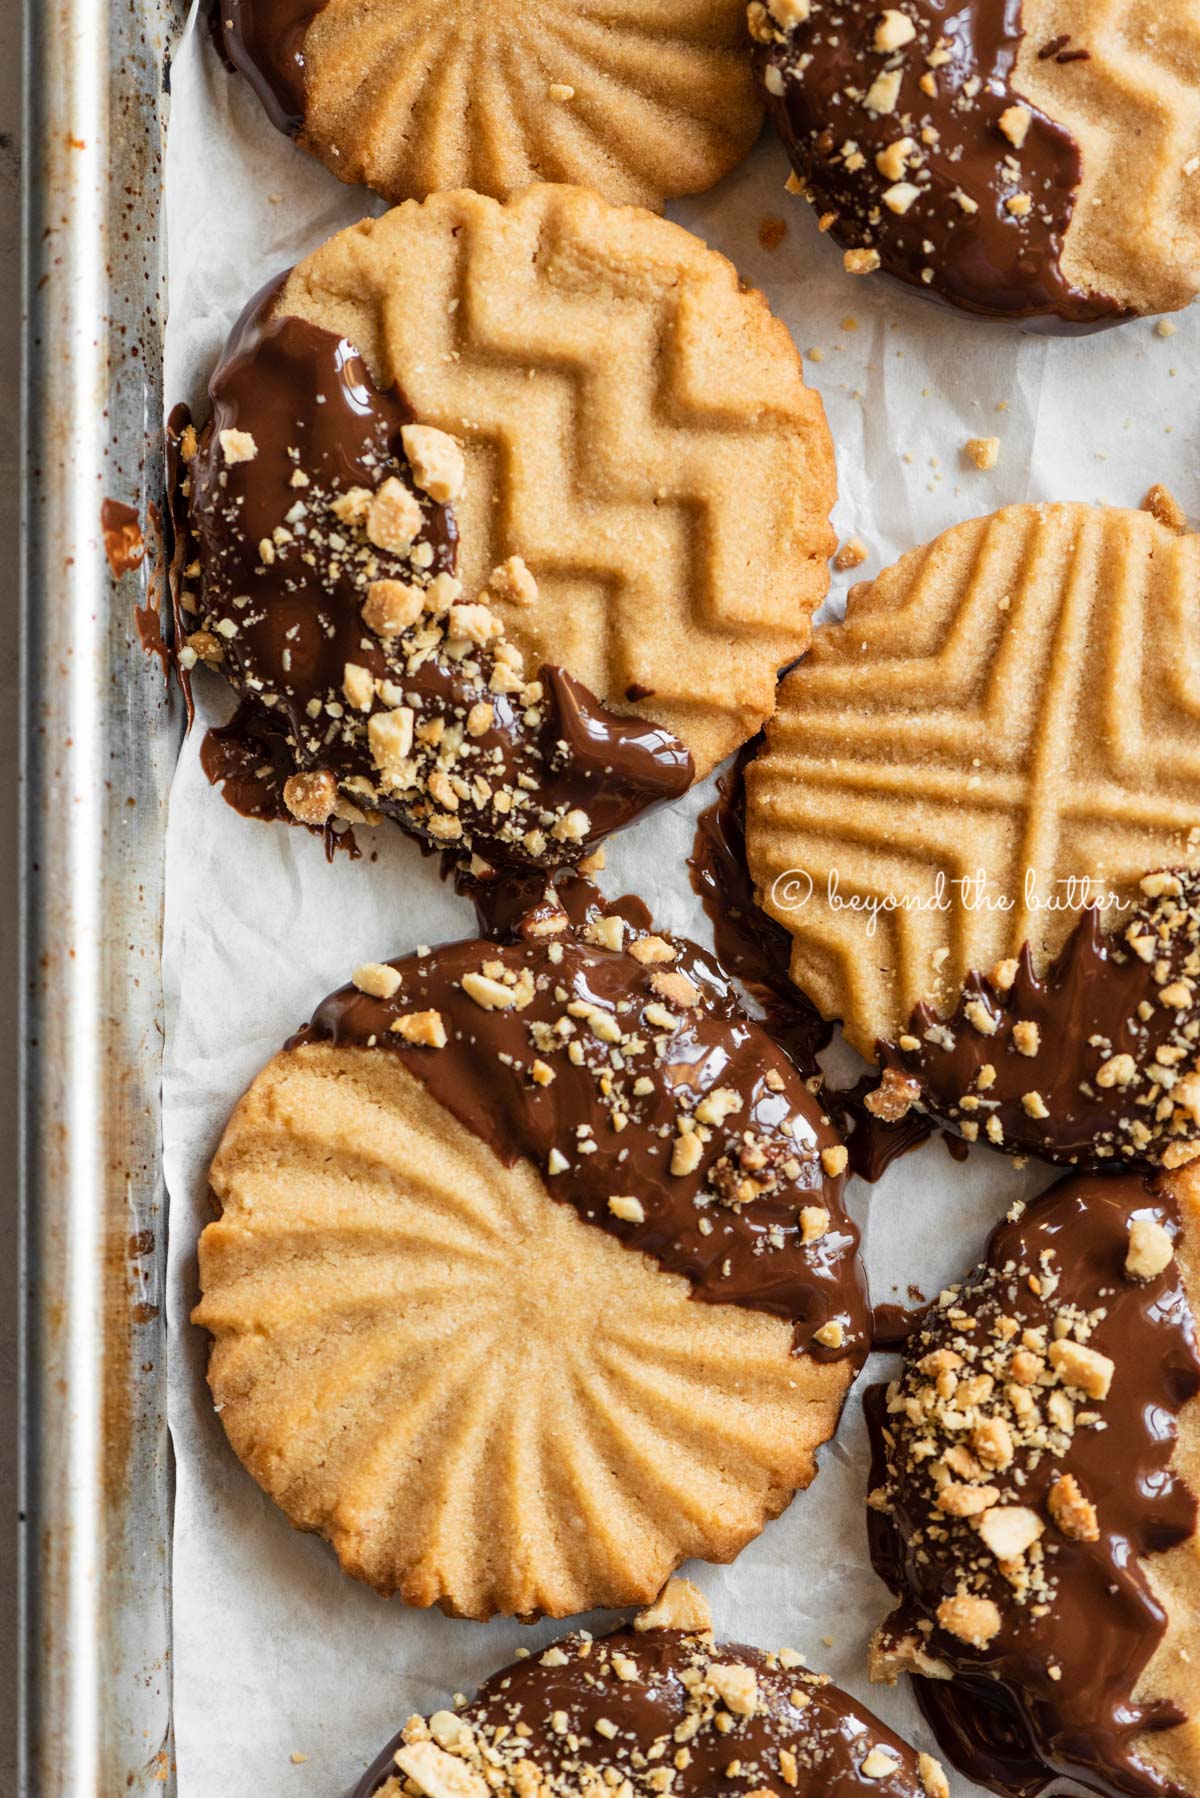
It's no secret that I love a good chocolate-peanut butter dessert! I've used this fabulous tasting combo in my chocolate-dipped peanut butter cookies, chocolate peanut butter whoopie pies, devil's food cupcakes with peanut butter frosting, and—where this recipe is inspired from—my late Grammy's chocolate covered peanut butter eggs recipe!
The peanut butter filling that's in the eggs is very similar to what is in this chocolate peanut butter swirl tart recipe. It's very creamy, has a nice light and airy texture, and not overly sweet.
The melted chocolate used to cover the peanut butter eggs was swapped out for this recipe with a rich chocolate ganache layer and a cookie sandwich crust that uses Benton's Original Chocolate Sandwich Cookies from ALDI!
Jump to:
Why You'll Love this Recipe
- No oven needed
- Looks super fancy, but it is easy to make
- Uses nine ingredients you probably already have in your home
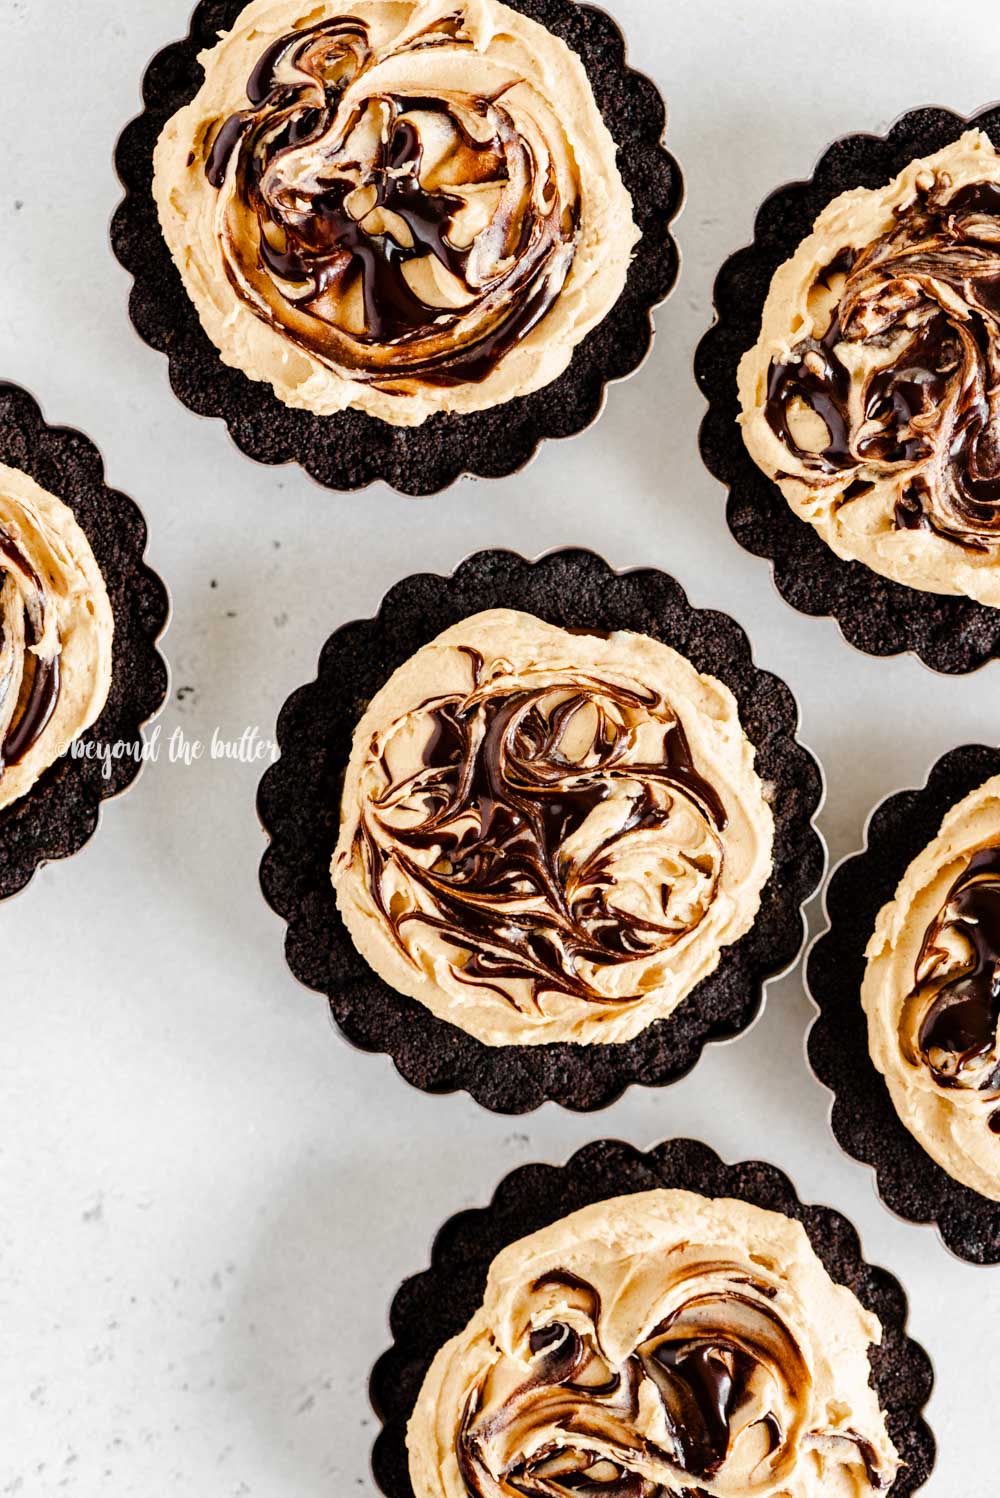
- Easily customizable from a 9 ½ inch tart pan to a 9-inch pie plate, 9-inch springform pan, or six mini tarts (4-inch in diameter)
- Tastes like chocolate peanut butter cups
- Light and creamy
- Rich and chocolatey
- Seriously indulgent, but not a heavy dessert
- The chocolate ganache layer is optional
- Switch up the hot fudge swirl for chocolate syrup or a border of crushed peanuts
If you're a huge fan of chocolate and peanut butter together, then you will definitely love this recipe!
Ingredients Needed
Only nine ingredients are needed to make this no-bake chocolate peanut butter swirl tart, most of which you probably already have in your pantry!
- Benton's Original Chocolate Sandwich Cookies - you'll need 24 of the 36 cookies that come in a package to make this chocolate peanut butter tart. You can dip the rest in some milk while binge-watching your favorite show!
- Countryside Creamery Unsalted Butter - melted down; this will help to bring that beautiful soft chocolate cookie crust together.
- Baker's Corner Semi-Sweet Chocolate Morsels - good quality chocolate chips that melt down nicely with the warm, heavy whipping cream! You can also use milk chocolate morsels as well!
- Heavy Whipping Cream - you'll use this when making the chocolate ganache and the peanut butter filling. For the chocolate ganache, you heat it in a small saucepan. For the peanut butter filling, you whip it up into soft peaks of whipped cream!
- Vanilla Extract - an essential baking item that's used in the chocolate ganache and again for the peanut butter filling.
- Cream Cheese - this must be softened to room temperature to get that nice smooth peanut butter filling.
- Peanut Delight Creamy Peanut Butter - one of the key ingredients to make this chocolate peanut butter swirl tart. Creamy, no-stir peanut butter is best for this recipe!
- Simply Nature Organic Powdered Sugar - for best results, make sure this is sifted prior to adding to the peanut butter filling.
- Hot Fudge Sauce or Chocolate Syrup - used to drizzle over the top of the peanut butter filling. You can skip this part if you don't have either item readily available.
For quantities and instructions, please see the recipe card below.
How to Make the Recipe
Below is a brief summary of how to make this no-bake chocolate peanut butter tart recipe.
Make the chocolate cookie sandwich crust. You'll need a food processor for this part to process the cookies into fine crumbs. Use the entire cookie!
Add in the melted butter and pulse until the mixture forms. It should be soft, mushy, and easily shaped into the 9 ½-inch tart pan.
If you don't have a small food processor, you can place the cookies in a sealed plastic storage bag and break them up into fine crumbs using a rolling pin.
When shaping the cookie crust in the tart pan, I like to start with the sides; then, I fill in the bottom. Use the bottom of a measuring cup to smooth and level out the bottom and sides of the crust. You can also use any flat-bottomed object like a glass, or you can go with just a rubber spatula.
Place your prepared crust in either the refrigerator or freezer to chill.
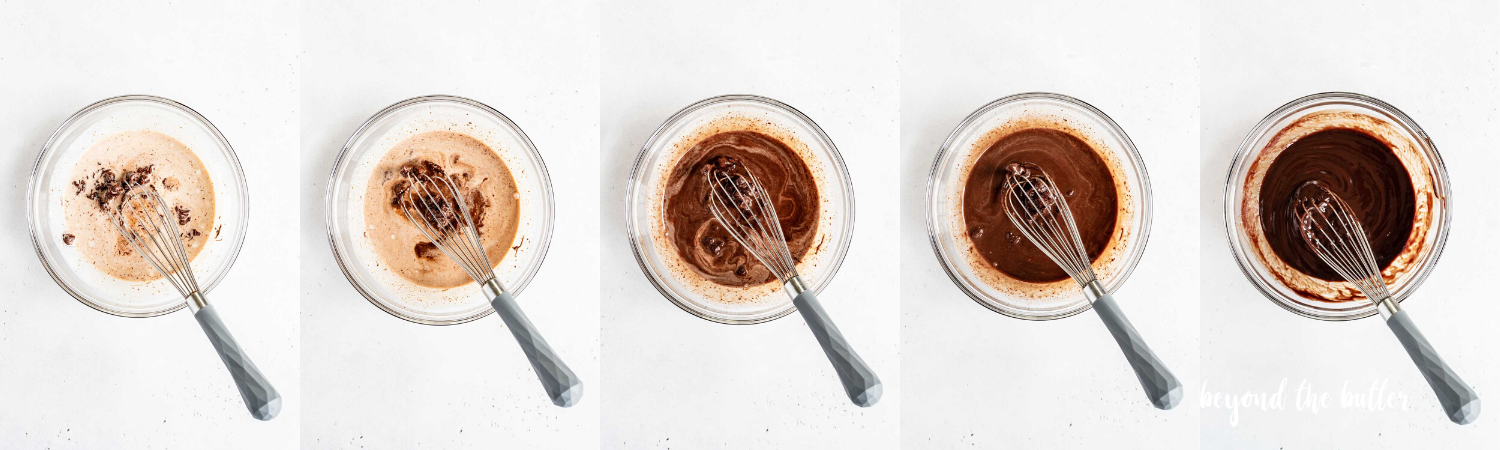
Make the chocolate ganache. You'll need a small mixing bowl, a whisk, and a sheet of aluminum foil to make the chocolate ganache. If you have a glass mixing bowl, that's best in case you need to heat up the remaining chocolate morsels that may not fully melt.
You can heat up the heavy whipping cream either in a saucepan over medium heat or in the microwave in a microwaveable measuring glass.
It's best to wait 4-5 minutes before you begin to whisk the ganache together. When whisking, do so slowly to avoid getting air bubbles in the ganache.
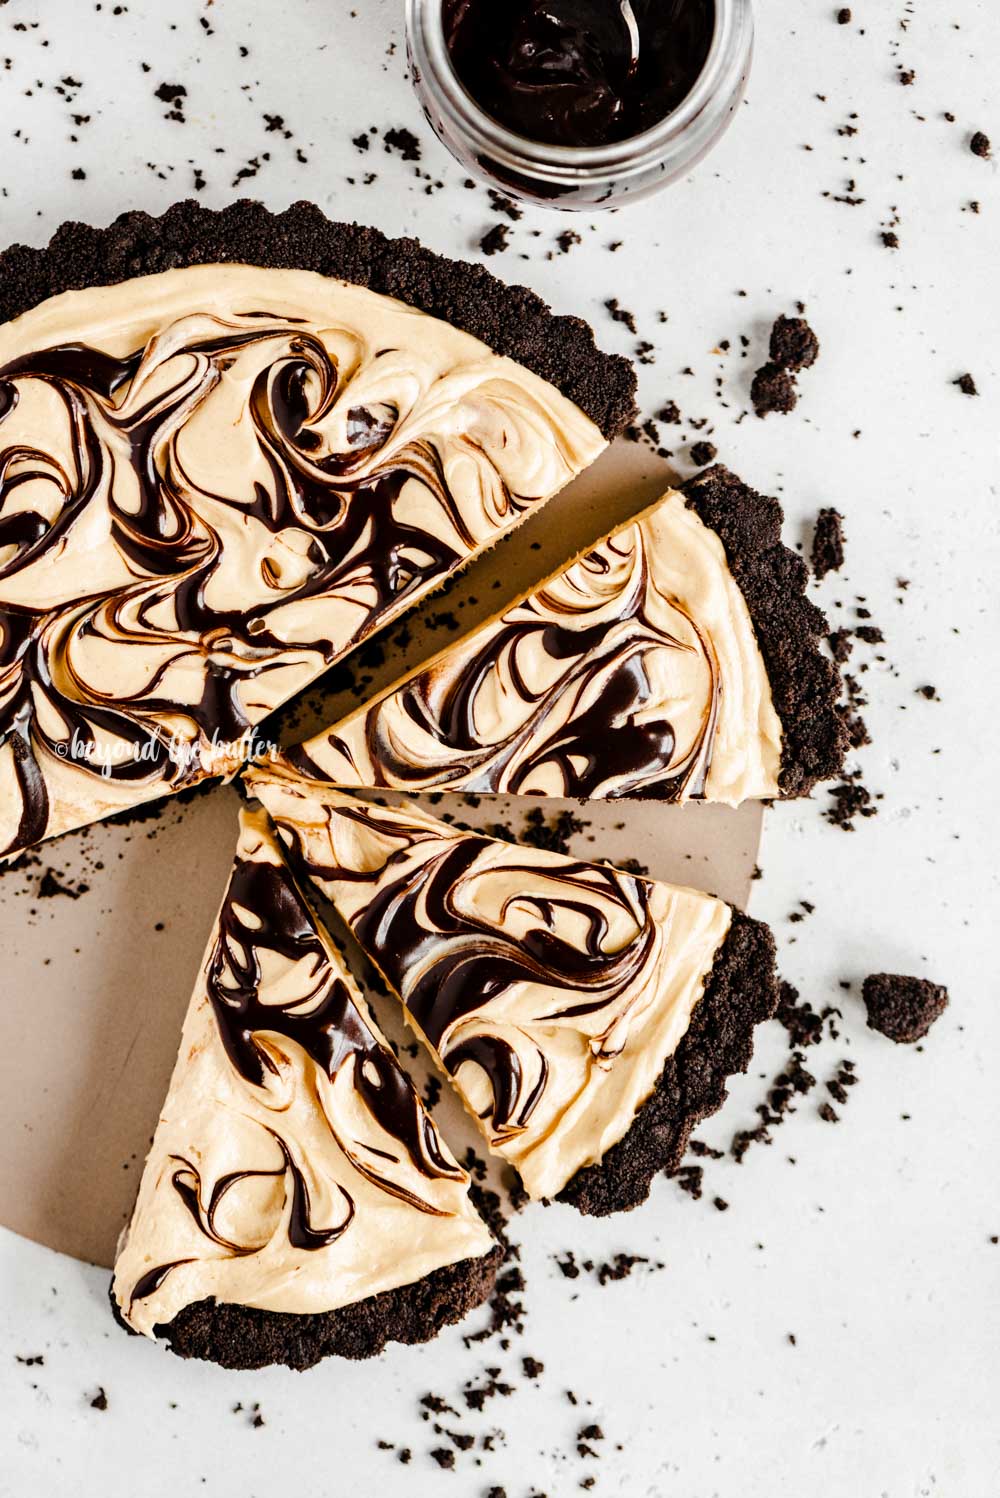
Pour the chocolate ganache over the chilled chocolate cookie crust. I used an offset spatula to smooth out the chocolate ganache over the bottom of the cookie crust. I highly recommend placing this in the freezer while you prepare the peanut butter filling. It will set much faster this way.
Make the peanut butter filling. For this part of the recipe, it's good to use either your hand-held mixer or your stand mixer that has both the whisk and paddle attachments.
I made the whipped cream first using my hand-held mixer so it had time to chill in the refrigerator while I made the rest of the filling. Chilling a metal mixing bowl first is helpful when whipping cream, but it's not required.
It just may take a minute longer. See my Quick Tips Before Starting section below for easy substitutes!
It's important to have your cream cheese at room temperature to avoid any lumps in the peanut butter filling. For powdered sugar, sifting is best for the same reason—lumps. They will show up in the peanut butter mixture if not done.
Beat half the whipped cream with the cream cheese peanut butter mixture, then fold in the rest. You want the peanut butter filling to be uniform in color (no white streaks from the whipped cream) and light and creamy in texture.
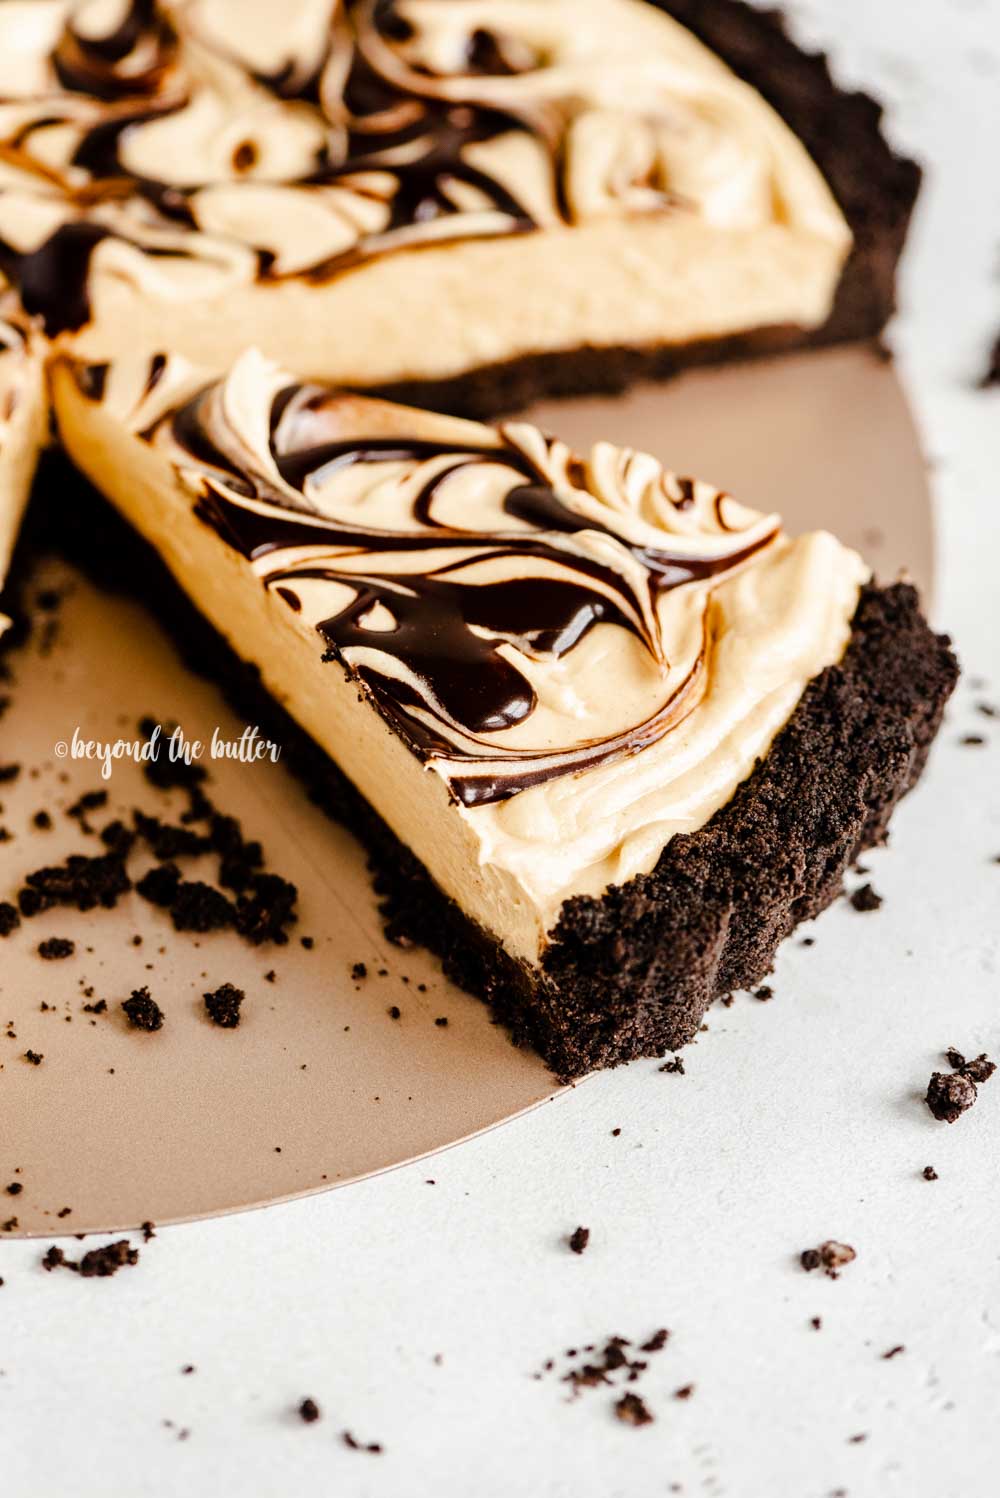
Add the peanut butter filling to the tart. I used an offset spatula to smooth the filling out. Along with the chocolate ganache, I find parts of recipes like this very soothing.
Drizzle and swirl with hot fudge sauce. Once the peanut butter filling is smoothed out, you can drizzle over the top with hot fudge sauce. You only need a ¼ cup. If the hot fudge is refrigerated, it's helpful to warm it up in a microwaveable bowl. See my Quick Tips Before Starting section below for easy topping substitutes!
To make the swirls, gently use a knife, a palette knife, or a wooden skewer.
Chill for a minimum of 2 hours or overnight. Place it uncovered in the refrigerator for at least 2 hours or overnight. This gives the chocolate peanut butter tart time to set.
Alternatively, you can place it in the freezer for 1 - 1 ½ hours. Set it out on the counter at room temperature about 10 minutes before serving.
Variations
If you don't have a 9 ½ inch non-stick loose bottom tart pan readily available, you can also make this chocolate peanut butter swirl tart the following two ways:
No-bake chocolate peanut butter pie. Simply swap out the tart pan for a 9-inch pie plate or springform pan!
For the spring form pan, increase the number of chocolate sandwich cookies to 30 and add one extra tablespoon of melted butter. Having just a little extra cookie crust for the sides is helpful.
No-bake mini chocolate peanut butter swirl tarts (shown above). This recipe will make 6, 4-inch size mini tarts, and man, are they the cutest! They make great little surprise gifts for your chocolate-peanut butter dessert-loving friends!
When adding the peanut butter filling to the mini tarts, you can use a large pastry bag. No piping tip is needed. Just snip the bottom off when you're ready to pipe. Pipe on a good mound of the peanut butter filling, then smooth out with an angled spatula.
Helpful Tips
- The 2 hours, 30 minutes noted for this recipe includes 2 hours of minimum chill time after the tart has been assembled.
- It's not required to spray the tart pan with baking spray. If you would like to, do so lightly.
- For the peanut butter filling only, you can swap out the heavy whipping cream with 1 ½ - 2 cups from a tub or can of whipped dairy topping you might already have in your refrigerator. The method of how it's added to the peanut butter mixture is the same.
- Instead of using hot fudge, you can use chocolate syrup, a border of chopped peanuts, or skip adding a topping entirely.
- As an alternative to using your stovetop, you can heat the whipping cream in the microwave for 1 minute using a microwaveable measuring glass.
- For clean slices, run the knife under hot water and dry off with a kitchen towel after each cut.
Enjoy These Other Chocolate Peanut Butter Desserts!

If you tried this Chocolate Peanut Butter Tart Recipe or any other recipe on my website, please leave a 🌟 star rating and let me know what you thought in the 📝 comments below. Thanks for visiting!
📖 Recipe

Chocolate Peanut Butter Swirl Tart
Author:Ingredients
chocolate sandwich cookie crust
- 24 Cookies from a 14.3 ounce package of Benton’s Original Chocolate Sandwich Cookie (processed into fine crumbs)
- 6 tablespoon Countryside Creamery Unsalted Butter (melted)
chocolate ganache
- ½ cup Baker’s Corner Semi-Sweet Chocolate Morsels
- ⅓ cup Heavy Whipping Cream
- 1 teaspoon Vanilla Extract
peanut butter filling
- 1 cup Heavy Whipping Cream (cold and whipped to soft peaks)
- 1 teaspoon Vanilla Extract
- 4 oz Cream Cheese (softened to room temperature)
- ¾ cup Peanut Delight Creamy Peanut Butter
- ¾ cup Simply Nature Organic Powdered Sugar (sifted)
- ¼ cup Hot Fudge Sauce (warmed)
Instructions
chocolate sandwich cookie crust
- Using a food processor, process the chocolate sandwich cookies (the entire cookie) into fine crumbs. Add in the melted butter and pulse until the cookie crust mixture forms. It should be the consistency of thick, mushy sand that can easily be shaped into the 9 ½ inch tart pan.24 Cookies from a 14.3 ounce package of Benton’s Original Chocolate Sandwich Cookie, 6 tablespoon Countryside Creamery Unsalted Butter
- Press the cookie crust mixture into the bottom and sides of a 9 ½ inch tart pan. Smooth and even out the cookie crust using a rubber spatula or the bottom of a measuring cup. Refrigerate the tart crust while you prepare the chocolate ganache layer.
chocolate ganache
- Place the semi-sweet chocolate morsels into a small, preferably glass, mixing bowl. Set to the side.½ cup Baker’s Corner Semi-Sweet Chocolate Morsels
- Pour the heavy whipping cream into a small saucepan and heat over medium heat until until it reaches a simmer.⅓ cup Heavy Whipping Cream
- Remove from heat and immediately pour over top of the semi-sweet chocolate morsels. Cover with a sheet of aluminum foil and let sit for 4-5 minutes at room temperature.
- Remove the foil and slowly whisk the chocolate ganache mixture together until it’s nice and smooth and it reaches room temperature. Add in the vanilla extract. If the chocolate hasn’t fully melted after whisking, you can heat it up in the microwave for 15 seconds at 50% power. This is why I recommend using a glass bowl instead of metal.1 teaspoon Vanilla Extract
- Spread the chocolate ganache into an layer over top of the prepared chocolate sandwich cookie crust.
- Place the tart in either the refrigerator or, preferably, the freezer while you make the peanut butter filling.
peanut butter filling
- In a separate bowl using either your hand-held mixer or stand mixer fitted with the whisk attachment, whisk the heavy whipping cream on medium-high speed until soft peaks form. Place in the refrigerator to chill.1 cup Heavy Whipping Cream
- Using your hand-held mixer or stand mixer fitted with the paddle attachment, beat the cream cheese on medium-high speed until smooth and creamy (about 2-3 minutes).4 oz Cream Cheese
- Add in the peanut butter, sifted powdered sugar, and vanilla extract, continuing to mix on medium-high speed until smooth.¾ cup Peanut Delight Creamy Peanut Butter, ¾ cup Simply Nature Organic Powdered Sugar, 1 teaspoon Vanilla Extract
- Beat in ½ of the chilled whipped cream and mix until just combined.
- Using a spatula, finish adding the remaining whipped cream by folding it into the mixture until it’s well blended and uniform in color. The peanut butter filling should be creamy, light and airy in texture.
- Spoon the peanut butter filling onto the top of the chocolate ganache layered tart and smooth out and level with an offset spatula.
- Drizzle over the top the hot fudge sauce, then gently create some marbled swirls using a knife, palette knife, or wooden or metal skewer.¼ cup Hot Fudge Sauce
- Place in the refrigerate to set for a minimum of 2 hours or overnight. This can also be placed in the freezer for a minimum of 1 hour.
- Before serving, unmold the tart, then cut using a sharp knife.
Recipe Notes
- The 2 hours, 30 minutes noted for this recipe includes 2 hours of minimum chill time after the tart has been assembled.
- It's not required to spray the tart pan with baking spray. If you would like to, do so lightly.
- For the peanut butter filling only, you can swap out the heavy whipping cream with 1 ½ - 2 cups from a tub or can of whipped dairy topping you might already have in your refrigerator. The method of how it's added to the peanut butter mixture is the same.
- Instead of using hot fudge, you can use chocolate syrup, a border of chopped peanuts, or skip adding a topping entirely.
- As an alternative to using your stove top, you can heat the whipping cream in the microwave for 1 minute using a microwaveable measuring glass.
- For clean slices, run the knife under hot water and dry off with a kitchen towel after each cut.
Nutrition
Nutritonal information provided above is an estimate only and will vary based on specific ingredients used.
Comments
No Comments