Forget the store-bought donuts and make these Easy Homemade Donuts from Scratch instead! They’re fried to a nice golden brown on the outside with a soft, fluffy delicious inside, then dipped in a smooth and silky chocolate glaze that comes together in minutes! These are a definite must-make for any morning treat!
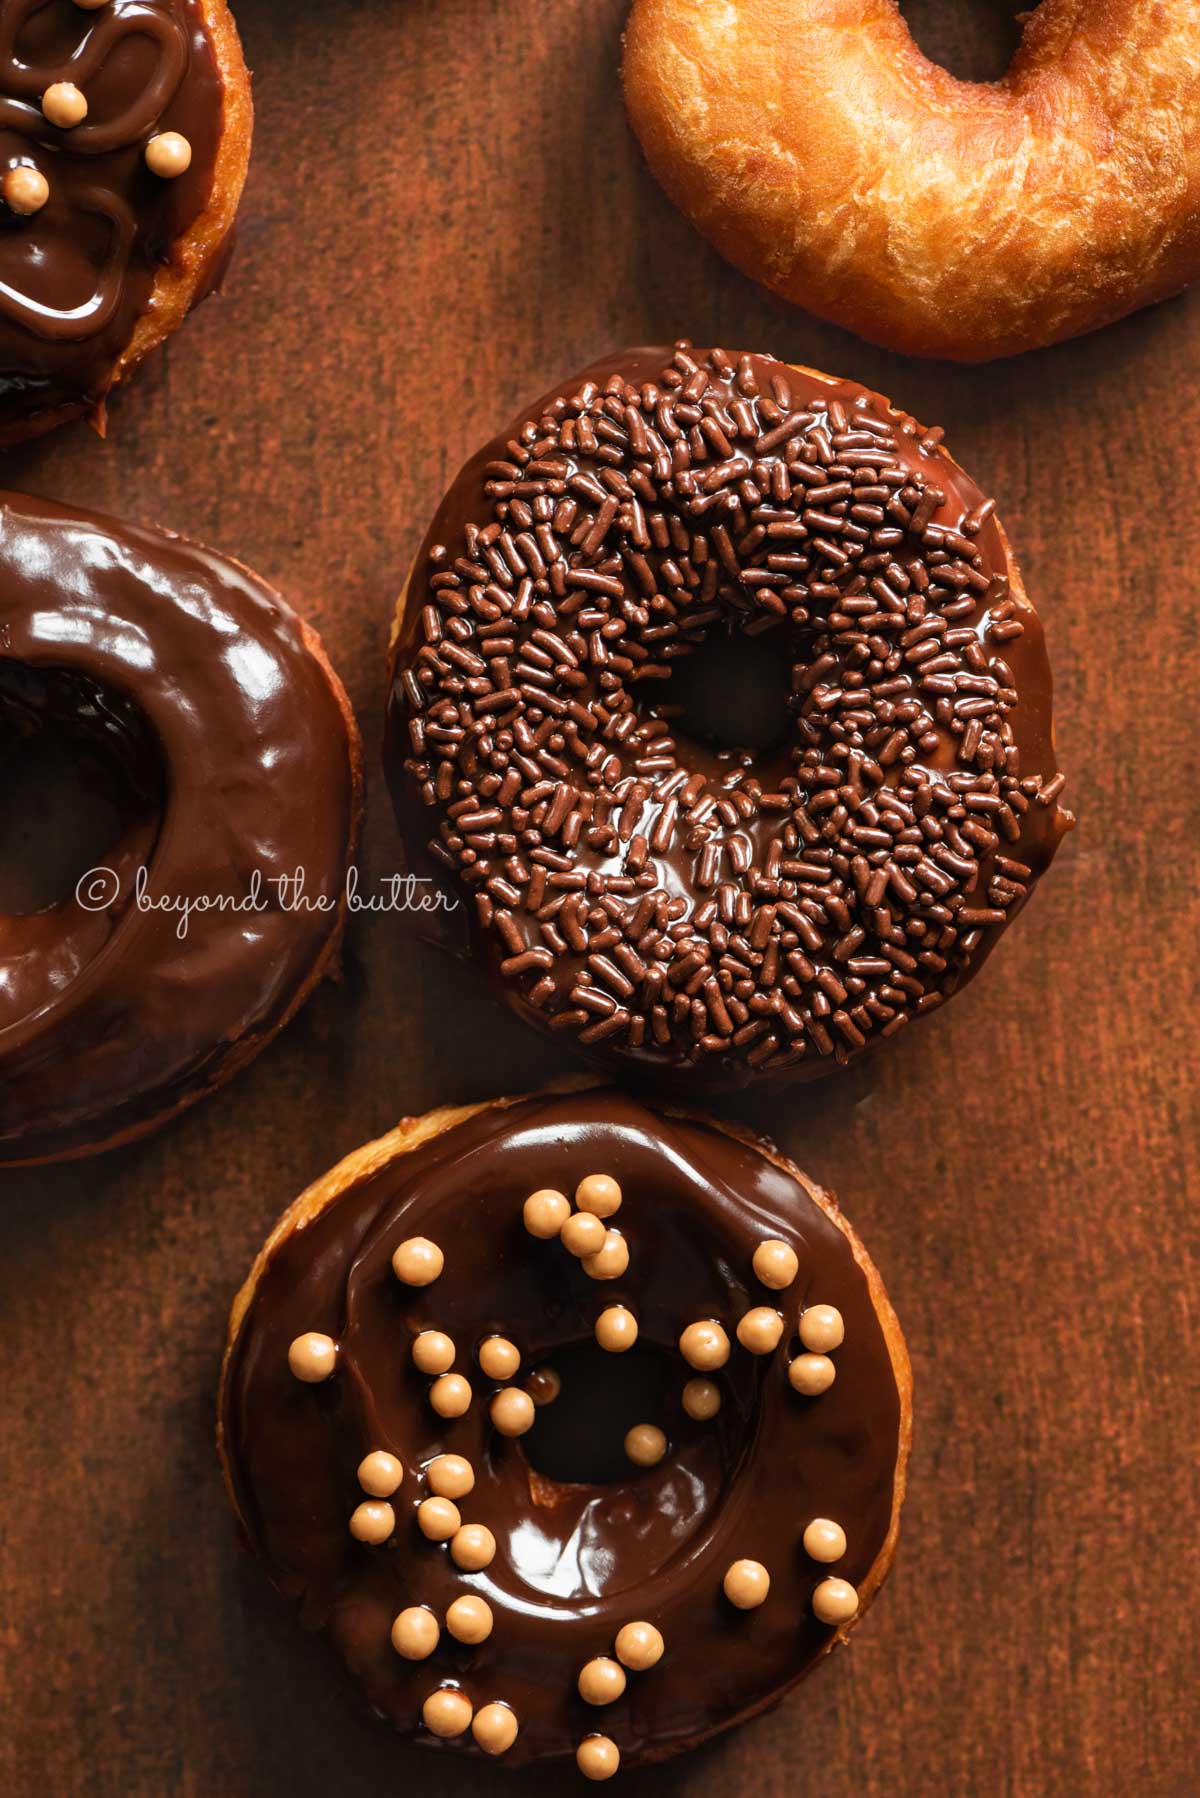

Table of Contents
- Reasons You’ll Love This Homemade Donuts Recipe
- The Best Oil to Use for Frying Donuts
- Making Donuts in Advance
- Frying Donuts with a Deep Fryer
- Deep Fryer Alternatives
- My Top Six Essential Donut-Making Tools
- What is the Best Temperature for Frying Donuts?
- How to Tell if Your Active Dry Yeast Has Gone Bad
- Last Minute Tips Before Starting
- More Breakfast Sweets to Enjoy!
- Homemade Donuts from Scratch Recipe
Reasons You’ll Love This Homemade Donuts Recipe
- No deep fryer is needed (if you have one, that’s totally cool too).
- So many flavors and topping combinations.
- Easy to make.
- Fun to make with kids (let them decorate the donuts after you’ve made them!).
- They’re fried to a nice golden brown on the outside with a soft and fluffy inside.
- They taste perfect, dipped in a silky chocolate glaze (or vanilla!).
- Makes approximately 15 fried donuts.
- Great to make and share with neighbors or family.
The only downside to this recipe (hey, I’m just being honest)—it has two rise times. 1 hour after you’ve made the dough and 1 hour after you have cut the donuts out. I promise you though; these are worth the wait!

The Best Oil to Use for Frying Donuts
Canola oil is what I recommend for frying these homemade donuts (deep fryer or skillet). It is a nice neutral-flavored oil, but you can also use vegetable oil (deep fryer or skillet), or good old-fashioned vegetable shortening (which I used with test batch #1).
For skillet or stock pot users. Pour the oil or place the vegetable shortening into the skillet or stock pot before heating it up.
I did not test nor recommend using vegetable shortening in a deep fryer.
Making Donuts in Advance
You can make these homemade donuts from scratch the night before; follow the recipe through step 5. Instead of placing a tea towel over the top to rest the dough for 1 hour (step 6), you will cover it with plastic wrap and place them in the refrigerator to rise overnight. In the morning, let them rest at room temperature for 1 hour before frying.


Frying Donuts with a Deep Fryer
While you definitely do not need to use a deep fryer to make these homemade chocolate frosted donuts, having one is really nice!
I have the Breville smart fryer, which has been a game-changer. I can set the temperature for the oil as well as a timer. Using the grill basket to remove the donuts is an added bonus too. While it’s on the pricier side, it’s a good investment and easy to clean!
Deep Fryer Alternatives
If you do not own a deep fryer, here are a few alternatives that will do just as good of a job when making these homemade donuts!
- deep, heavy skillet
- large stock pot – 10.5 quart
My Top Six Essential Donut-Making Tools
These are the top tools I like to use when making homemade donuts from scratch!
1. Deep Fryer, Large Skillet, or Stock Pot. You can’t really fry donuts without having at least one of these essential tools!
2. Donut Cutters. For this donut recipe, I used a 3-inch donut cutter with a 1.25-inch center cut out. This was gifted to me, so I don’t have any information on who makes it, but I believe it may have come from Michael’s.
If you prefer to make them larger, I recommend the Ateco 14423 3.5-inch donut cutter. It cuts very well through the dough.
If you prefer to make them smaller, this 2.5-inch size is perfect.
And if you don’t have any donut cutters, but you do have a set of round cookie cutters, use them!
3. Candy Thermometer. If you’re not using a deep fryer, you will definitely need a candy thermometer.
They’re not expensive, and it’s an important tool to ensure your oil is at the right temperature before and while frying your donuts.
Mine is a Taylor Precision Products Candy/Deep Fryer Thermometer which was given to me by my mother-in-law. You can find very similar ones at any major retailer like Walmart, Target, Williams Sonoma, etc.
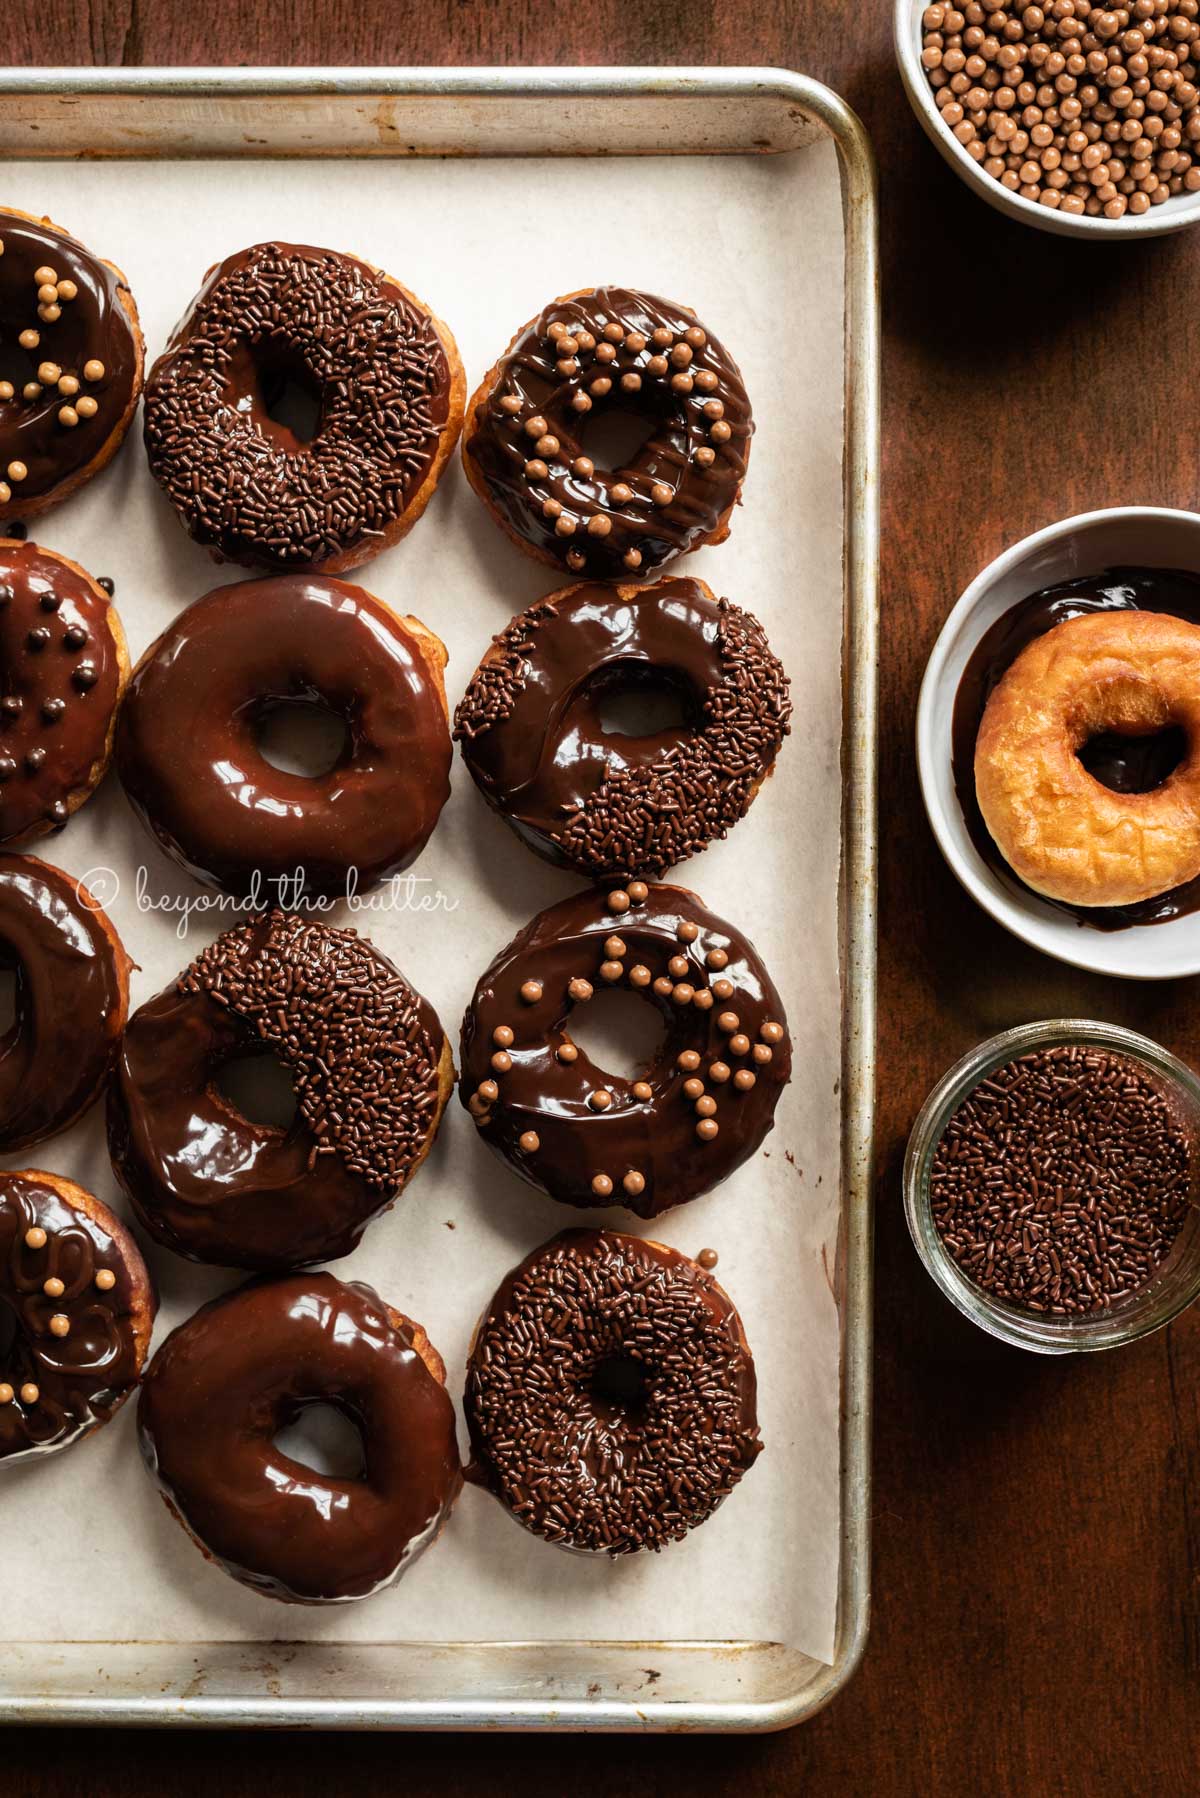
4. Large Baking Sheets. I recommend having two on hand to make these donuts.
You will need one baking sheet lined with parchment paper to place the donuts on after cutting them out and another that will be used after you’ve fried them to let the excess oil drain off.
5. Cooling Rack. Super helpful for allowing the donuts to cool and catching any little oil drips. I also recommend using a layer of paper towels underneath for the oil part!
6. Tongs or Slotted Spoon. These are very handy for flipping the donuts and removing them from the oil (if you’re not using a grill basket).
I had success just using our everyday kitchen tongs, but you can also try using a slated spatula or small strainer. Use whatever is easiest for you!

What is the Best Temperature for Frying Donuts?
For this recipe, I recommend using a temperature of 365ºF, frying each side for 45 seconds. Your donuts should get to a nice golden brown color on the outside with a nice fluffy inside.
If you’re not using a deep fryer, using a timer to track the time to fry each side will be helpful. And as recommended earlier, use a candy thermometer throughout the frying process.
How to Tell if Your Active Dry Yeast Has Gone Bad
Your active dry yeast, when mixed with the warm water, should bubble up nicely. If it doesn’t, you can try adding a pinch of sugar to it. If nothing happens, I’m afraid your yeast packet is a dud.
Last Minute Tips Before Starting
- The recipe times listed do include the chocolate or vanilla glaze prep times. It’s basically like 5 minutes, though.
- Store leftover glazed donuts in an airtight container at room temperature for up to 2 days, but are best served fresh the same day they’re deep fried and glazed.
- Donuts can be reheated for about 15 seconds in a microwave.
- After frying the donuts, do NOT pour the oil down the drain. I know this is probably old news to many of you, but I still need to say it. Wait for it to completely cool, and then pour the used oil into a large glass jar, these Toss-It! Bags (which I use), or reuse it for later.
- I did not use a vanilla glaze for these donuts this time around, but I include it in the recipe below.
More Breakfast Sweets to Enjoy!


Homemade Donuts from Scratch

Equipment
- Deep Fryer or heavy skillet or large stock pot
- Paper Towels
- Tongs / Slotted Spoon
Ingredients
Homemade Donuts
- 2 1/4 tsp Active Dry Yeast, 1 packet
- 3/4 cup Warm Water
- 1/3 cup Granulated Sugar
- 1/2 tsp Salt
- 1/4 cup Unsalted Butter, room temperature
- 1 Large Egg, room temperature
- 1 Large Egg Yolk, room temperature
- 1 tsp Vanilla Extract
- 3 cups All-Purpose Flour, plus any additional flour for rolling dough
- 4 cups Canola Oil
Chocolate Glaze
- 1/2 cup Semi-Sweet Chocolate Chips
- 1/4 cup Heavy Whipping Cream
- 1 tsp Vanilla Extract
Vanilla Glaze
- 2 cups Powdered Sugar, sifted
- 1/4 cup Water
- 1 1/2 tsp Vanilla Extract
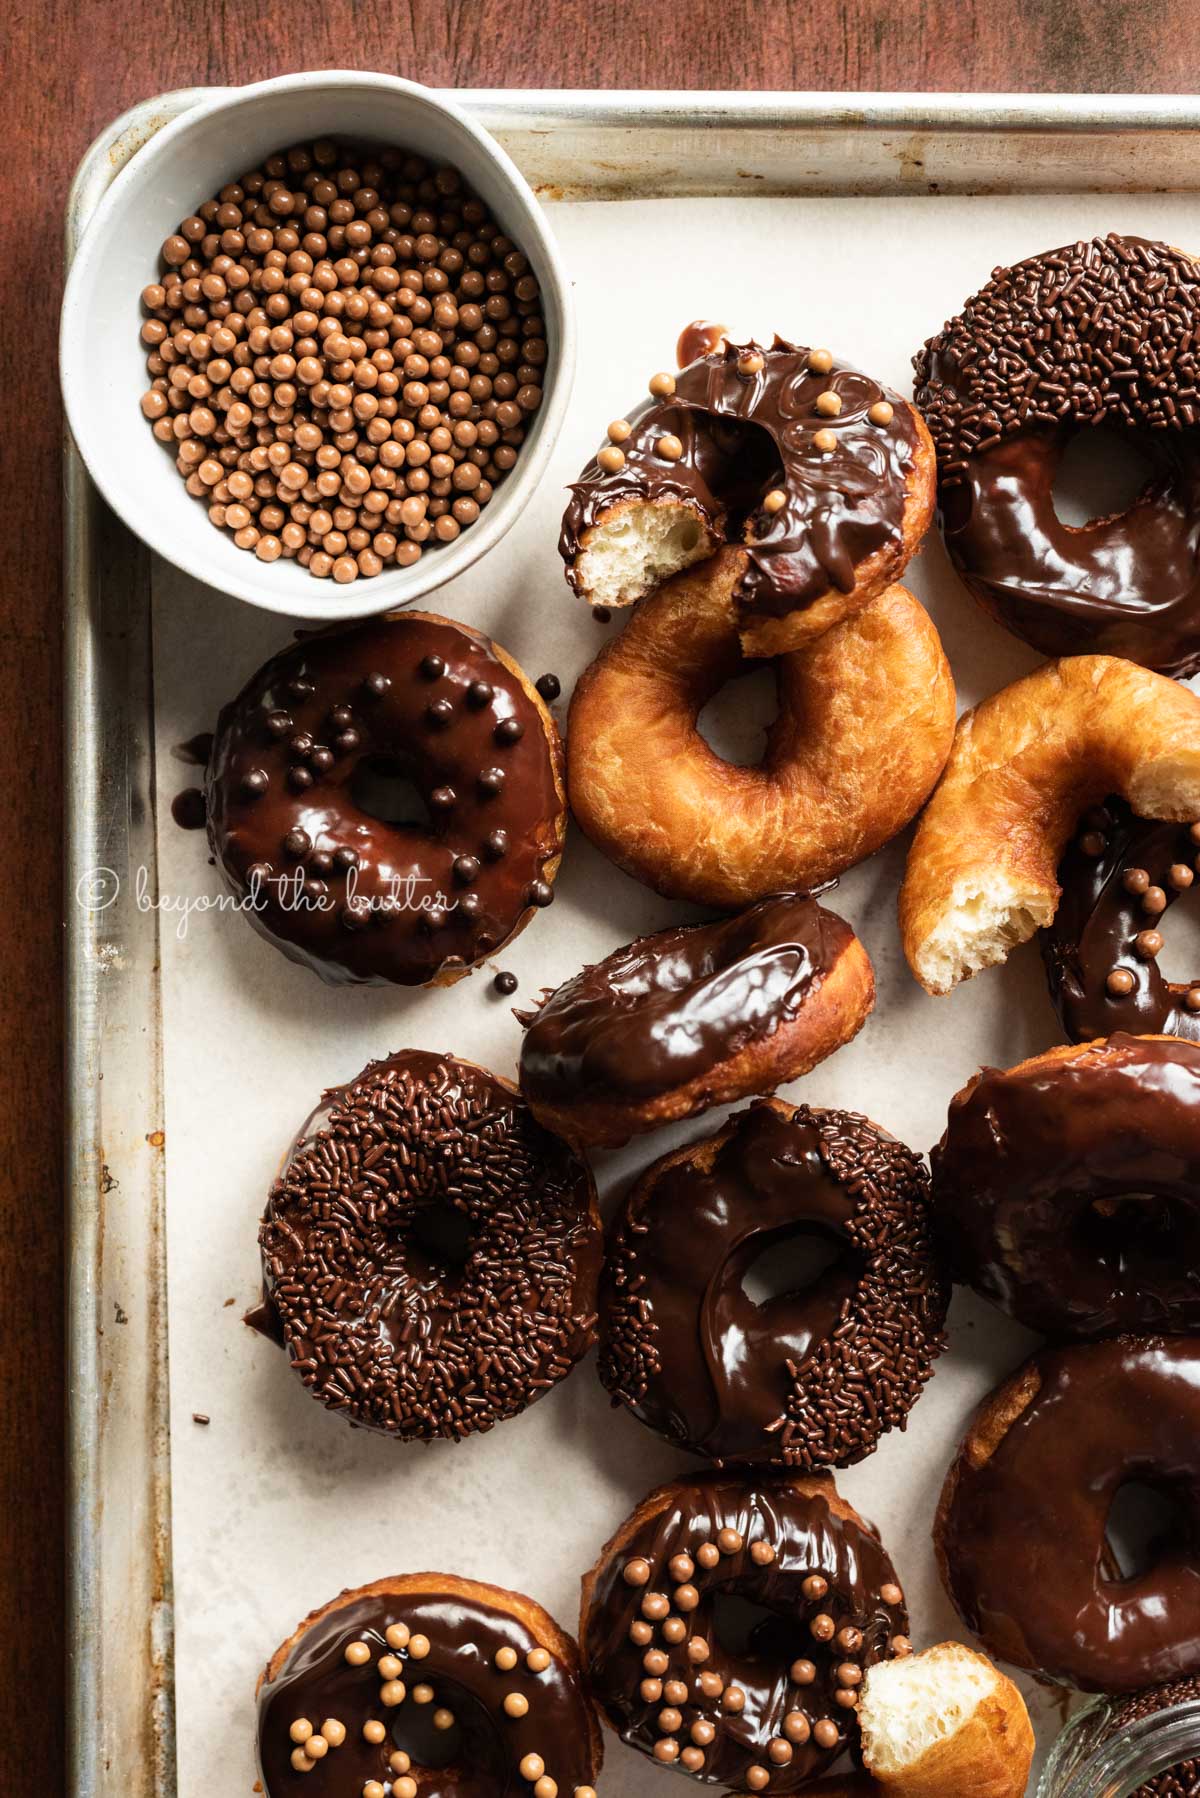
Suggested Toppings (optional)
- Chocolate Jimmies
- Rainbow Sprinkles
- Chocolate Pearls
- Crushed Oreos
Instructions
homemade donuts
- Combine the packet of active dry yeast and the warm water in the mixing bowl of the stand mixer that's fitted with the dough hook attachment. Let the sit covered with a tea towel for 10 minutes.2 1/4 tsp Active Dry Yeast, 3/4 cup Warm Water
- Add in the granulated sugar, salt, unsalted butter, egg, egg yolk, vanilla extract, and all-purpose flour. Then set the mixer speed to low and knead until the dough begins to form. It should pull away from the sides of the bowl easily. If you find that it's still really sticky, you can add 1 tablespoon of flour until the dough is soft and slightly tacky.1/3 cup Granulated Sugar, 1/2 tsp Salt, 1/4 cup Unsalted Butter, 1 Large Egg, 1 Large Egg Yolk, 1 tsp Vanilla Extract, 3 cups All-Purpose Flour
- Transfer the dough over to a lightly greased, medium size bowl, flipping it over once to coat the entire ball. Cover tightly with plastic wrap (do NOT use aluminum foil) and place in a warm, draft free spot for about 1 hour or until it's almost doubled in size. That last part is very important!
- When ready, gently punch the dough down in the center, then turn it out on to a clean and lightly floured surface. Knead the dough until it turns into a smooth ball about 6-7 times, roughly.
- Using a floured rolling pin and lightly floured work surface, roll the dough out to about a 1/2 inch thickness rectangle. Coat your donut cutter (mine was the 3.5" dia size) with some flour and then cut out the donuts, placing them onto a parchment lined baking sheet (space them out about 1 1/2 inches apart). With any leftover dough you may have, you can roll some into balls to make donut holes or reroll to get a few more donuts. Optional step: lightly spray the parchment paper with baking spray to keep the donuts from sticking to the parchment.
- Cover the baking sheet with a clean tea or dish towel and allow the donuts to rest for 1 hour or until they've almost doubled in size.
- Meanwhile, line a large baking sheet with about 2 layers of paper towels with a cooling rack placed over top. Set aside.
- When ready to fry the donuts, pour the canola oil into your deep fryer (following the min/max guidelines), deep heavy skillet, or stock pot. Then heat the oil until it reaches 365ºF. If using a skillet or stock pot, use your candy thermometer. Do not guess!4 cups Canola Oil
- Place 1-2 donuts in at a time for 45 seconds on each side, turning them over with either tongs or a slotted spoon. You want the donuts to be a nice medium golden brown color. At the correct temperature, they will fry quickly, so please pay attention while you're doing this part! I highly recommend using a timer.
- When the donuts are ready, carefully remove from the oil and place onto the cooling rack to let any excess oil drain off of it. Allow them to cool before dipping them in the chocolate or vanilla glazes and any additional toppings.
chocolate glaze
- Place the semi-sweet or milk chocolate chips into a medium size bowl. Set to the side.1/2 cup Semi-Sweet Chocolate Chips
- Using a heat proof bowl or glass measuring cup, heat the heavy whipping cream for 1 minute, 15 seconds at full power. Pour it over the chocolate chips then cover loosely with aluminum foil. Let it sit for 2 minutes.1/4 cup Heavy Whipping Cream
- Remove the foil, then add in the vanilla extract. Slowly whisk the mixture until it is smooth and fully melted. Use a small spatula to smoosh any stubborn chocolate chips that may not want to fully melt.1 tsp Vanilla Extract
- Dip each slightly cooled donut into the glaze, swirl around 1-2 times, then carefully lift up and place onto a large parchment lined baking sheet or cooling rack. Dip or sprinkle on the additional toppings (if using) immediately after the glaze.
vanilla glaze
- In a medium bowl, slowly mix together the powdered sugar, water, and vanilla extract until smooth.2 cups Powdered Sugar, 1/4 cup Water, 1 1/2 tsp Vanilla Extract
- Dip each slightly cooled donut into the glaze, swirl around 1-2 times, and carefully lift up and place onto a parchment lined baking sheet or cooling rack. If you want to glaze the entire donut, flip it over and cover the other side with the glaze and then place on the cooling rack. Add any additional toppings immediately after the glaze.Chocolate Jimmies, Rainbow Sprinkles, Chocolate Pearls, Crushed Oreos
Notes
- Store leftover donuts in an airtight container at room temperature for up to 2 days, but are best served fresh the same day they’re deep fried and glazed.
- Donuts can be reheated about 15 seconds in a microwave.
- After frying the donuts, do NOT pour the oil down the drain. I know this is probably old news to many of you, but I still need to say it. Wait for it to completely cool and then pour it into a large glass jar, these Toss-It! Bags (which what I use), or reuse it.
Nutrition
Nutritional information provided above is an estimate only and will vary based on specific ingredients used. See Nutritional Disclaimer for more info.


This site uses Titan Security to reduce spam. Learn how your comment data is processed .