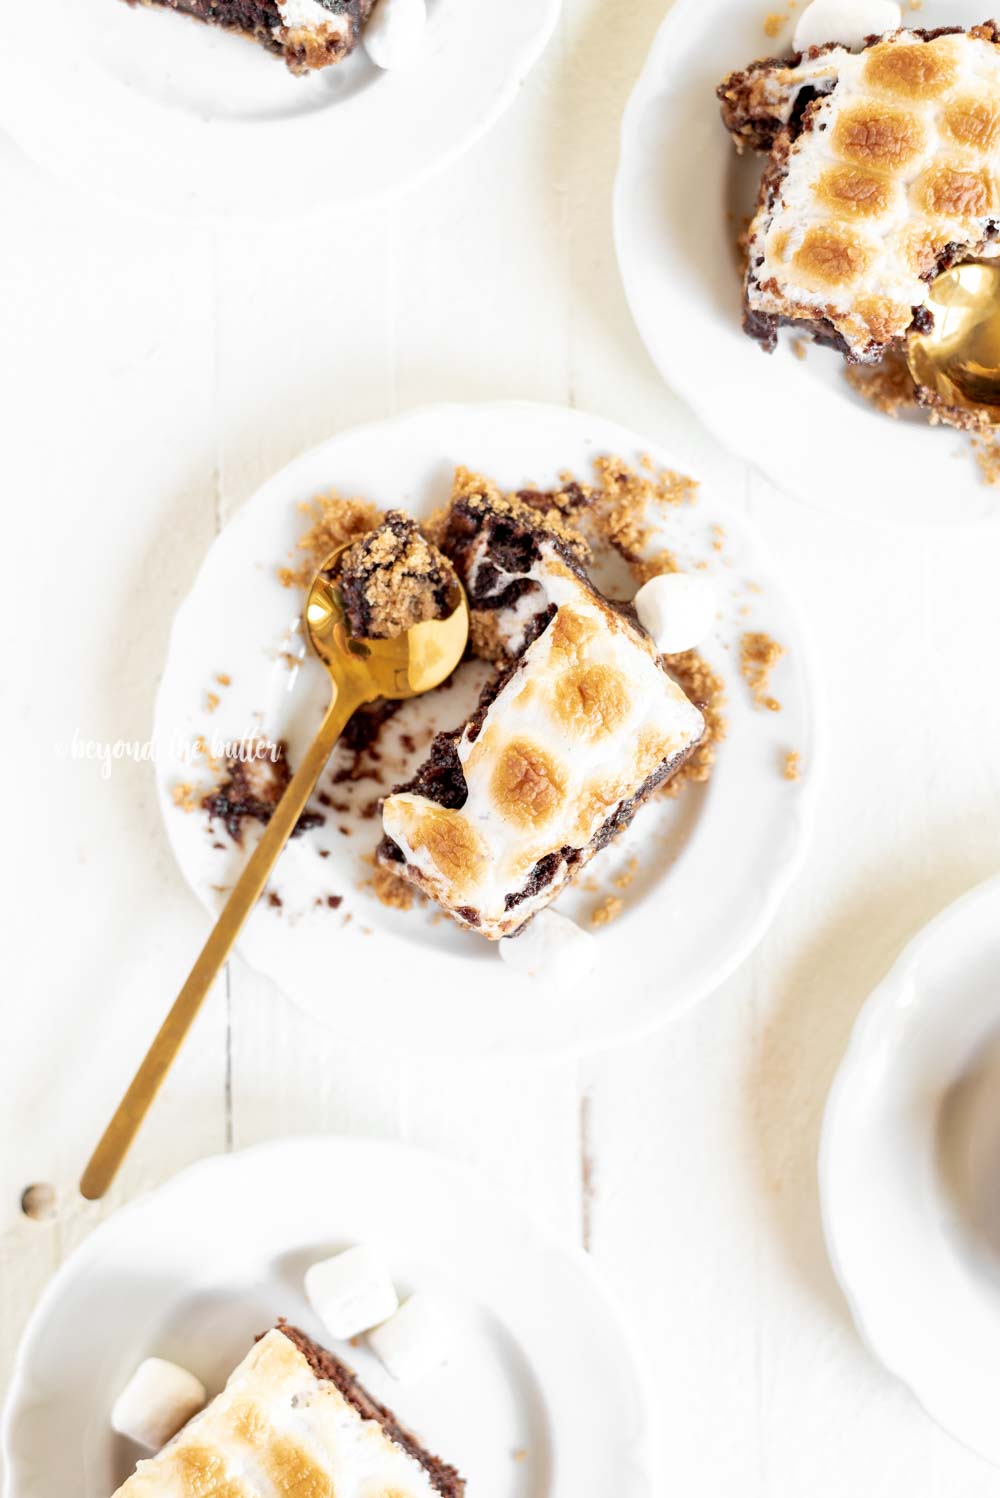
These Layered S’mores Brownies are the perfect way to elevate that classic summer treat into something a little fancy! It’s a decadent dessert made in an 8″ x 8″ baking pan that layers toasted mini marshmallows and fudgy brownies with milk chocolate caramel squares, followed by a buttery graham cracker crust. It’s a must-try for summer, fall, or really any time of the year!
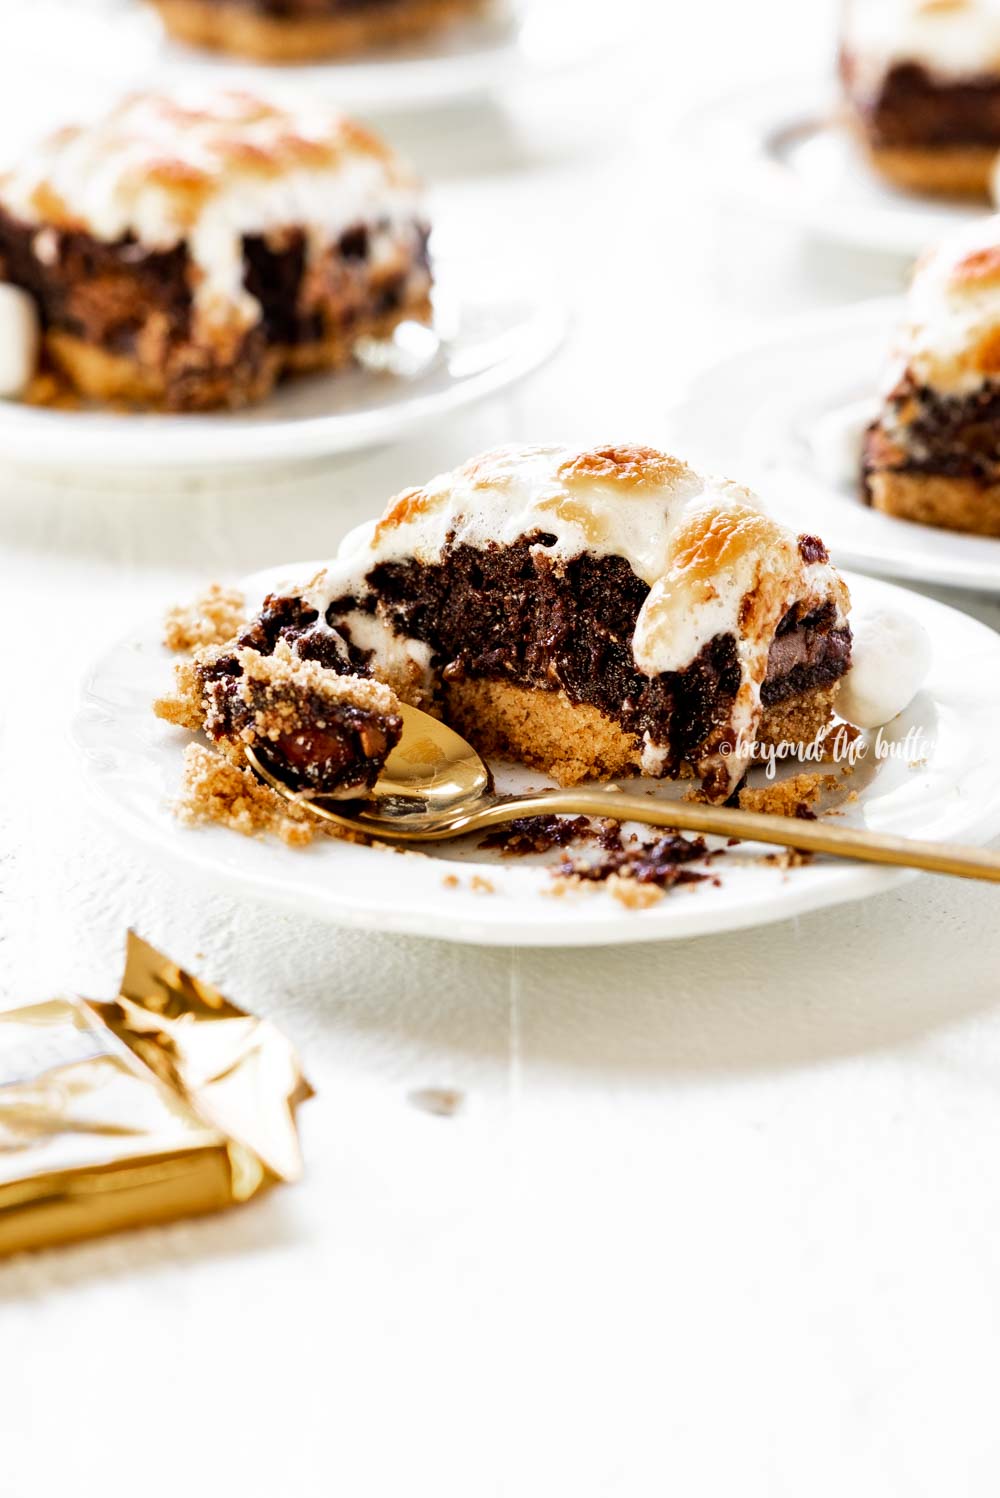
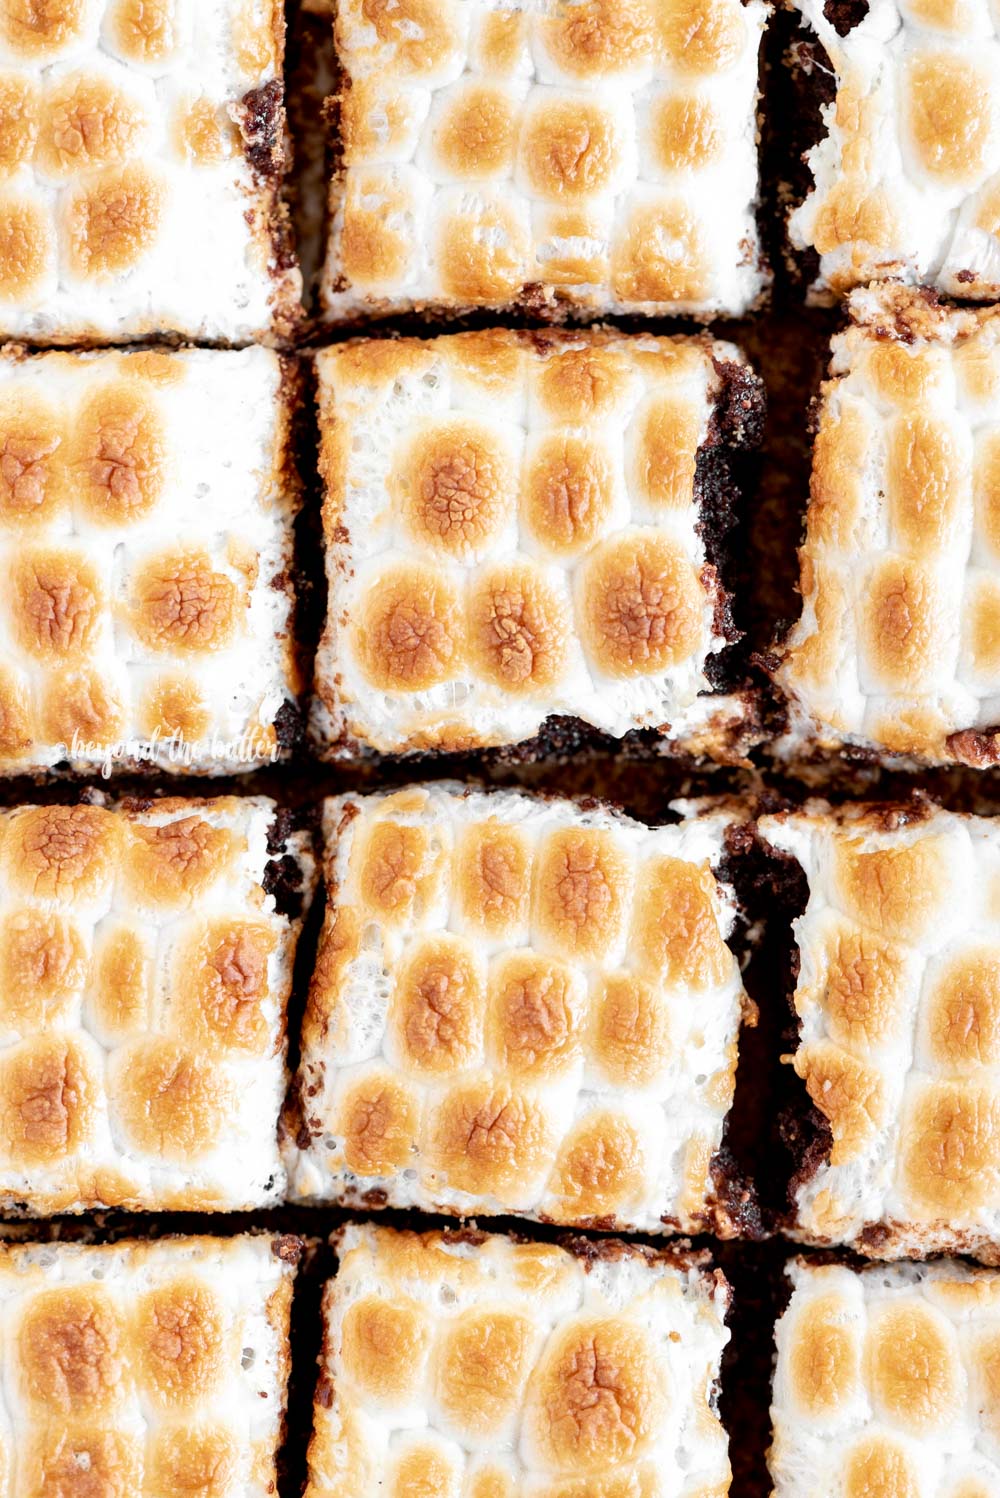
Table of Contents
How to Make the Recipe
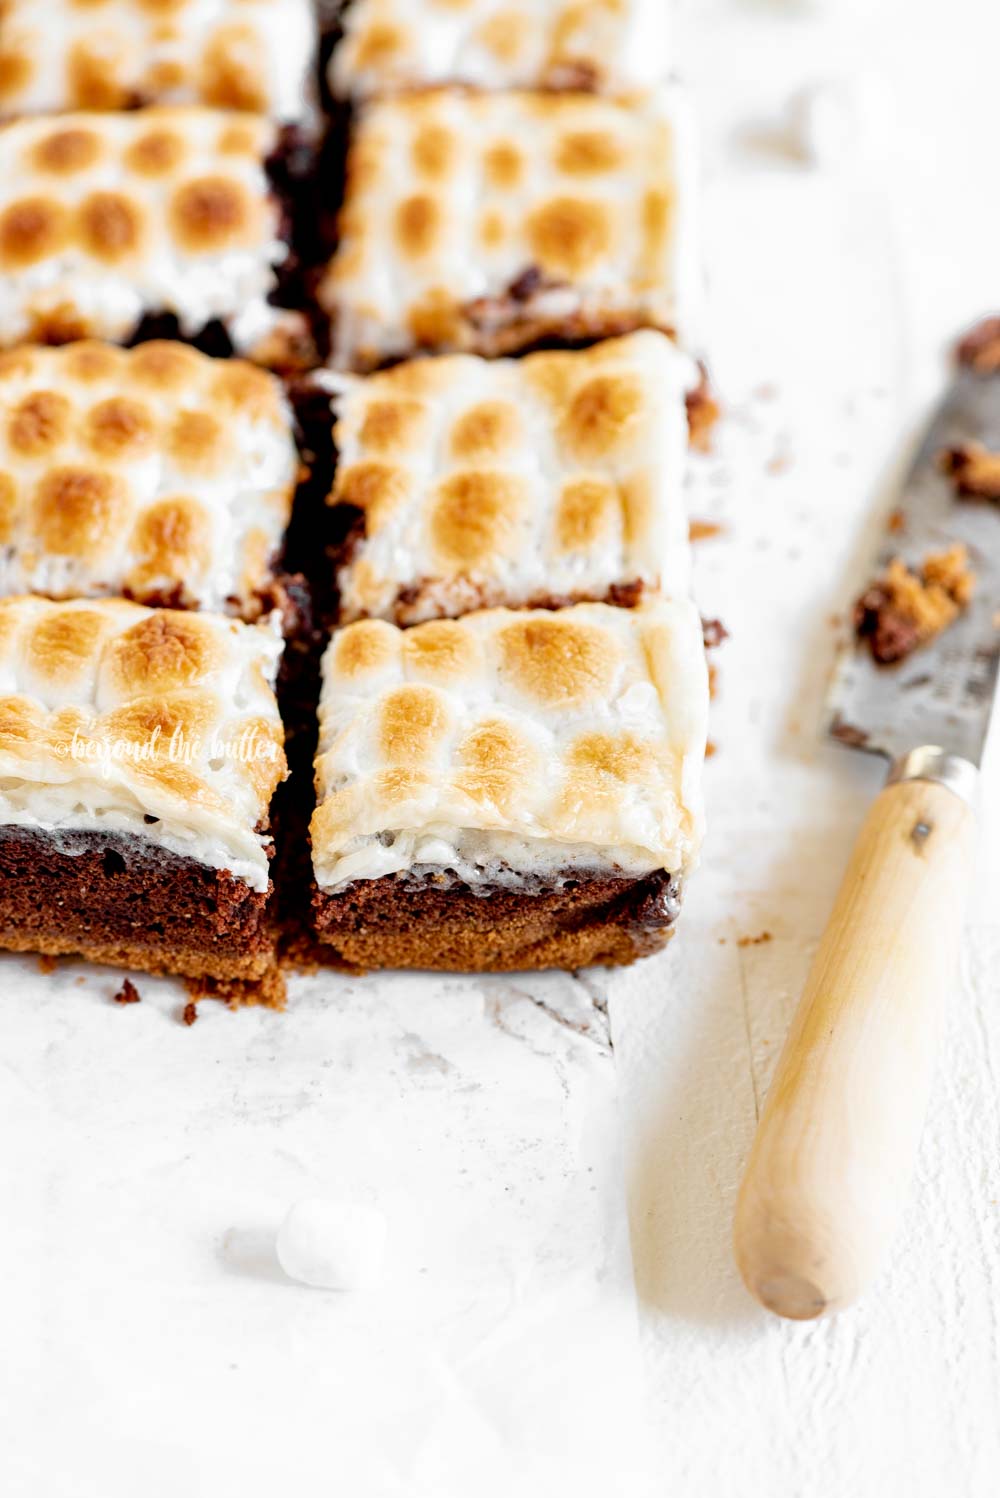
This classic layered S’mores Brownies recipe is an easy one that’s broken out into three layers —the graham cracker crust, super fudgy brownies with milk chocolate caramel squares, followed by the toasted mini marshmallows.
Graham Cracker Crust
The first layer in this brownie recipe is the graham cracker crust. It combines only two ingredients: melted butter and graham cracker crumbs.
That’s it!
Using my food processor I pulverize 12 graham crackers, then add in the melted butter. Next, you’ll spoon the crust into the bottom of a prepared 8″ x “8 baking pan and press down using the bottom of a measuring cup or glass until level.
I make this part of the recipe first because it requires some chilling in the freezer while you make the brownie batter.
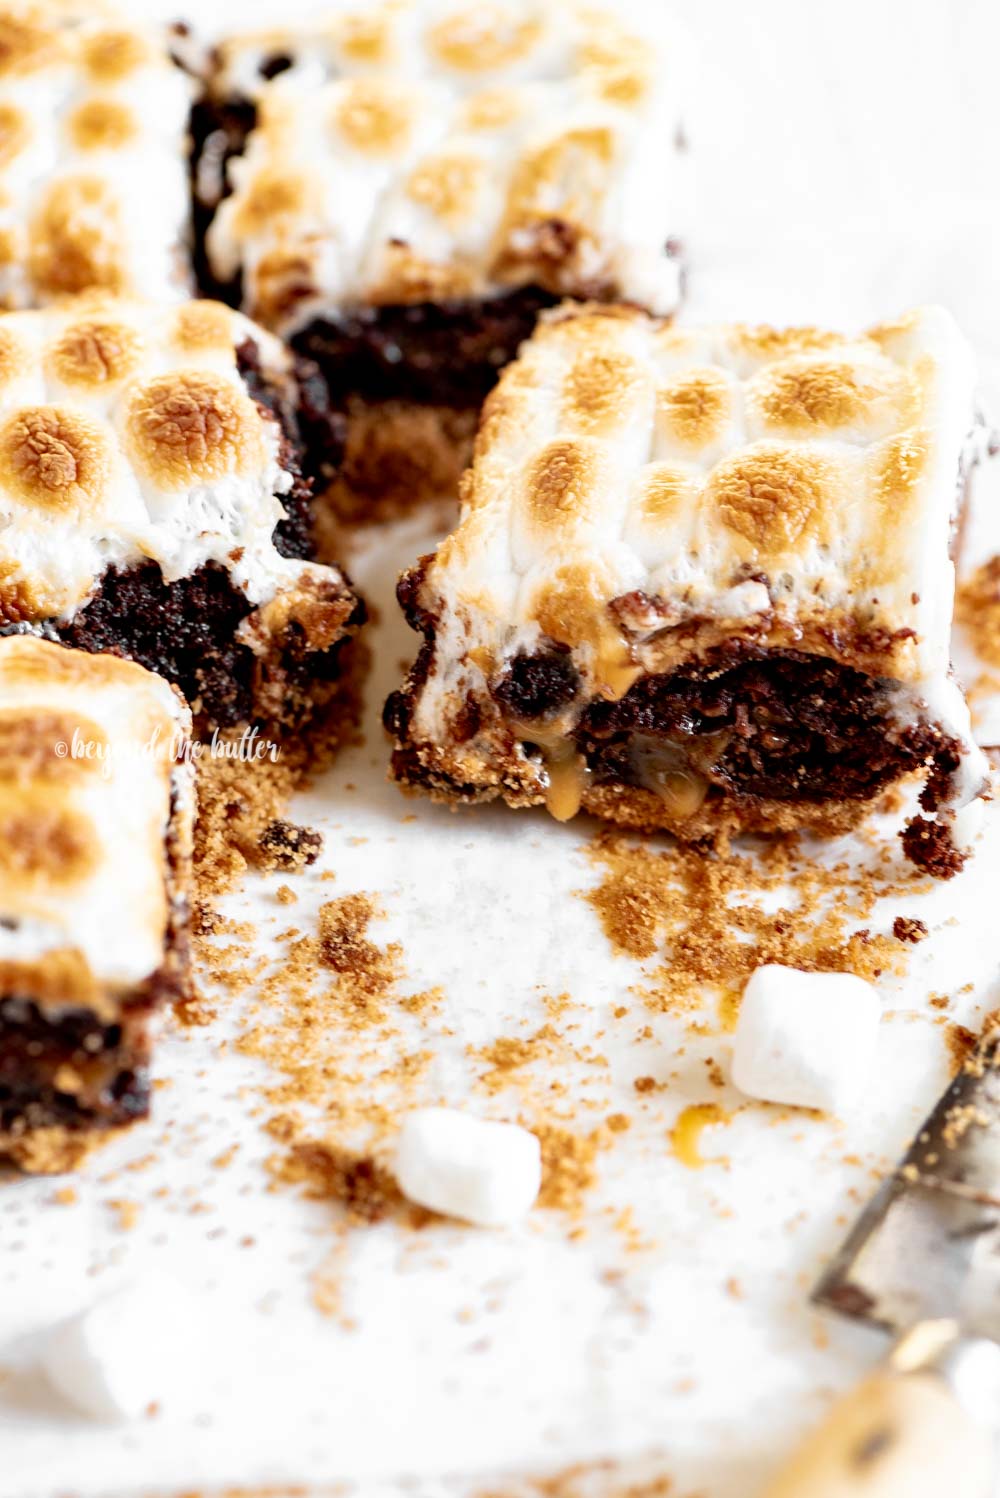
Fudgy Brownies with Milk Chocolate Caramel Squares
For this part of the layered s’mores brownies recipe, I’ve tweaked my Double Chocolate Mint Brownies recipe to make them even fudgier!
The ingredients include all-purpose flour, salt, baking powder, unsweetened cocoa, unsalted butter, vegetable oil, granulated sugar, three large eggs, and vanilla extract.
Instead of the melted Andes chocolates I used in the mint brownies, I’m using 9 Ghirardelli Milk Chocolate Caramel Squares. The difference this time around is you don’t melt the squares. You’ll simply unwrap them and place them in a grid pattern in between two layers of the brownie batter. I’ve also increased the baking time slightly because of the graham cracker crust below them.
Toasted Mini Marshmallows
The toasted mini marshmallows layer is probably the easiest one of them all because it’s the only ingredient needed! Of course, if you’d rather use the regular large-size marshmallows, that’s okay too!
For the toasting part, you’ll need to use your oven’s broiler.
Never broiled anything before? I’ve got you covered with many tips below on how to do it without burning your marshmallows to bits!
You can also use a kitchen blow torch for toasting the marshmallows as well. I used this method when making my S’mores Rolls!
Toasting Marshmallows – Broiler Method
If you saw my Instagram Stories the other day, you could see the first round of these layered s’mores brownies that went up in flames.
Literally up in flames. I’m not making this up.
The mini marshmallows I carefully hand-placed into rows were now a well-charred black layer mess. And the parchment paper that hung over the edges of my 8″ x 8″ USA baking pan…burnt to ashes. Gone.
Go ahead; you can laugh! I am…now.
So, I thought I would take a minute to give you some helpful broiling tips for toasting the mini-marshmallow layer of this s’mores brownies recipe.
Broiling Settings
After baking the brownies and placing the mini marshmallows on top, switch the oven from Bake to Broil, and select ‘HI’.
Some ovens will have a temperature that you can enter, some will have the Hi/Low combination, and others will just have the broil setting. My oven has the HI/LOW setting.
If your oven has the temperature option, please refer to your oven’s manual for recommended broiler temps – or Google it. Google has all the answers!
Oven Rack Position
You can either leave the oven rack at the 2nd level mark, or you can move it down to the 3rd level or center mark.
I would highly recommend moving your s’mores brownies to 3rd level. This is where I placed mine the 2nd time around, and it took almost 6 minutes.
Whatever level you decide to move your oven rack to, do not become impatient and move it to the top level that’s directly underneath the broiler.
You might think that it will be quicker to toast the mini marshmallows this way, but you’ll more than likely burn them badly, and worse yet, you’ll set the top layer on fire.
Ahem, like I did.☺️
Avoid Distractions
Avoid any distractions as much as possible while you’re broiling the top of the mini marshmallows layer. It’s important to pay attention and keep and eye on them while they toast. This take any where from 3-6 minutes.
Set a Timer
Set a timer on your phone, the microwave, a kitchen timer—anything to help you keep track of the time.
Know When They’re Done
Take them out of the oven once the tops of them have turned a light golden brown color. Leaving them in longer can result in possibly burning them.
Despite my epic fail the first time around, broiling in itself really isn’t difficult. But, like I mentioned above and will stress again here, you really need to pay attention to the time while they’re in there.
Recommended Baking Tools
Below are the baking tools I recommend when making these layered s’mores brownies.
Last Minute Quick Tips
- Recommended baking times for the brownies are 35-40 minutes at 350ºF. My brownies took the full 40 minutes. I recommend starting to check them at the 35 minutes mark.
- Broiling times will vary from oven to oven, but for this recipe, the recommended times are 3-6 minutes. Carefully monitor the broiling time!
- I used my 8″ x 8″ baking pan by USA Pan. This pan is one of the best pans I’ve ever used. It’s indestructible!
- Lining your baking pan with parchment is optional, but it does help when it comes time to cutting your s’mores brownies. If you choose to line the pan, make sure to spray it with a flour-based baking spray before and after placing the paper.
- You can use mini marshmallows or regular large-size marshmallows.
- When adding the marshmallows, I placed them in rows, but you can get creative and do a cool swirl pattern or just simply place them on top!
Layered S’mores Brownies

Ingredients
graham cracker crust
- 12 Honey Graham Crackers, crushed into fine crumbs
- 5 tbsp Unsalted Butter, melted
fudgy brownies
- 1 cup All-Purpose Flour
- 1/2 tsp Salt
- 1/2 tsp Baking Powder
- 1/2 cup Unsweetened Cocoa Powder
- 1/4 cup Unsalted Butter, softened
- 1/4 cup Vegetable, Canola, or Coconut Oil
- 1 1/4 cup Granulated Sugar
- 3 Large Eggs, whisked slightly
- 2 tsp Vanilla Extract
- 9 Ghirardelli Milk Chocolate Caramel Squares, unwrapped and placed in grid pattern
toasted mini marshmallows
- 3-4 cup Mini Marshmallows
Instructions
- Adjust the oven rack to the 2nd level position just above center and preheat then oven to 350ºF.
- Generously spray an 8 inch square pan with a flour-based baking spray. Set aside. Tip: If you’d like to be able to pull the brownies out of the pan easier to cut them, add 2 overlapping strips of parchment paper on top of the flour-based coated pan, then spray again with the flour-based baking spray. If you plan to just keep them in the pan to cut them, then you can skip the parchment paper.
- Using a food processor, pulverize the graham crackers into fine crumbs. Add in the melted unsalted butter and pulse until fully combined.12 Honey Graham Crackers, 5 tbsp Unsalted Butter
- Spoon the graham cracker crust into the borrow of the prepared 8” x 8” brownie pan, then place in the freezer to chill while you prepare the brownie batter.
- In a medium bowl, whisk together the all-purpose flour, salt, baking powder, and unsweetened cocoa powder. Set aside.1 cup All-Purpose Flour, 1/2 tsp Salt, 1/2 tsp Baking Powder, 1/2 cup Unsweetened Cocoa Powder
- Using your hand mixer or stand mixer fitted with a paddle attachment, beat the unsalted butter, vegetable oil, and granulated sugar together on medium speed until well blended.1/4 cup Unsalted Butter, softened, 1/4 cup Vegetable, Canola, or Coconut Oil, 1 1/4 cup Granulated Sugar
- Add in the slightly whisked eggs and vanilla extract, scraping down the sides of the bowl as needed.3 Large Eggs, 2 tsp Vanilla Extract
- Switching the mixer speed to low, add in your dry ingredients a little at a time until it’s blended with the wet mixture. Be careful not to over mix the brownie batter.
- Bring the pan out from the freezer and spoon half of the brownie batter onto the top of the chilled graham cracker crust. Evenly place each unwrapped Ghirardelli Milk Chocolate Caramel Square in a grid pattern, then pour the remaining half of brownie batter over top.9 Ghirardelli Milk Chocolate Caramel Squares
- Bake for 35-40 minutes at 350ºF. Avoiding the caramel squares as best you can, insert a toothpick to make sure your brownies are done. If they still have crumbs on the toothpick, remove them from the oven. If they still have brownie batter on the toothpick, then keep them in, but monitor them every minute until done.
- Using hot pads move the oven rack from the 2nd level position to the 3rd level position. Switch your oven settings from bake to broil, and set to HI.
- Carefully top the brownies with the mini marshmallows, then place the pan into the broiler.3-4 cup Mini Marshmallows
- Toast/broil the marshmallows for 3-6 minutes max. Closely monitor this part of the recipe carefully so the marshmallows do not burn.
- Remove from the oven when the mini marshmallows have puffed up and have a very light golden brown color to them.
- Remove s’mores brownies from the oven and allow to cool completely before cutting into them.
Notes
- Recommended baking times for the brownies are 35-40 minutes at 350ºF. My brownies took the full 40 minutes. I recommend starting to check them at the 35 minutes mark.
- Broiling times will vary from oven to oven, but for this recipe, the recommended times are 3-6 minutes. Carefully monitor the broiling time!
- I used my 8″ x 8″ baking pan by USA Pan. This pan is one of the best pans I’ve ever used. It’s indestructible!
- Lining your baking pan with parchment is optional, but it does help when it comes time to cutting your s’mores brownies. If you choose to line the pan, make sure to spray it with a flour-based baking spray before and after placing the paper.
- You can use mini marshmallows or regular large-size marshmallows.
- When adding the marshmallows, I placed them in rows, but you can get creative and do a cool swirl pattern or just simply place them on top!
Nutrition
Nutritional information provided above is an estimate only and will vary based on specific ingredients used. See Nutritional Disclaimer for more info.


This site uses Titan Security to reduce spam. Learn how your comment data is processed .