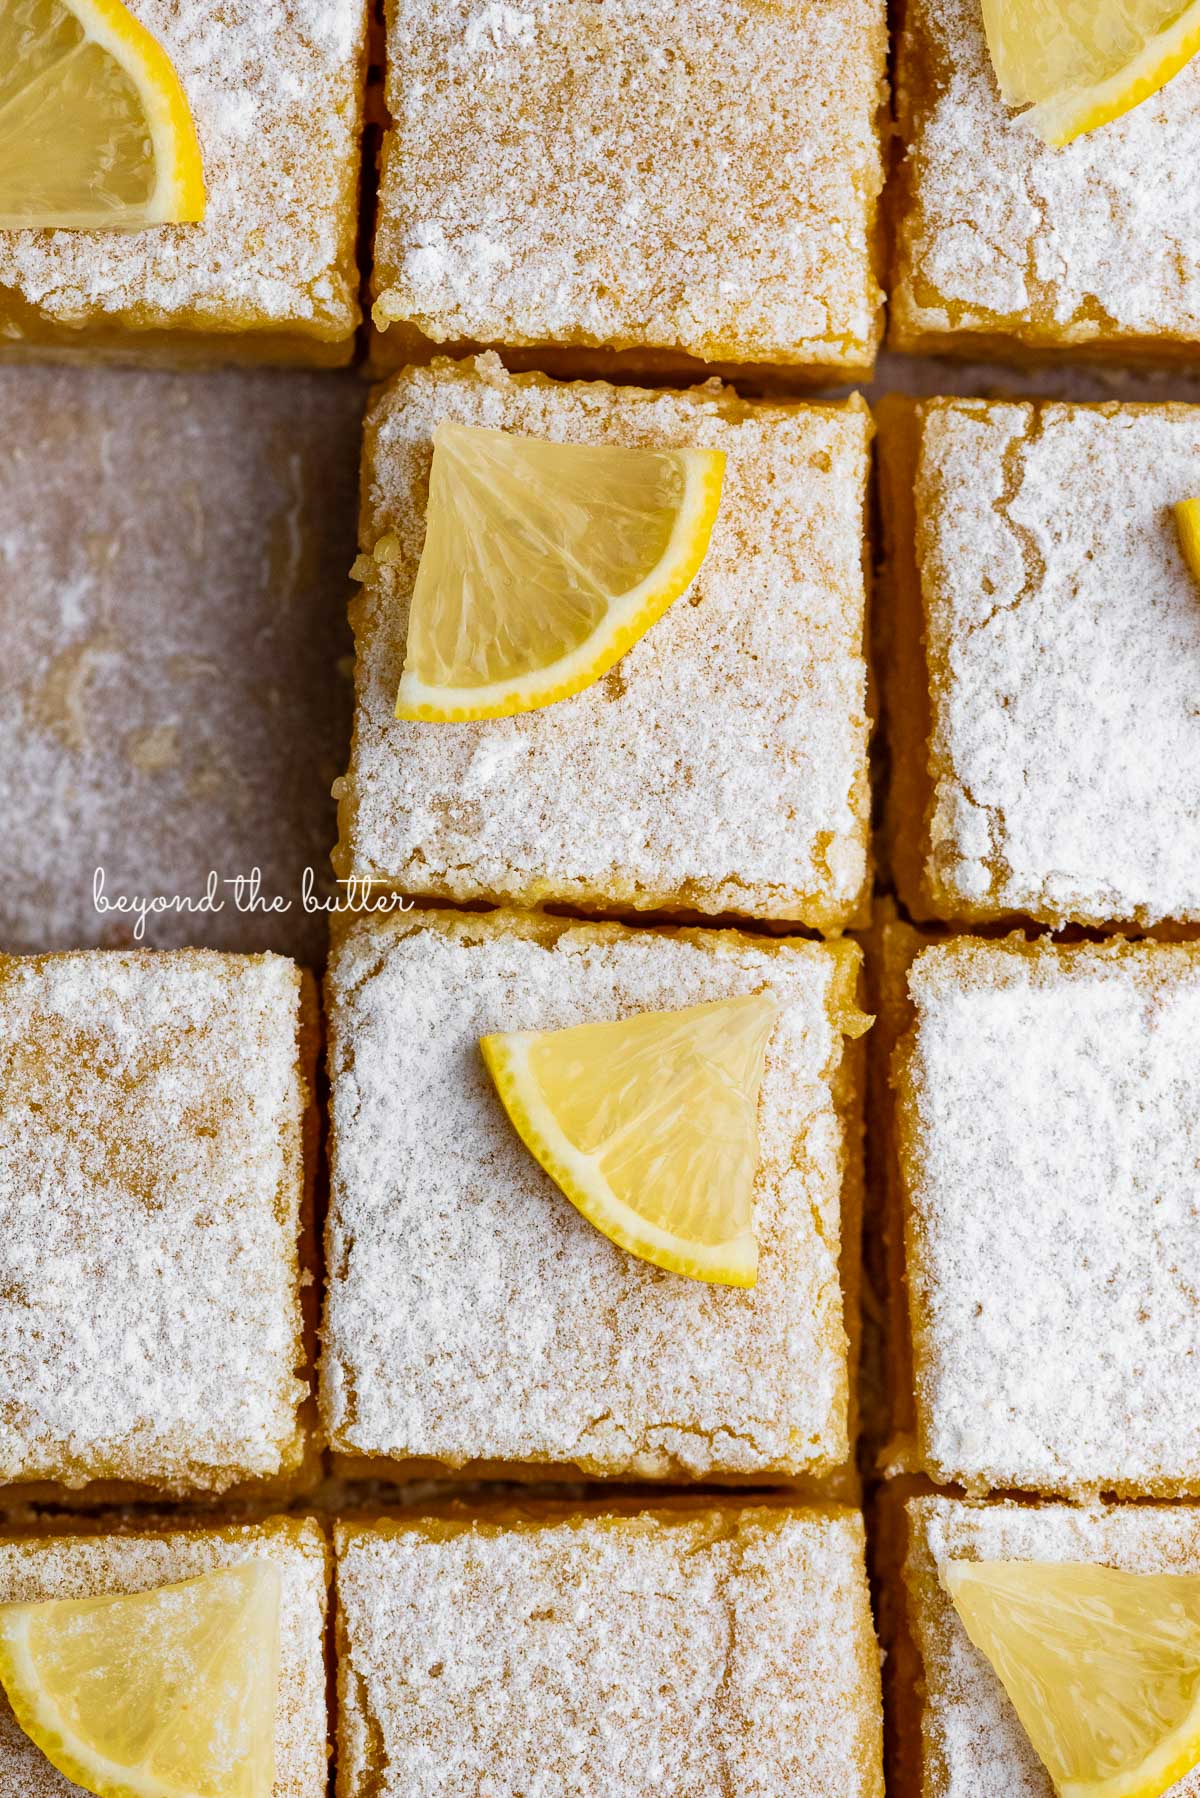
These Super Easy Lemon Bars combine a tart and tangy lemon curd filling with a buttery, shortbread crust. Made in an 8″ x 8″ baking pan, they make the perfect citrusy treat to enjoy with family, friends, or coworkers all year round!
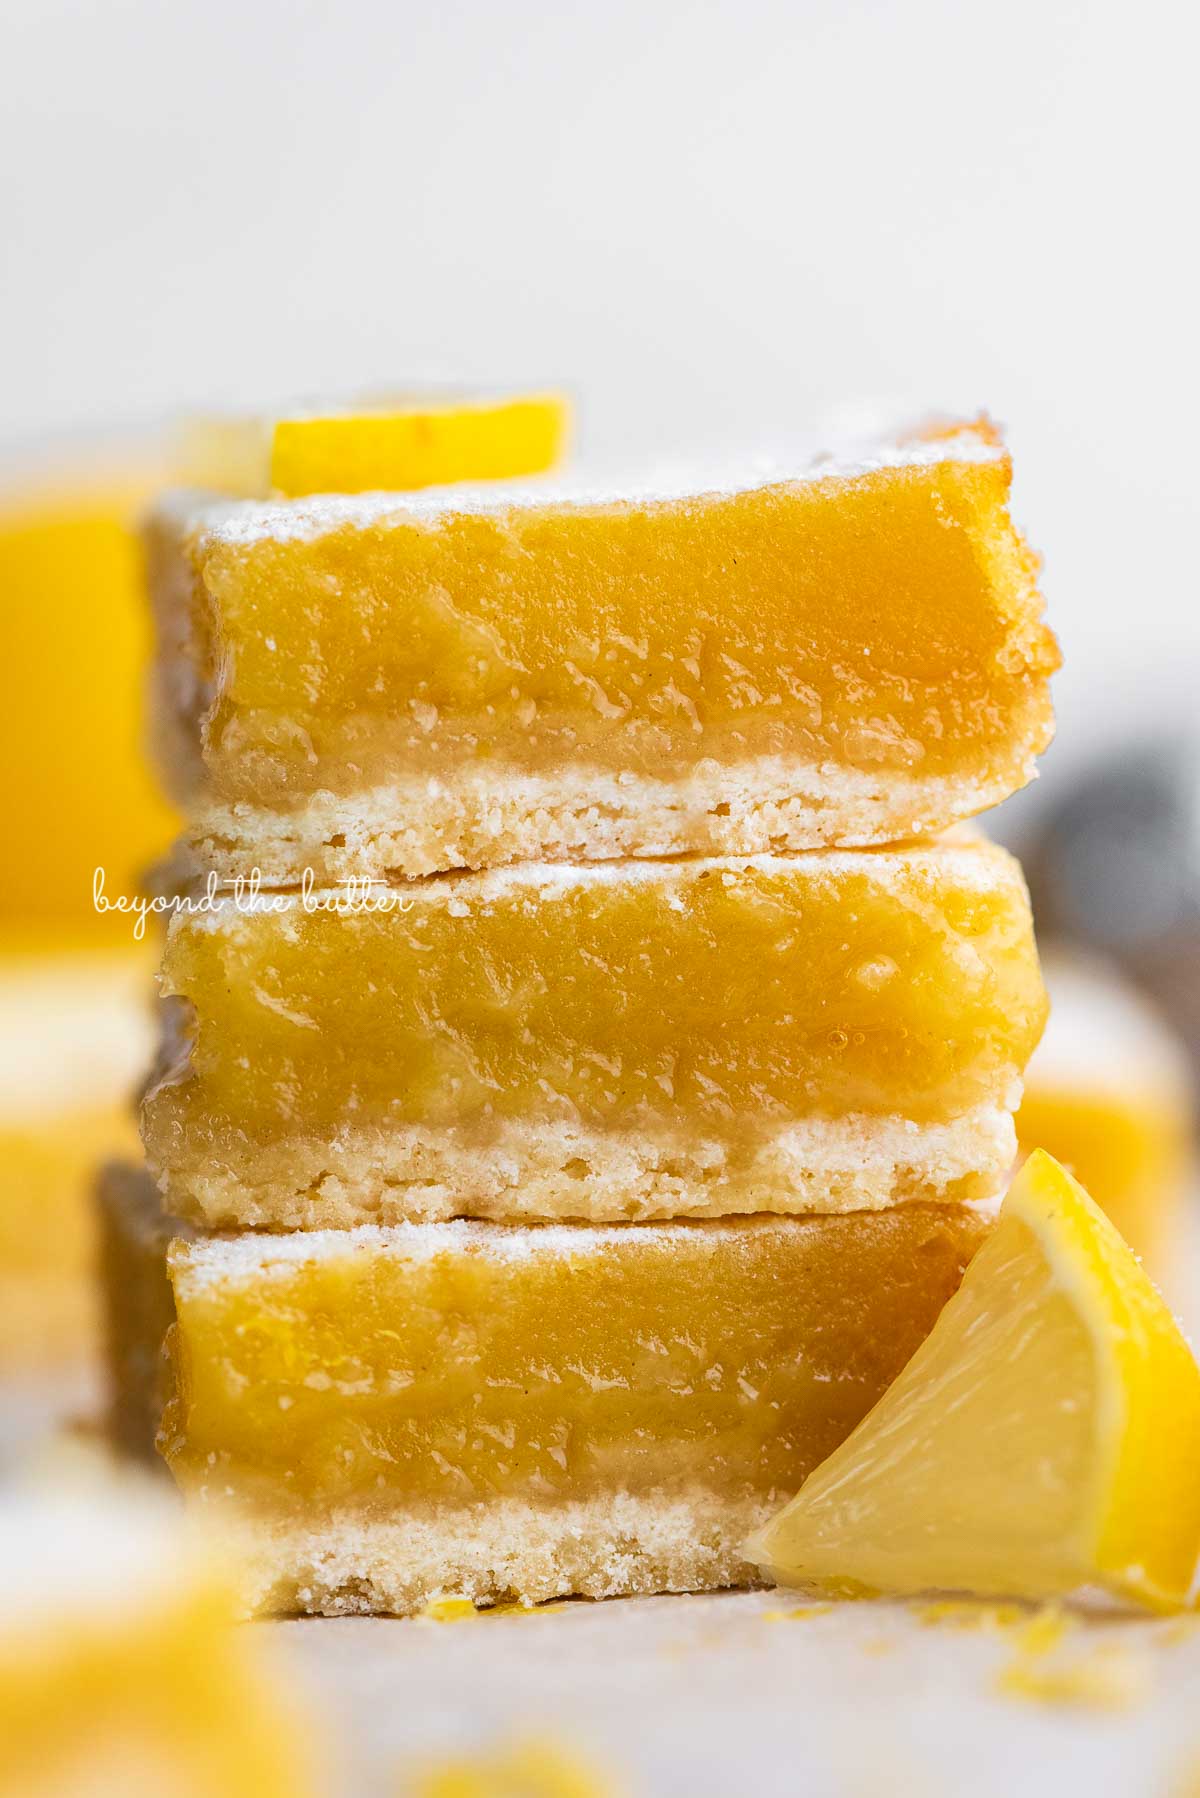
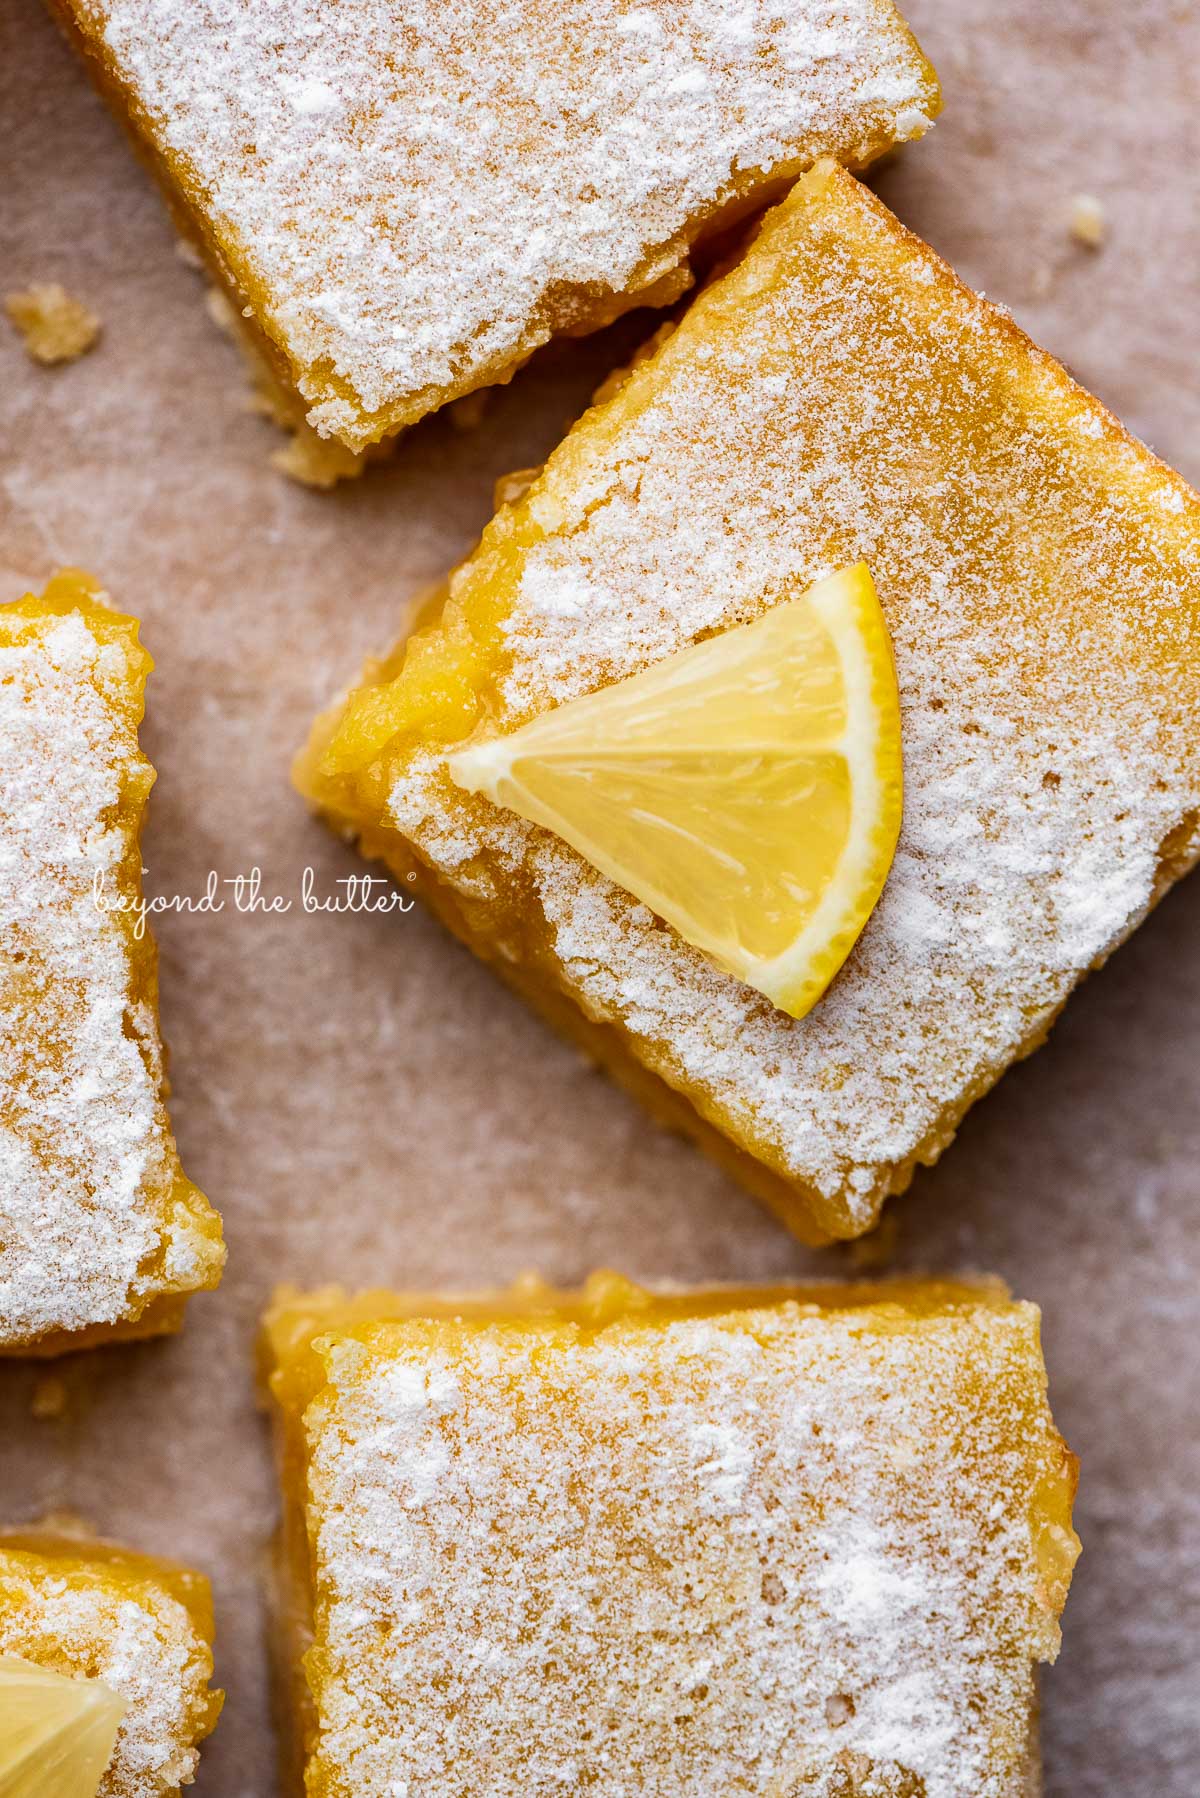
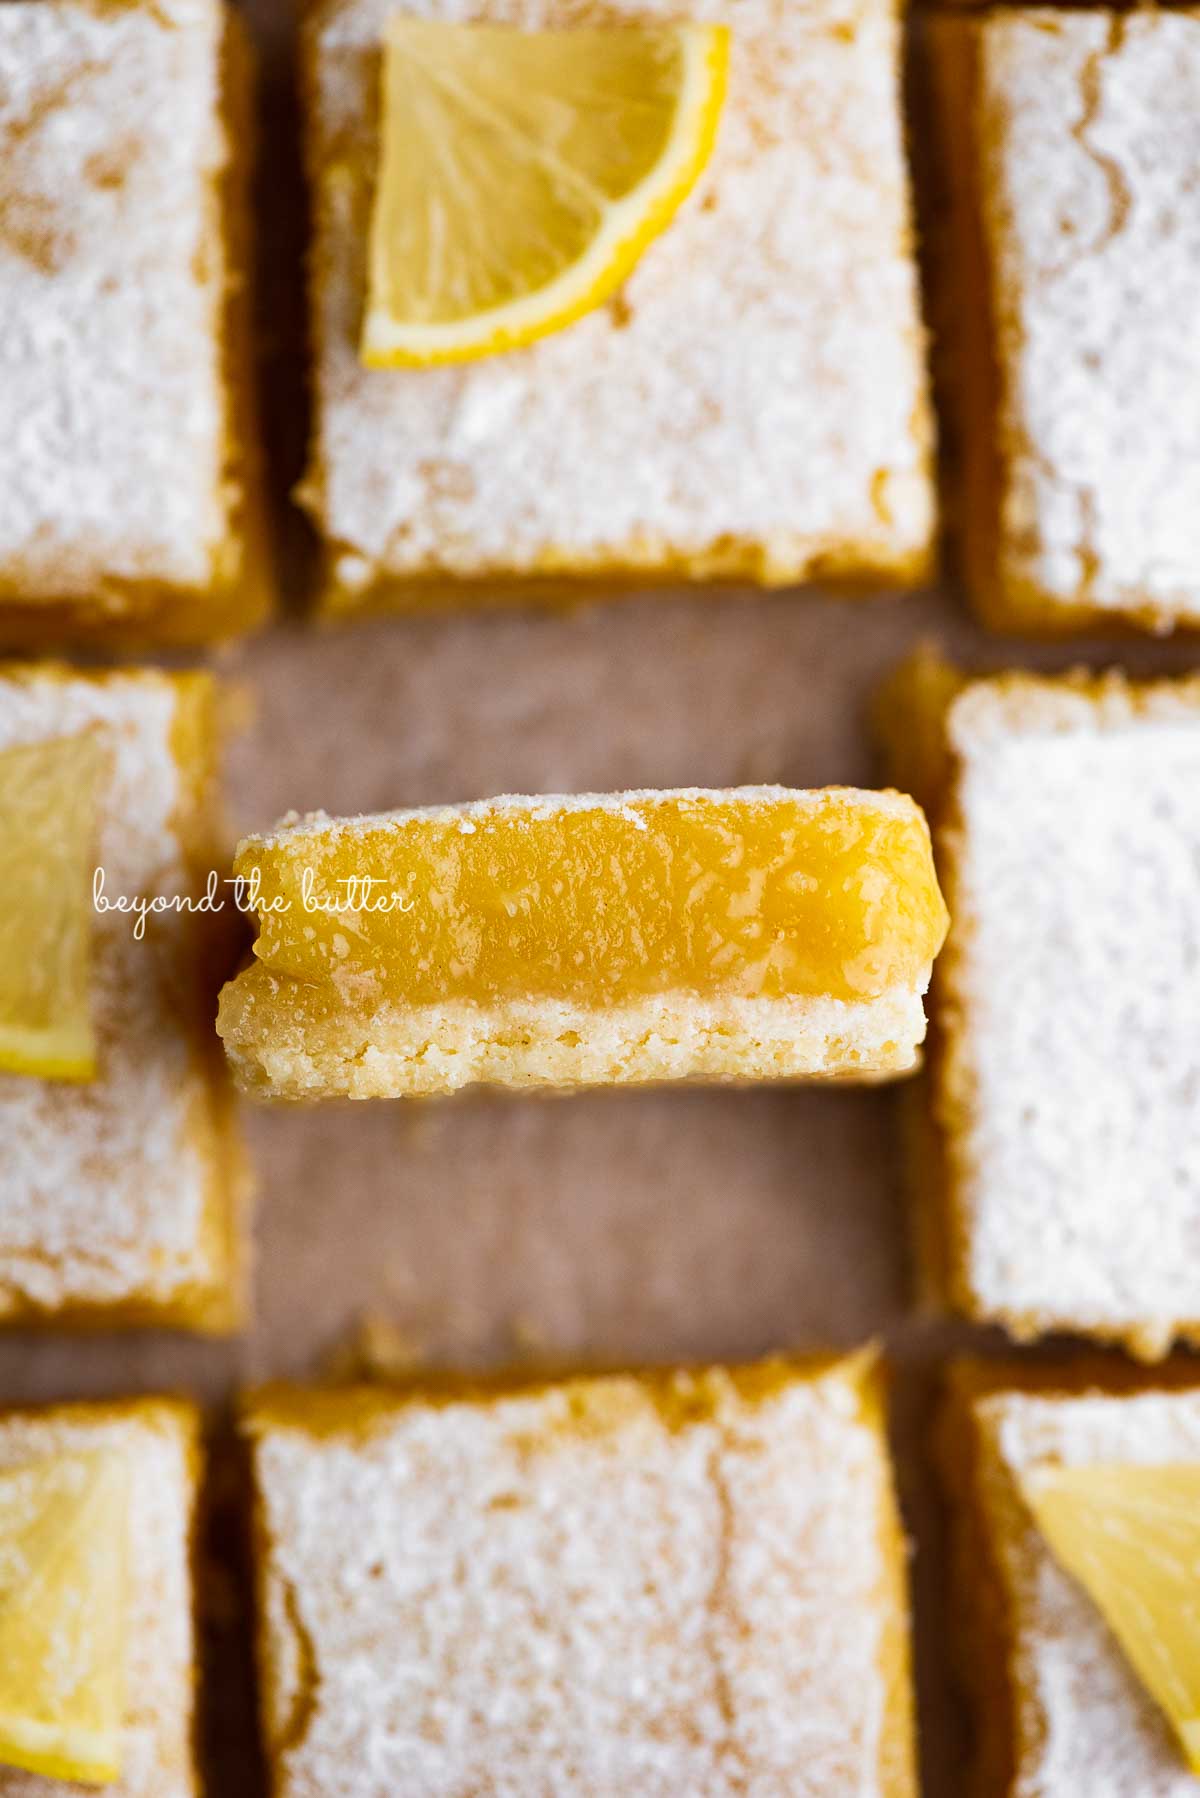
Table of Contents
About the Recipe
Just like the Chocolate Covered Peanut Butter Eggs I’ve shared with you, this Super Easy Lemon Bar recipe is another family favorite because it comes slightly adapted from the recipe box of my late Grammy!
If you’re ever craving a lip-smackingly good dessert, this tart and tangy treat is the best lemon bars recipe you’ll ever make!
Key Ingredients Needed
To make these lemon bars from scratch, you will need only these six ingredients:
- All-Purpose Flour. Needed for both the shortbread crust and the lemon curd filling. for the filling, I recommend sifting the flour to avoid any potential clumps.
- Unsalted Butter. This is only needed for the shortbread crust. Make sure it’s at room temperature.
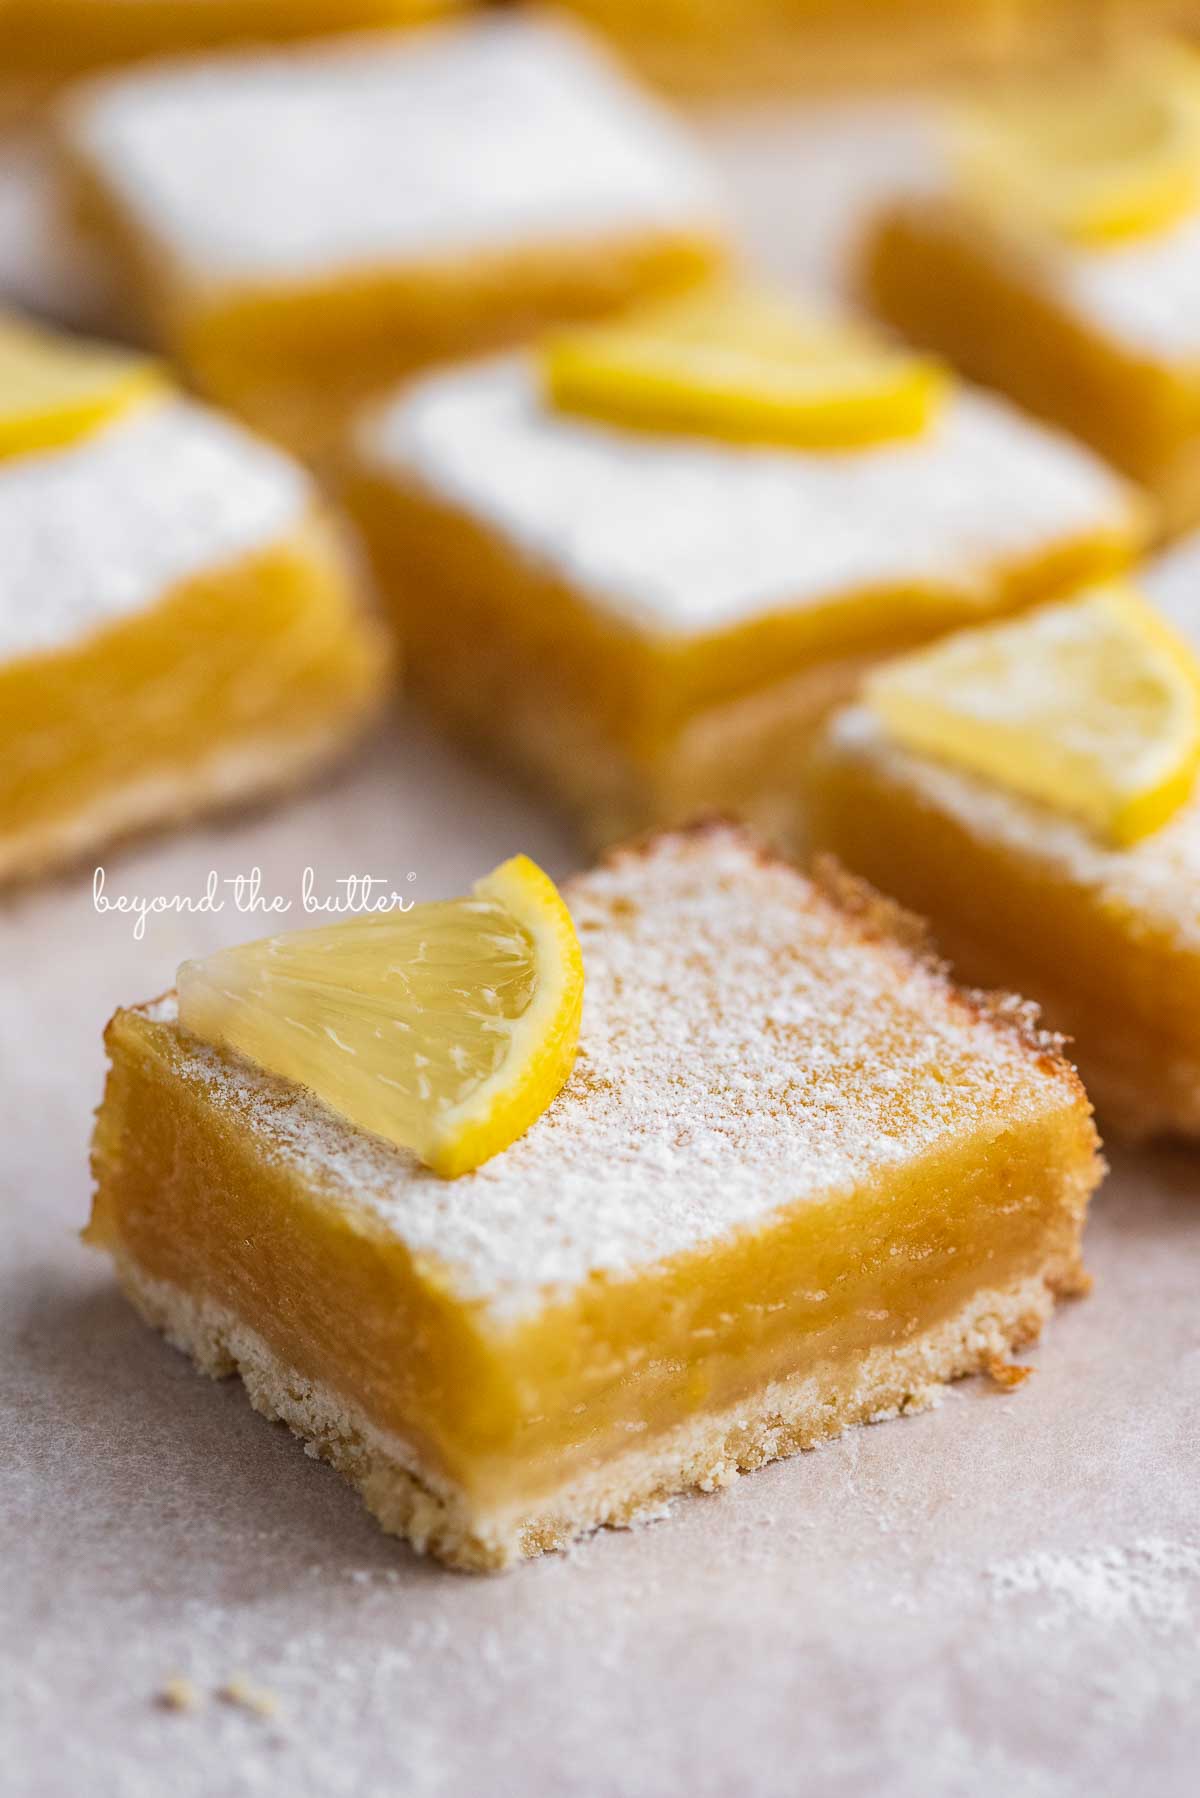
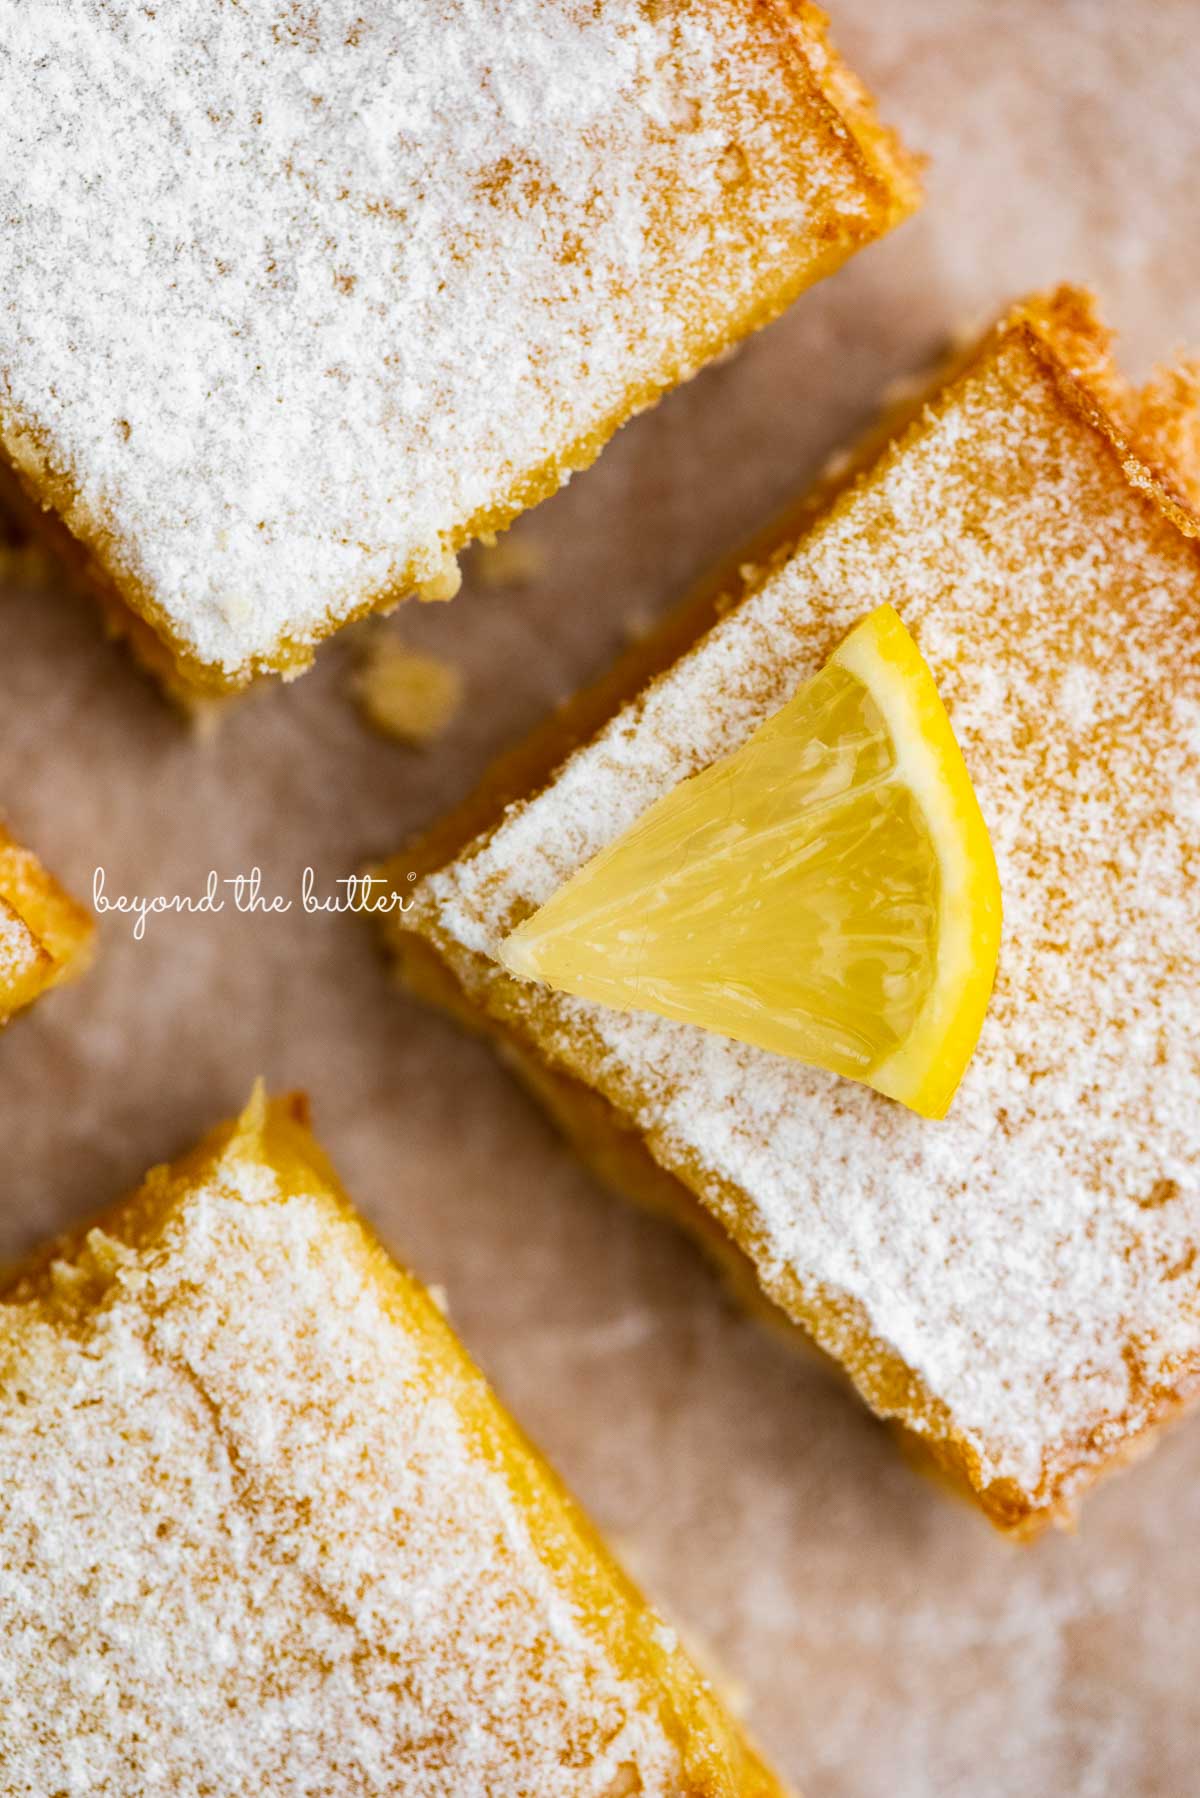
- Powdered Sugar. Mainly needed for the shortbread crust layer, but you can also use this as a dusting over the lemon bars—after they have cooled and chilled!
- Granulated Sugar. You’ll only need this for the lemon curd filling. You can use regular white granulated sugar or organic pure cane sugar.
- Lemons. You’ll need about three medium-sized lemons for the lemon juice and zest.
- Eggs. It helps to bring that beautiful lemon filling together!
How to Make Super Easy Lemon Bars from Scratch
This is a pretty straightforward, easy lemon bar recipe to prep and takes roughly a total of 40-48 minutes to bake. The lemon bars do require some time for chilling, however.
Shortbread Crust
Prepare the shortbread crust. This buttery shortbread crust comes together very quickly with the help of using either a food processor, stand mixer, or hand-held mixer. I prefer the food processor, but any of these will get the job done.
See my general prep tips below for adding a parchment paper sleeve before adding the shortbread dough to the pan!
Press the shortbread crust into the bottom of the baking pan. You can level and flatten the top of the crust using a spatula or the bottom of a measuring cup.
Chill the crust. Place the prepared shortbread crust into the refrigerator or freezer for about 10-15 minutes. I prefer the freezer, but if using a glass pan, I would stick to the refrigerator, or you can skip it altogether.
Bake the crust. Bake for 12-15 minutes at 350ºF or until you get a light golden brown top. Let it sit at room temperature to cool slightly while you make the lemon curd filling.
It does not need to be cooled completely before adding the lemon curd filling.
Lemon Curd Filling
Prep your ingredients before starting. This includes prepping the lemon juice and lemon zest, and I suggest sifting the all-purpose flour. It’s a small amount to sift, but it keeps any lumps out.
Mix the ingredients together. Place all of the ingredients into the mixing bowl and whisk on medium speed until it’s well blended. That’s it!
Pour, then bake. Pour the lemon curd filling into the slightly cooled shortbread crust and bake for an additional 25-30 minutes at 350ºF. Be careful not to overbake the lemon bars. You still want the center to have some jiggle to it when it comes out.
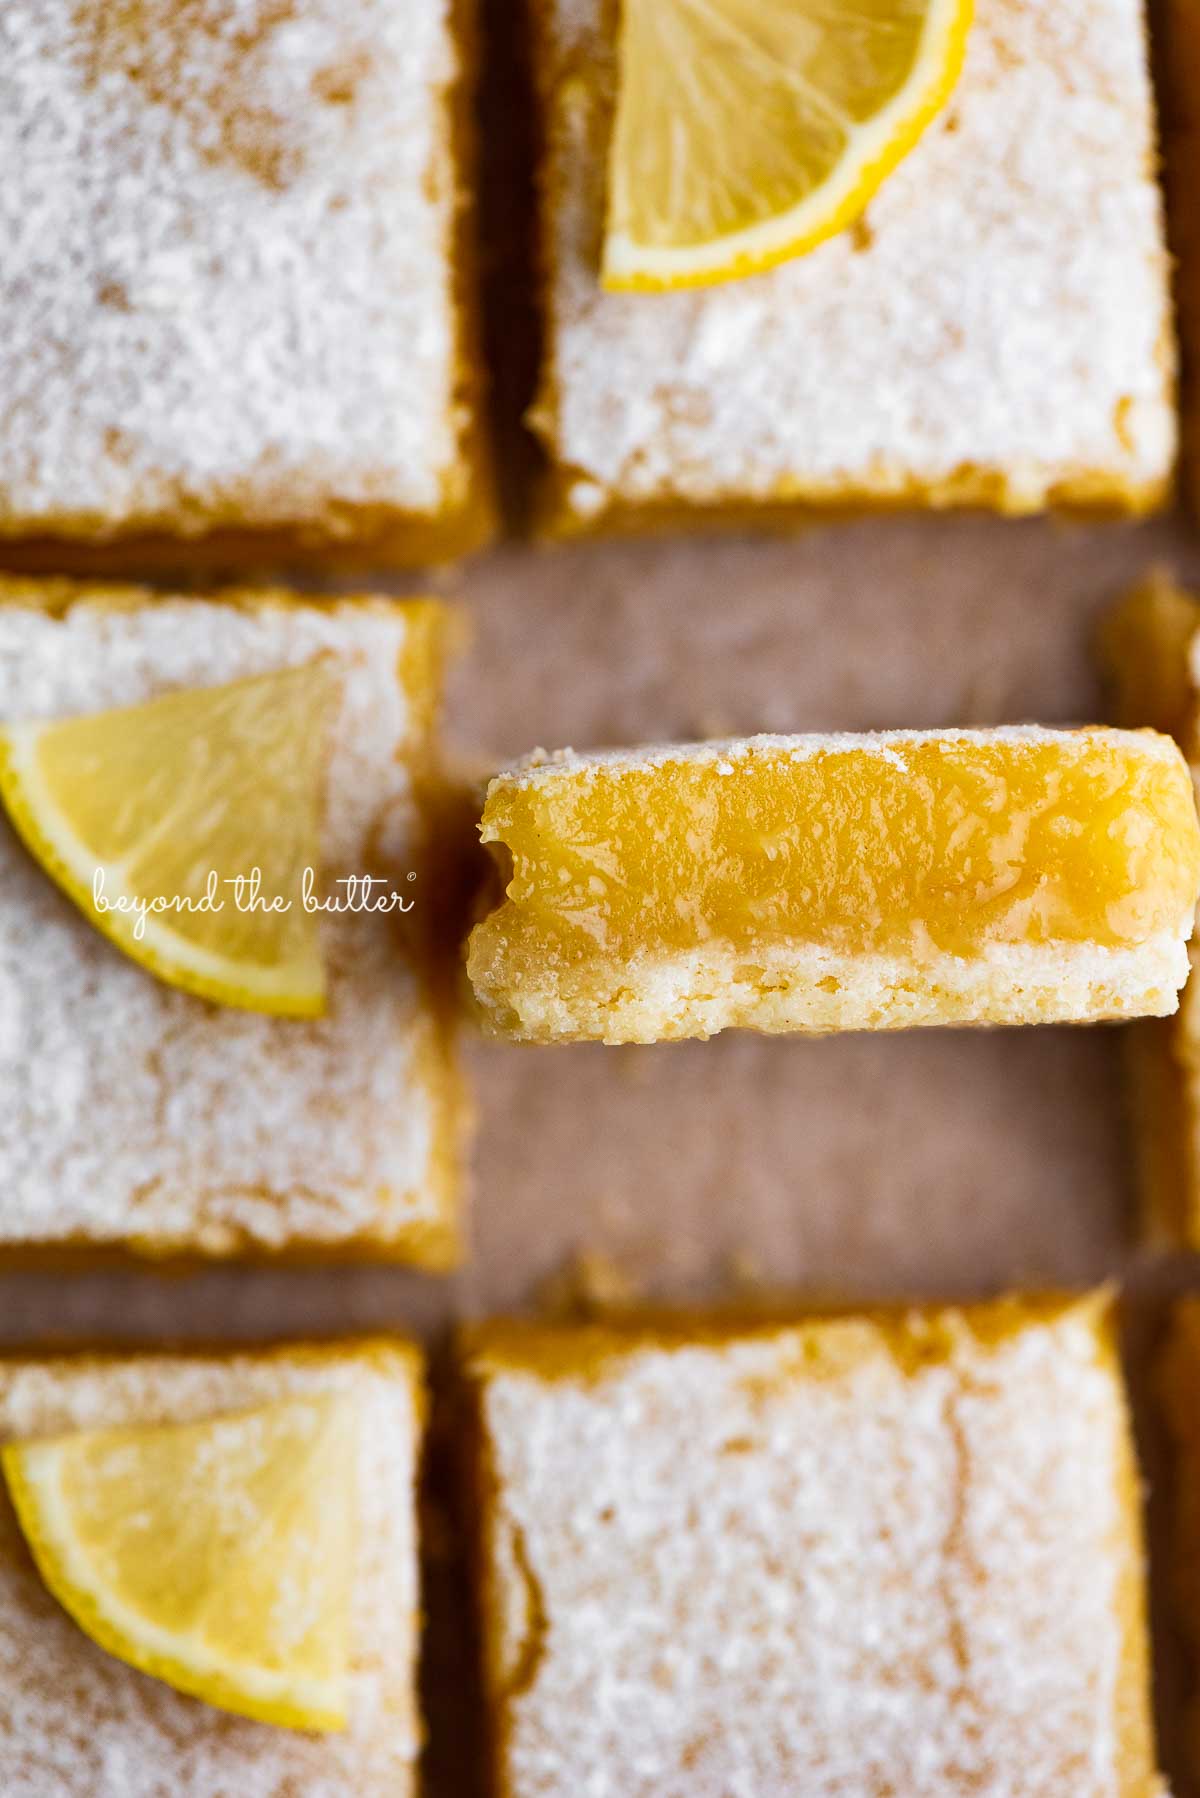
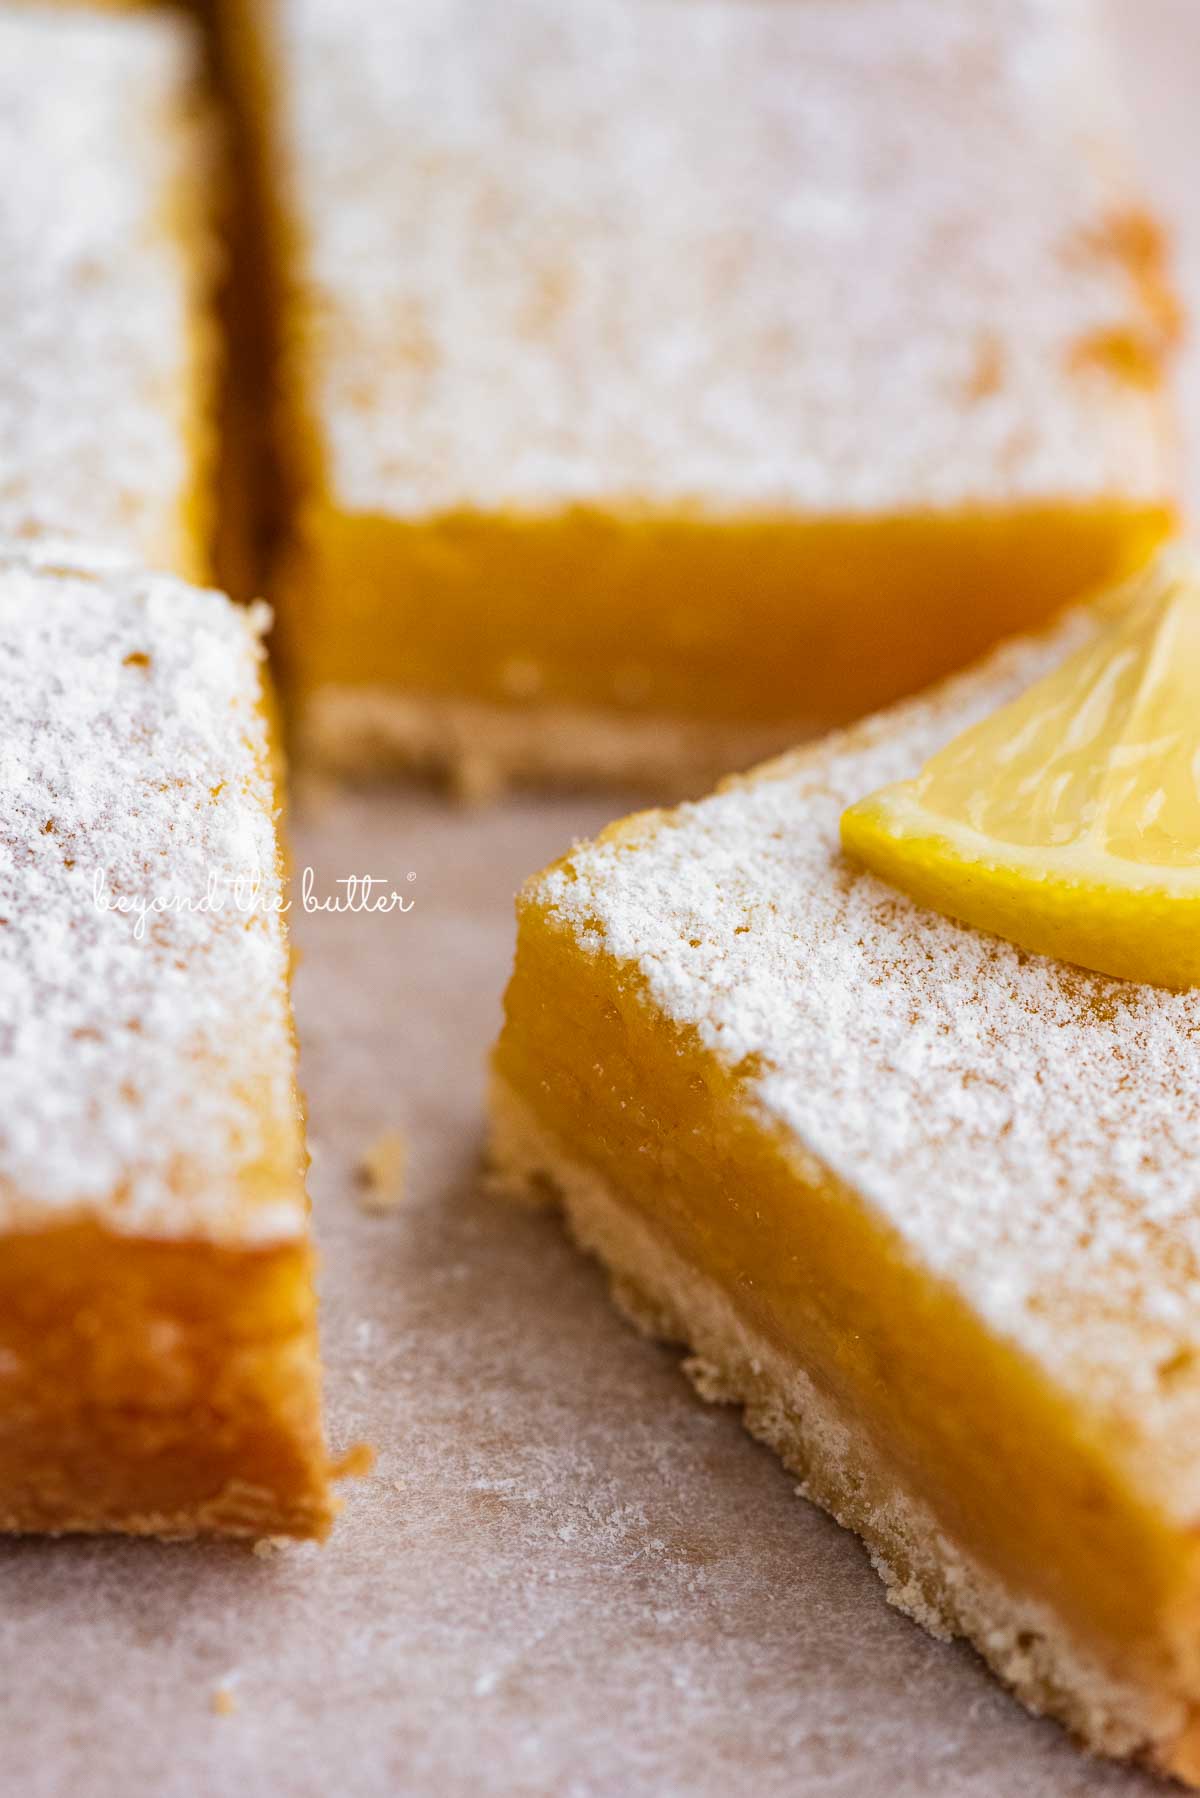
Cool to room temperature, then chill. Cooling the lemon bars to room temperature after they’re done baking can take up to approximately 2 hours. After cooling to room temperature, I highly suggest chilling the lemon bars (covered) for a minimum of 1 hour in the refrigerator.
This allows the lemon filling to become firm. It makes for an easier, less messy time of cutting them as well.
Plus, if I’m being honest, they just taste really good chilled!
Recommended Baking Tools
For these foolproof lemon bars, you’ll need the following baking tools:
- 8 inch Square Baking Pan
- Hand Mixer or Stand Mixer
- Spatula
- Flour-Based Baking Spray. Baker’s Joy is my favorite!
- Parchment Paper. Optional to use as a sleeve for easier removal and cutting of the lemon bars.
- Citrus Juicer
- Fine Grater
- Sifter. For the all-purpose flour in the lemon curd filling.

Helpful Tips for Making the Best Lemon Bars
- I used an 8-inch square baking pan for this lemon bars recipe, but you can also use a 9-inch square pan. For the latter size, adjust your recommended baking times to 20-25 minutes at 350ºF.
- Chilling the lemon bars gives them a nice firm texture. It helps make them easier to cut and taste good chilled! A minimum chill time of 1 hour is needed, but I highly recommend chilling them for longer!
- You can place a parchment paper sling into the bottom of your baking pan for easier cutting. To prevent the sides from collapsing into the lemon bars during baking, you can use metal binder clips!
- I used this KitchenAid lemon juicer for the lemon juice. It’s inexpensive and does a good job of separating the seeds and pulp from the juice. It also has a measuring cup on the side!
- To get the lemon zest, I used my Microplane grater.
- Make sure to sift the all-purpose flour. If not, it may not fully mix with the other ingredients, leaving little lumps.
How to Freeze Your Lemon Bars
Make the lemon bars following the recipe instructions, then cool them completely. Skip adding the powdered sugar.
Once cooled, cut them into squares and freeze them until solid. Wrap each bar 2-3 times in plastic wrap and place it back into the freezer in a freezer bag or tightly sealed container. They can also be frozen whole and wrapped in plastic wrap and aluminum foil. Lemon bars will last in the freezer for up to 3 months.
To defrost, place them in the refrigerator up to 24 hours in advance. If frozen whole cut them into squares. You can sprinkle them with powdered sugar before serving.
Lemon Bars FAQs
You will need an 8-inch square baking pan.
Overbaking the lemon bars can cause the top to form this thin crust. You can try to pick it off or do what I’ve done and simply dust some powdered sugar over the top. They’ll still be good!
No, it’s not required, but it does help to firm up the butter a little before baking. If you’re using a glass baking dish, I don’t recommend chilling it before baking.
Enjoy These Other Lemon Desserts from Beyond the Butter!


Super Easy Lemon Bars

Ingredients
shortbread crust
- 1/2 cup Unsalted Butter , room temperature
- 1 cup All-Purpose Flour
- 1/4 cup Powdered Sugar
lemon curd filling
- 1/2 cup Lemon Juice, 2-3 lemons
- 1 tbsp Lemon Zest, finely grated
- 3 Large Eggs, room temperature
- 1 1/2 cups Granulated Sugar
- 1/2 cup All-Purpose Flour, sifted
- Powdered Sugar, for dusting
Instructions
shortbread crust
- Lightly spray an 8” x 8” baking pan with a flour-based baking spray. Set to the side. If you'd like, you can spray the pan, then place a parchment paper sling into the pan which can help make for easier cutting later. To prevent the sides from collapsing into the bars during baking, you can place a binder clips on top of the paper.
- Using a hand mixer or a stand mixer fitted with a paddle attachment, beat together the unsalted butter, all-purpose flour, and powdered sugar until the shortbread bottom layer forms. It will resemble light yellow loose crumbs. Pat the shortbread layer into the bottom of the prepared 8″ x 8″ pan. Then place in the freezer or refrigerator for about 10-15 minutes to chill. You can skip the chilling if you're using a glass baking dish.1/2 cup Unsalted Butter , 1 cup All-Purpose Flour, 1/4 cup Powdered Sugar
- While the shortbread layer chills, adjust the oven rack to the 2nd level position (just above center) and preheat the oven to 350ºF.
- Place the pan in the oven and bake for 15-18 minutes at 350ºF or until it's light golden brown.
- Remove from the oven and allow to cool slightly while you prepare the lemon curd filling. You can choose to leave the oven on, or you can turn it off while you make the lemon curd filling. If you turn it off, remember to preheat it again to 350ºF.
lemon curd filling
- Grate a lemon with a fine grater, adding the zest to a small bowl. Then cut each lemon in half and with a lemon juicer, squeeze out the lemon juice from each lemon. Sift the all-purpose flour into a small bowl.
- Using a hand mixer or a stand mixer fitted with a whisk attachment, mix together the lemon juice, lemon zest, eggs, granulated sugar, and all-purpose flour on medium-high speed until well blended.1/2 cup Lemon Juice, 1 tbsp Lemon Zest, 3 Large Eggs, 1 1/2 cups Granulated Sugar, 1/2 cup All-Purpose Flour
- Pour the lemon curd filling into the slightly cooled crust, then place back into the oven to bake for 25-30 minutes at 350ºF or until the top is almost set with the center jiggling a little. I recommend checking on them at the earliest recommended baking time to start.Note: Leaving them in too long can cause a thin crust to form over the top. The lemon bars are still good though if this happens!
- Remove from the oven and allow lemon bars to cool completely. Then cover and place into the refrigerator to chill and set for a minimum of 1 hour (overnight is my preference). When ready to serve, dust with powdered sugar and cut using a well-sharpened knife.Powdered Sugar
- Keep lemon bars stored in an airtight container in the refrigerator for up to 5 days.
Video
Notes
- The 48-minute cook time noted above combines the longest baking time for both the shortbread crust (18 minutes) and the final baking time for both layers (30 minutes).
- If you’d like, you can spray the pan, then place a parchment paper sling into the pan, which can help make for easier cutting later. To prevent the sides from collapsing into the bars during baking, you can place a small dab of the lemon filling in between the parchment paper and baking tin, or you can use metal (not plastic) binder clips.
- You may notice a small amount of the lemon filling fall behind or slightly under the parchment paper sling (if you use one) during baking. This is okay—it happens to me when I make them sometimes. Please note, this does not mean the lemon filling moves entirely underneath the crust.
- Overbaking the lemon bars for too long can cause a thin crust to form over the top. You can try to pick it off, or do what I’ve done and dust on some powdered sugar because they’re still good!
- To prevent the powdered sugar topping from melting, you can use King Arthur’s non-melting powdered sugar. I love it for desserts like this and my dark chocolate crinkle cookies!
- Recipe is adapted from my Grammy’s lemon bars recipe.
- Recipe updated 9/30/2022 with updated recipe notes.
Nutrition
Nutritional information provided above is an estimate only and will vary based on specific ingredients used. See Nutritional Disclaimer for more info.


Just wondering if I were to use salted butter in this recipe rather than unsalted butter would it alter the taste?
Eh, maybe just a little, but with the powdered sugar for the crust and granulated sugar in the lemon curd filling I think you will be okay!
Are the instructions for the 9×9 adaptation perhaps incorrect? I don’t think you’d cook them longer than you would the 8×8 since everything will be thinner. They’d need less time, right?
I was incredibly nervous making these, so 14 year old son jumped into to help. They were so easy to make. This were a hit with my picky eaters. Best part was I had all the ingredients and didn’t have to run to the store for anything. Thank you for sharing this very easy fun recipe!
This is awesome, Angie! I’m so glad they were a hit!
Hi, I also had a crust on top and only baked for 20mins. Which is fine, I sprinkled icing sugar on top. My partner liked them, but I noticed a floury taste in the lemon curd. I shifted the flour and blended well. Although, I thought 1/2 cup was a lot. Can I reduce amount of flour in lemon curd or do you have any suggestions?
Hi! It could just be the type or brand of flour you used that gave you the floury taste. For the amount used, I didn’t test the recipe with different amounts, but you are more than welcome to try it and see how they come out. You could maybe try a different brand of flour too. Just a thought, hope this helps!
Would it be possible to add some raspberries to this dessert ?
I haven’t tried it, but I don’t see why not! It sounds really good!
I think I must be useless, the taste was fabulous but I think something went wrong. I got a crust on the top. Also how long do you let the base to cool for? I want to try again and get it right. Any help will be appreciated. Jilly
You’re definitely not useless! The crust has happened to be before and it’s because I simply let them in too long. You want the center to still have some jiggle when you take it out. You can also check what oven rack level you’re baking them on. I usually bake on the 2nd mark, the one just above center. For the base, you just need it to cool slightly. I usually let it cool while I make the rest of the recipe. Hope this helps! Don’t hesitate to reach out with more questions either here or through Facebook/Instagram!
My mum used to make something very similar only she used cornstarch in the Lemon curd. She would mix the curd
Mixture with s wooden spoon as she said if you over whisk, you get a froth on top which sets like a meringue. Thank you for reminding me of my childhood.
You’re very welcome! And thank you for sharing that great tip!
I’ve tried this twice and it was delicious! Do you think using light brown sugar will mess it up?
Hi Lucia! I’m so glad this is a favorite of yours! I honestly don’t know about the light brown sugar, but you could try it out sometime and comment back here to say how it turned out!
I also got a crust on top! Unfortunately I didn’t see this comment until I had finished baking. Anything that can be done about that retroactively?
I’ve left it to cool just now, and am waiting to cut into it!
Will they taste the same despite the crust?
I still sprinkle on the powdered sugar and they still taste good! If you make them again, I would just avoid baking them as long. Two other things to note is to make sure the oven rack position isn’t right at the top and your oven is calibrated to the correct temp. Hope this helps and you still enjoyed them!❤️
I had this happen to mine too! I think it’s because it got over whipped with the beaters so all the bubbles floated to the top creating a white crispy layer on top. Next time I’ll try just stirring the ingredients together with a wooden spoon like another person suggested.
These lemon bars were absolutely delicious. Super tangy and creamy! I’ve always liked lemon bars (some more than others) but this was my first attempt at making them. And boy were they good! I was worried about being able to get them out of the pan so I used the tip about putting parchment paper underneath. Unfortunately I somehow got some of the lemon underneath the paper (under the crust and everything), so some pieces were not as pretty as others. Next time I will try it without the paper. I think the shortbread crust has enough butter in it that it will still come out of my pan easily enough. Just thinking about them is making my mouth water…
Had a similar issue with butter tart squares. Solution: be sure the base has cooled before adding the lemon filling.
These bars are pure joy! They taste so good! Easy to bake and they impresed my family! My kids loooooooove them! They remind me of my aunt Diane’s family recipe! Thanks for sharing it!
I’m so happy you and your family loved these lemon bars! I especially love that these remind you of your Aunt’s family recipe!❤️ Thank you again for making them and for sharing your picture over on Instagram!
Made these today as the sun was coming out and wanted a summer treat, the recipe is very straight forward, helpful and they came out great. Thank you so much for sharing!! 🍋
Maggie this made my day to read this, thank you so much for making them!💛
Es algo sencillamente delicioso, muy facil de hacer!!!! Gracias
De nada!
Amazing!!! So easy to make and a real hit with the whole family. Make these! You won’t regret it
Thank you for taking the time to make one of my recipes! It makes me happy to hear you and the family loved them!
love these easy to make, fresh & fruity and soft bars. YUM! will definitely make them again and am looking forward to trying out the next recipe ♥️
Thank you so much for making them!❤️