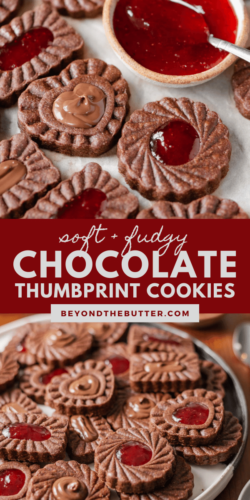
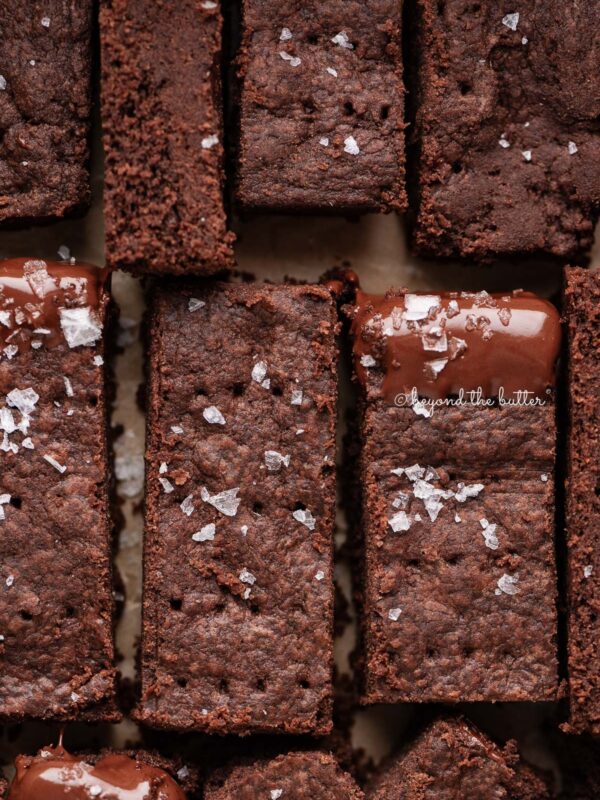
These homemade Chocolate Thumbprint Cookies are an elevated twist on the classic using a fun cookie stamp set. They’re soft and chocolatey with a fudgy, chewy jam-filled (or hazelnut spread-filled) center! It’s an easy recipe to make that gives you really delicious, sophisticated cookies!
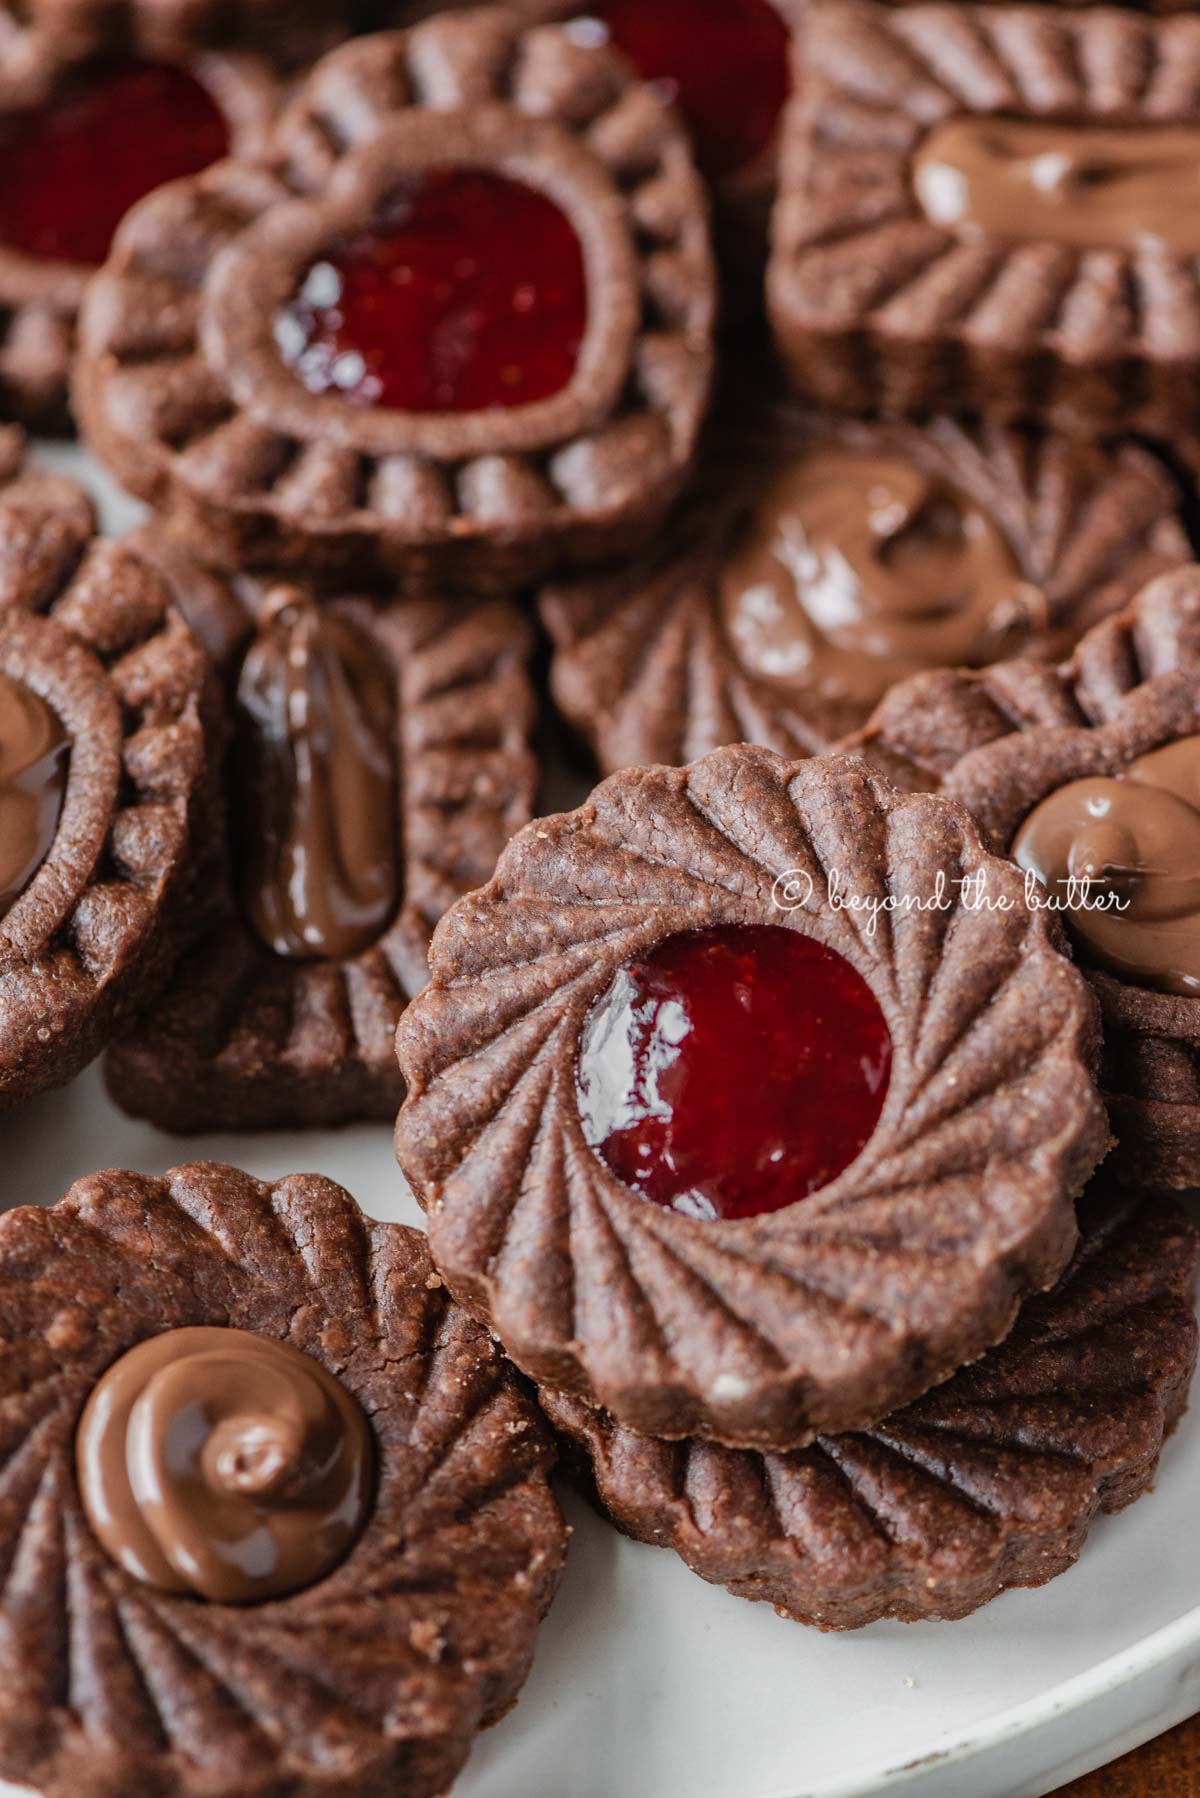
Table of Contents
The classic thumbprint cookie—or jamboree cookie —has been one of my favorites since childhood. So I decided to take my late Grammy’s holiday jamboree cookie recipe and turn it into a chocolate version, and instead of rolling them into a ball and making an indent, I decided to use a thumbprint cookie set.
I absolutely love how they came out, and my word, do they ever taste good! They’re a great addition to any cookie box or simply to enjoy at home!
How to Use a Plunger-Style Cookie Stamp
- Cut into the cookie dough with the cookie stamp.
- Push down with the plunger to press the design into the cookie.
- Let go and allow the plunger to pop back up on its own.
- Holding the cookie stamp over the parchment paper, push down on the plunger to release the cookie.
Cookie Stamping Tips
Chill before baking. It’s an added step that is not required, but I do highly recommend it because it does a great job of keeping the details of the cookies. After you roll out the dough and stamp out the cookies, place them into the refrigerator or—my preference—the freezer. 10-15 minutes is good.
Thicker cookies are better. Your dough should be rolled out to 1/4 inch to 5/16 inch thick. This will give you a better-looking cookie and the perfect center for the jam or hazelnut spread.
If it’s rolled out too thin, when you press down on the cookie stamp plunger, it will go right through the dough.
Coat the stamps in flour. It will make things easier when stamping out the cookies. I keep a small bowl of flour next to my baking sheets as I stamp out the cookies. I dip it into the flour after stamping out 2-3 cookies.
Helpful Chocolate Thumbprint Cookie Tips
Go the classic route. If you don’t have thumbprint cookie stamps, you can go the classic route! Simply roll the chocolate cookie dough into small 1 to 1.5-inch balls, then press your finger into the center to create a cavity for where the jam or Nutella will go.
Chilled dough is the best. You really only need to chill the cookie dough for 30-45 minutes before you roll it out for the cookie stamps or roll it into balls for the classic. Without chilling, either option will be too mushy and difficult to handle.
When the dough is brought out of the refrigerator, it will be stiffer, but as you work with it, it will soften up.
Flour your work surface and rolling pin. The flour will bake off, so don’t worry if it gets on your cookies! Having your work surface and rolling pin lightly floured helps to keep the dough from sticking to anything.
Use a spatula. The thumbprint cookies will be very soft and lightly puffy after you bake them. Use a spatula to transfer them from the baking sheet to the wire cooling rack. The puffiness will settle as the cookies cool.
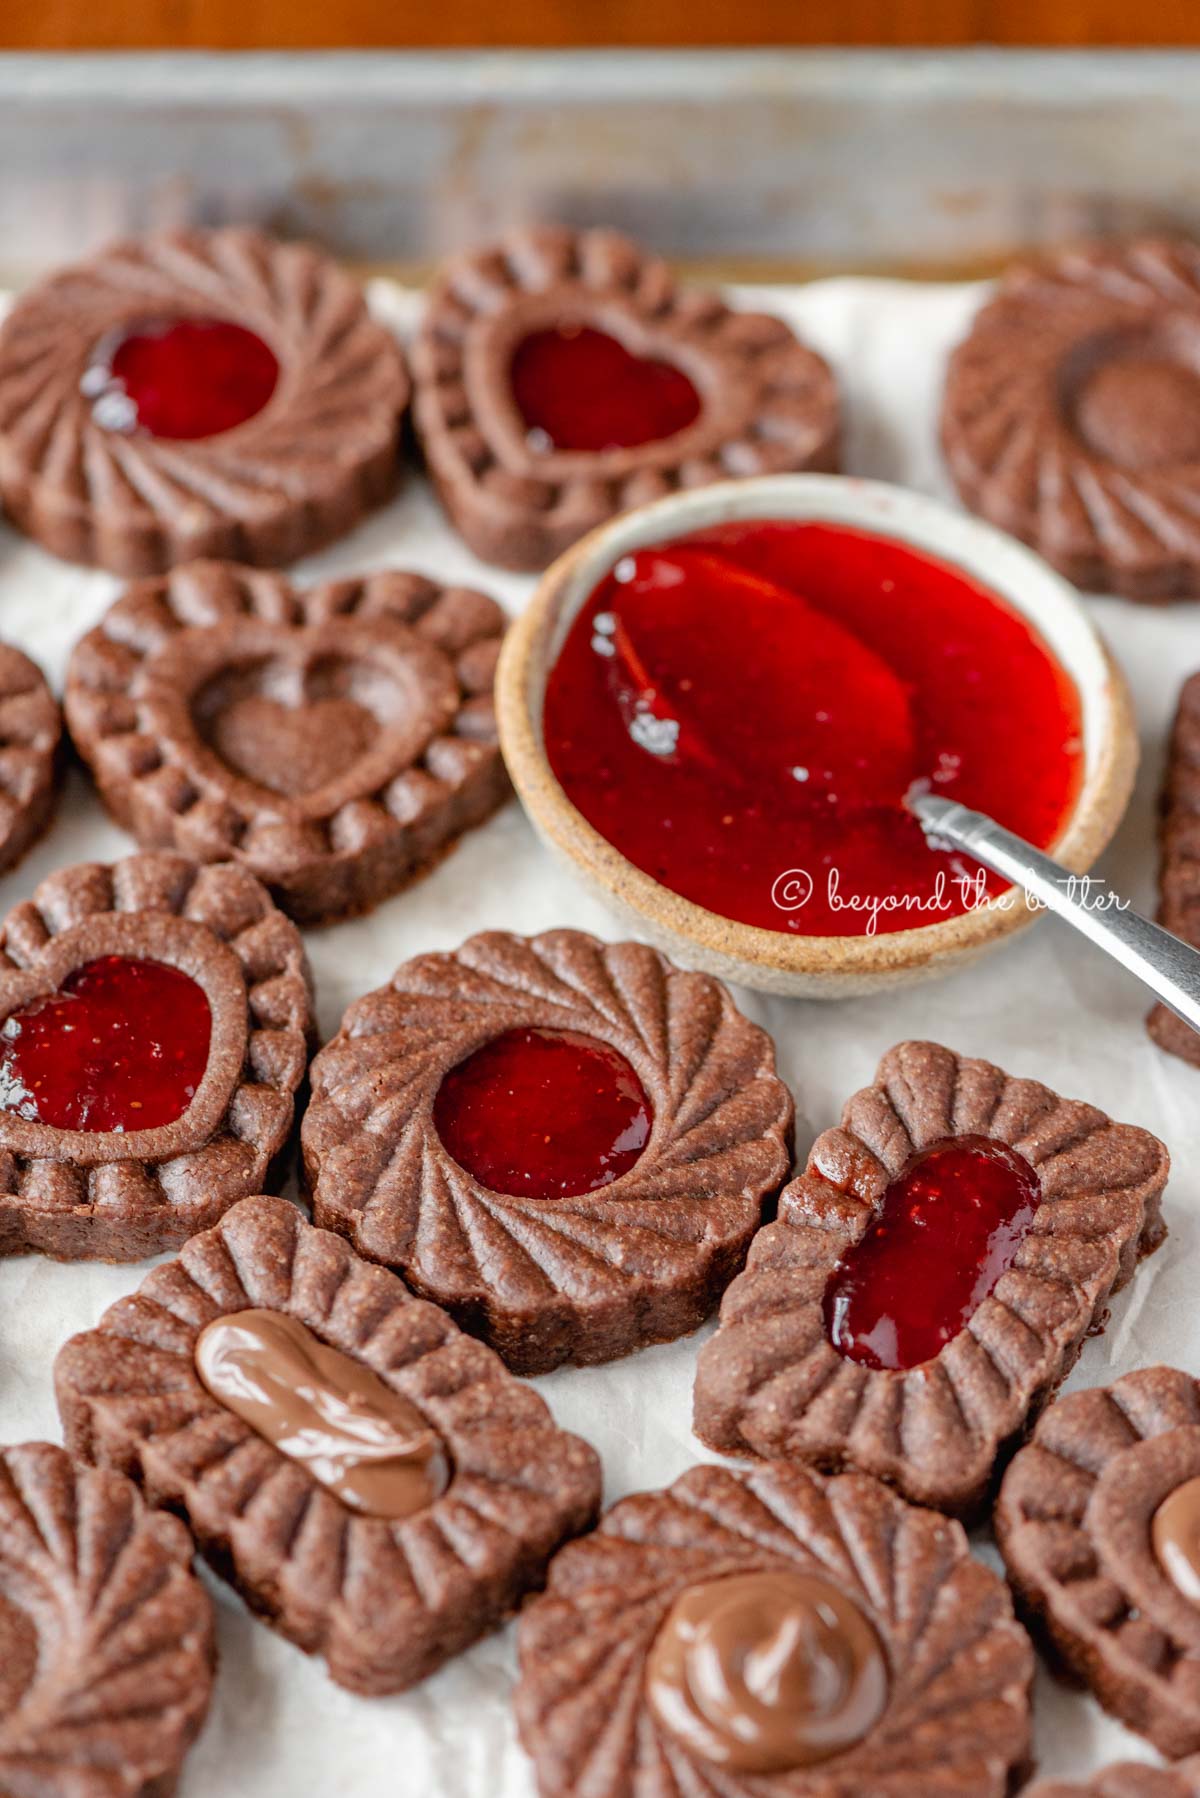
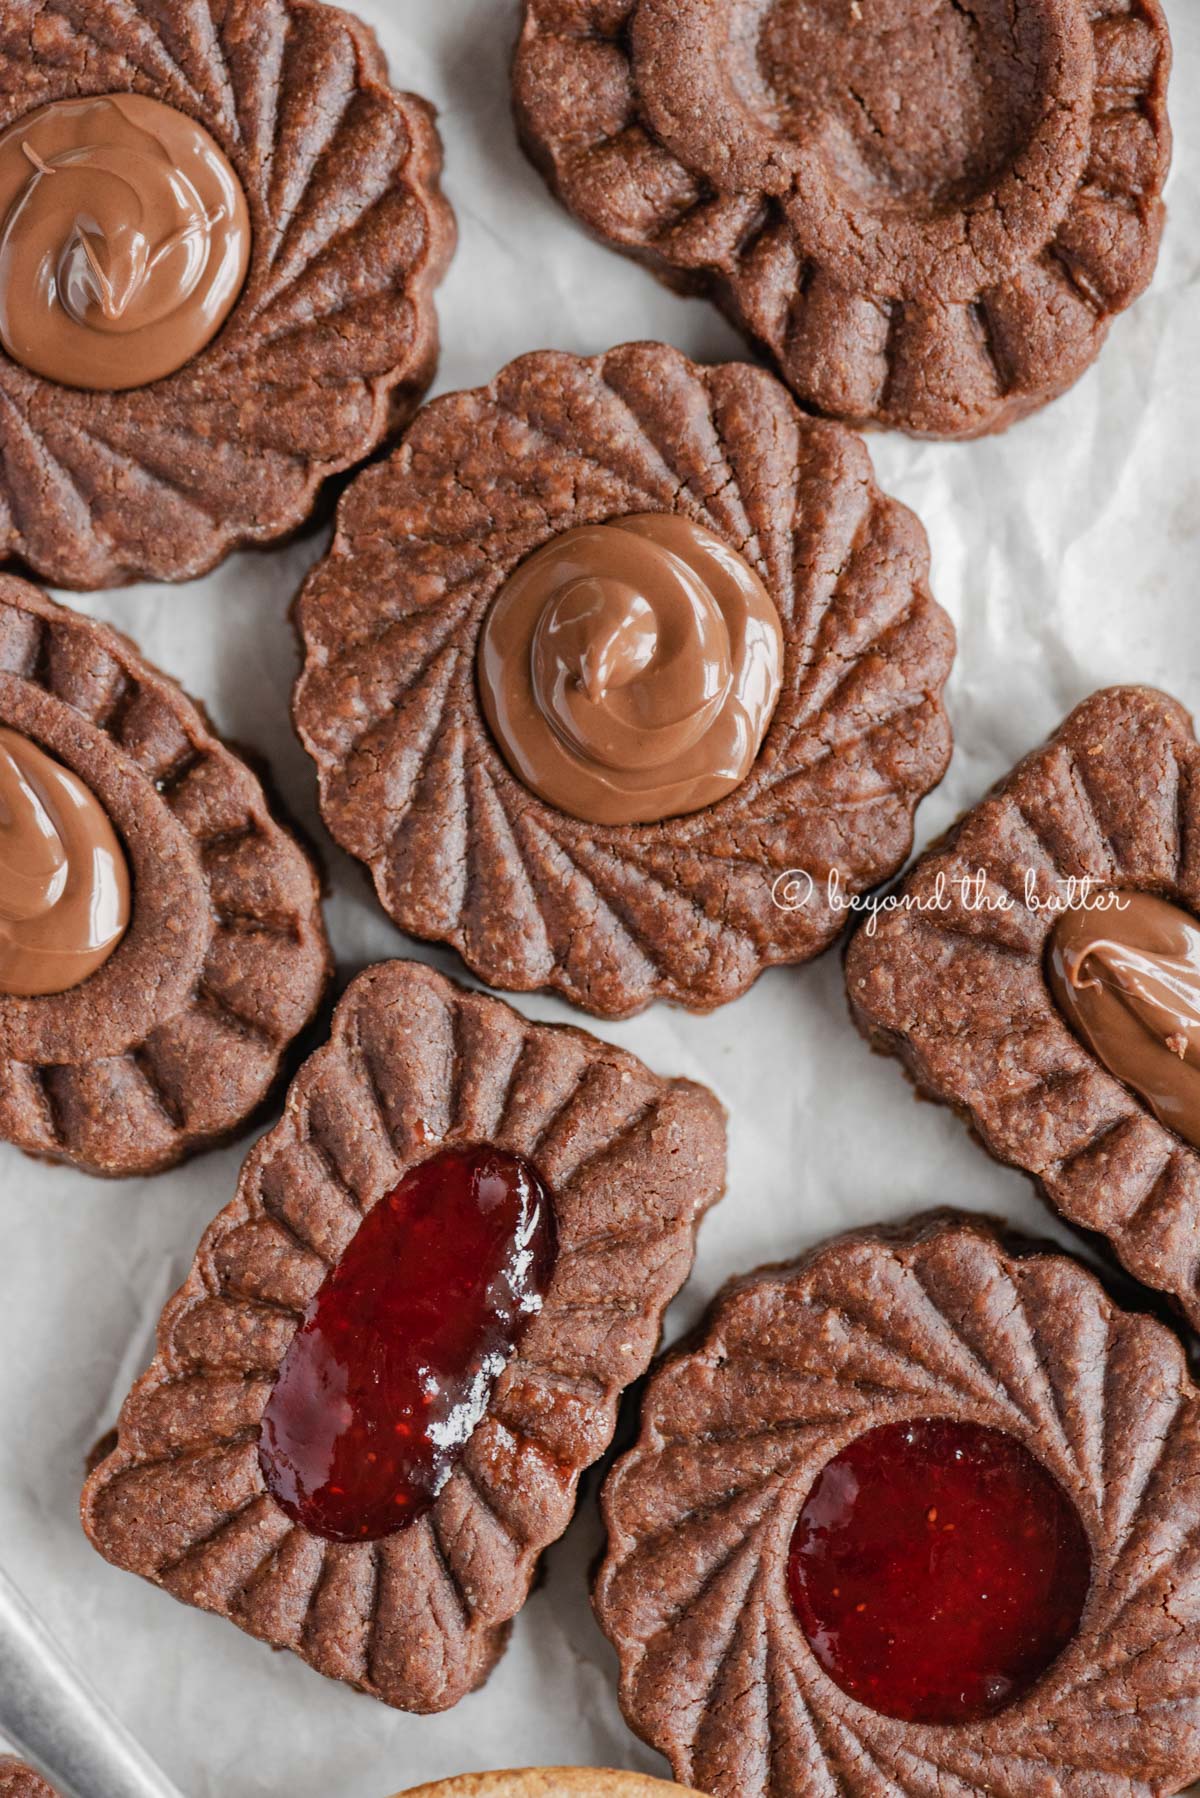
Piping bags for the win. When filling the cookie centers, I found it easier to use piping bags. No decorative tip is needed; just snip the end off when you’re ready to use it. Plastic bags can be used instead of piping bags, and spoons are, of course, a good alternative if you don’t have the bags.
Recipe FAQs
I got these thumbprint cookie stamps from Williams Sonoma. They’re plunger-style, which I really like because they do a good job of pushing out the cookie dough after they’ve been stamped. You can also give this thumbprint circle or rectangle cookie stamp a try.
Yes, but I recommend freezing the cookies after you have cut them out. It will make things a whole lot easier come baking time! No defrosting is needed. Just pop them in the oven. Same temperature, but it’s recommended to add 1-2 minutes to your baking time.
Add These Cookies to Your Must-Bake List


If you tried this Chocolate Thumbprint Cookies recipe or any other recipe on my website, please leave a 🌟 star rating and let me know what you thought in the 📝 comments below. Thanks for visiting!
Chocolate Thumbprint Cookies

Ingredients
- 2 cups All-Purpose Flour
- 1/2 cup Unsweetened Cocoa Powder
- 1 tsp Salt
- 1 cup Unsalted Butter, room temperature
- 1 cup Granulated Sugar
- 1 Large Egg Yolk
- 1 tsp Vanilla Extract
- Hazelnut Spread and/or Jam of your choice
Instructions
- In a medium bowl, whisk together the all-purpose flour, unsweetened cocoa powder, and salt. Set aside.2 cups All-Purpose Flour, 1/2 cup Unsweetened Cocoa Powder, 1 tsp Salt
- Using your hand mixer or stand mixer with a paddle attachment on medium speed, beat together the unsalted butter and granulated sugar until light and fluffy. Add in the egg yolk and vanilla extract.1 cup Unsalted Butter, 1 cup Granulated Sugar, 1 Large Egg Yolk, 1 tsp Vanilla Extract
- Switching the mixer speed to low, gradually add in your dry ingredients, then mix until well blended.
- Cover the dough tightly with plastic wrap and chill for a minimum of 1 hour in the refrigerator. You can, alternatively, chill the dough overnight as well. If you choose this option, you may want to shape the dough into discs, like you would for pie crust, so it's easier to roll out the next day. When ready to bake, bring the dough out to sit at room temperature for about 30 minutes.
- Preheat the oven to 350ºF and line 2 cookie sheets with parchment paper.
- Roll out the dough (1/4 inch – 5/16 inch thickness) onto a floured surface. Using the lightly floured cookie stamps, stamp out each cookie and place it on a parchment-lined cookie sheet. For a well-defined cookie shape, I highly recommended chilling the cookies in the refrigerator or freezer for 15-20 minutes before placing in the oven to bake.
- Once chilled, bake the cookies for 10-12 minutes (my oven did well at 10 minutes). The cookies will be slightly puffy, but will settle as they cool. Remove from the oven and allow to cool on cookie sheet for about 5 minutes before transferring to a cooling rack. Use a spatula to transfer them as they'll be very soft.
- Fill each cooled thumbprint cookie with either hazelnut spread or jam of your choice. You can use either a spoon or small piping bag, and I recommend heating up both fillings to make it easier to add to the center. Plastic bags can be used in place of piping bags. Just snip the corner when ready to start filling the cookies.Hazelnut Spread and/or Jam of your choice
- Cookies can be stored at room temperature in a well-sealed container for up to 4 days or chilled in the refrigerator for a week.
Notes
- If you don’t have thumbprint cookie stamps, you can roll the chocolate cookie dough into small 1 to 1.5-inch balls, then press your finger into the center to create a cavity for the jam or Nutella. Fill the centers with hazelnut spread or your favorite jam after they have cooled.
- Chill the cookie dough for 30-45 minutes before rolling it out or shaping it into balls.
- Cookies can be stamped out and kept in the freezer for up to a month. Add 1-2 minutes to your baking time. Do not defrost the cookies before baking.
- Recipe adapted from my late Grammy’s Jamboree Cookie recipe and the Washington Post.
Nutrition
Nutritional information provided above is an estimate only and will vary based on specific ingredients used. See Nutritional Disclaimer for more info.


I LOVE these cookies. They’re a hit with my family and friends. Making it a tradition to bake these every Valentine’s Day. Thank you. I use strawberry jam for the filling, heart shaped cookie cutters, and piping bag nozzles (the metal ones) to cut a hole in half the cookies for my filling.
So glad you enjoyed them, Kenzie!
Tried these for the first time using my set of cookie plungers They are very good, nice and chocolatey! Easy to make. I baked mine filled with jam for 13 minutes. I think Another couple of minutes in the oven would be better. Very happy with the results and these are definitely a keeper. Thank you for the recipe!
Would it be okay to fill the biscuits before baking so that the jam sets harder and caramel darkens? I find I like them better when the filling is firmly set into them.
I didn’t test the recipe this way, but you can certainly try them this way!
I have these thumbprint molds. I have filled them before baking. It works out well as long as you freeze the cookies for 15-20 minutes before baking, as per the directions. This helps the jams freeze enough that it doesn’t boil over the top while baking. Don’t overfill the cookie. Do a test cookie first.
Can the holiday jamboree cookie recipe be used to make these stamped cookies for a non-chocolate version?
I never tried it, so I can’t say if you definitely could, but I think the dough would be a little harder to work with. If you try it out though, please let me know how they turned out!