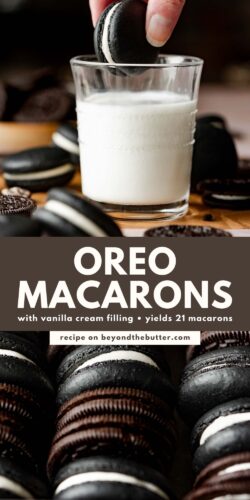
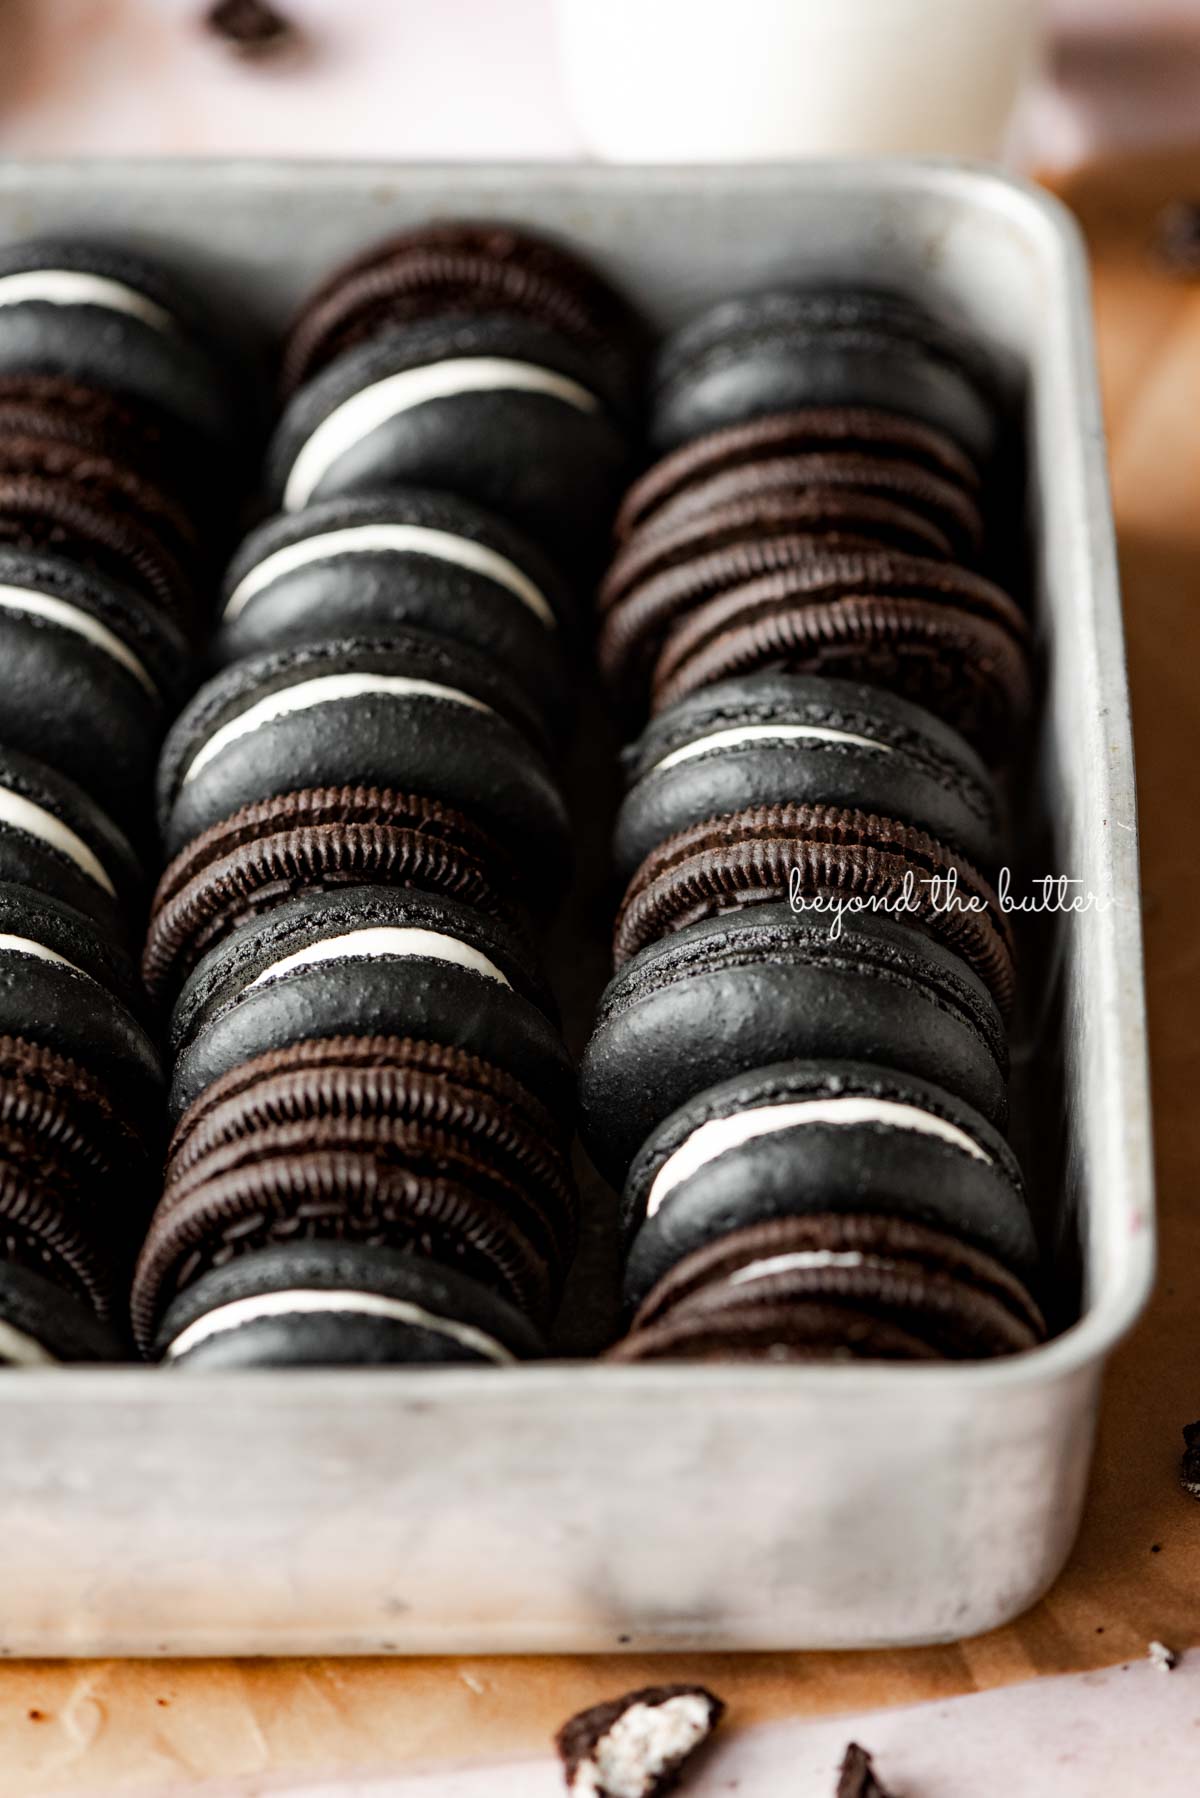
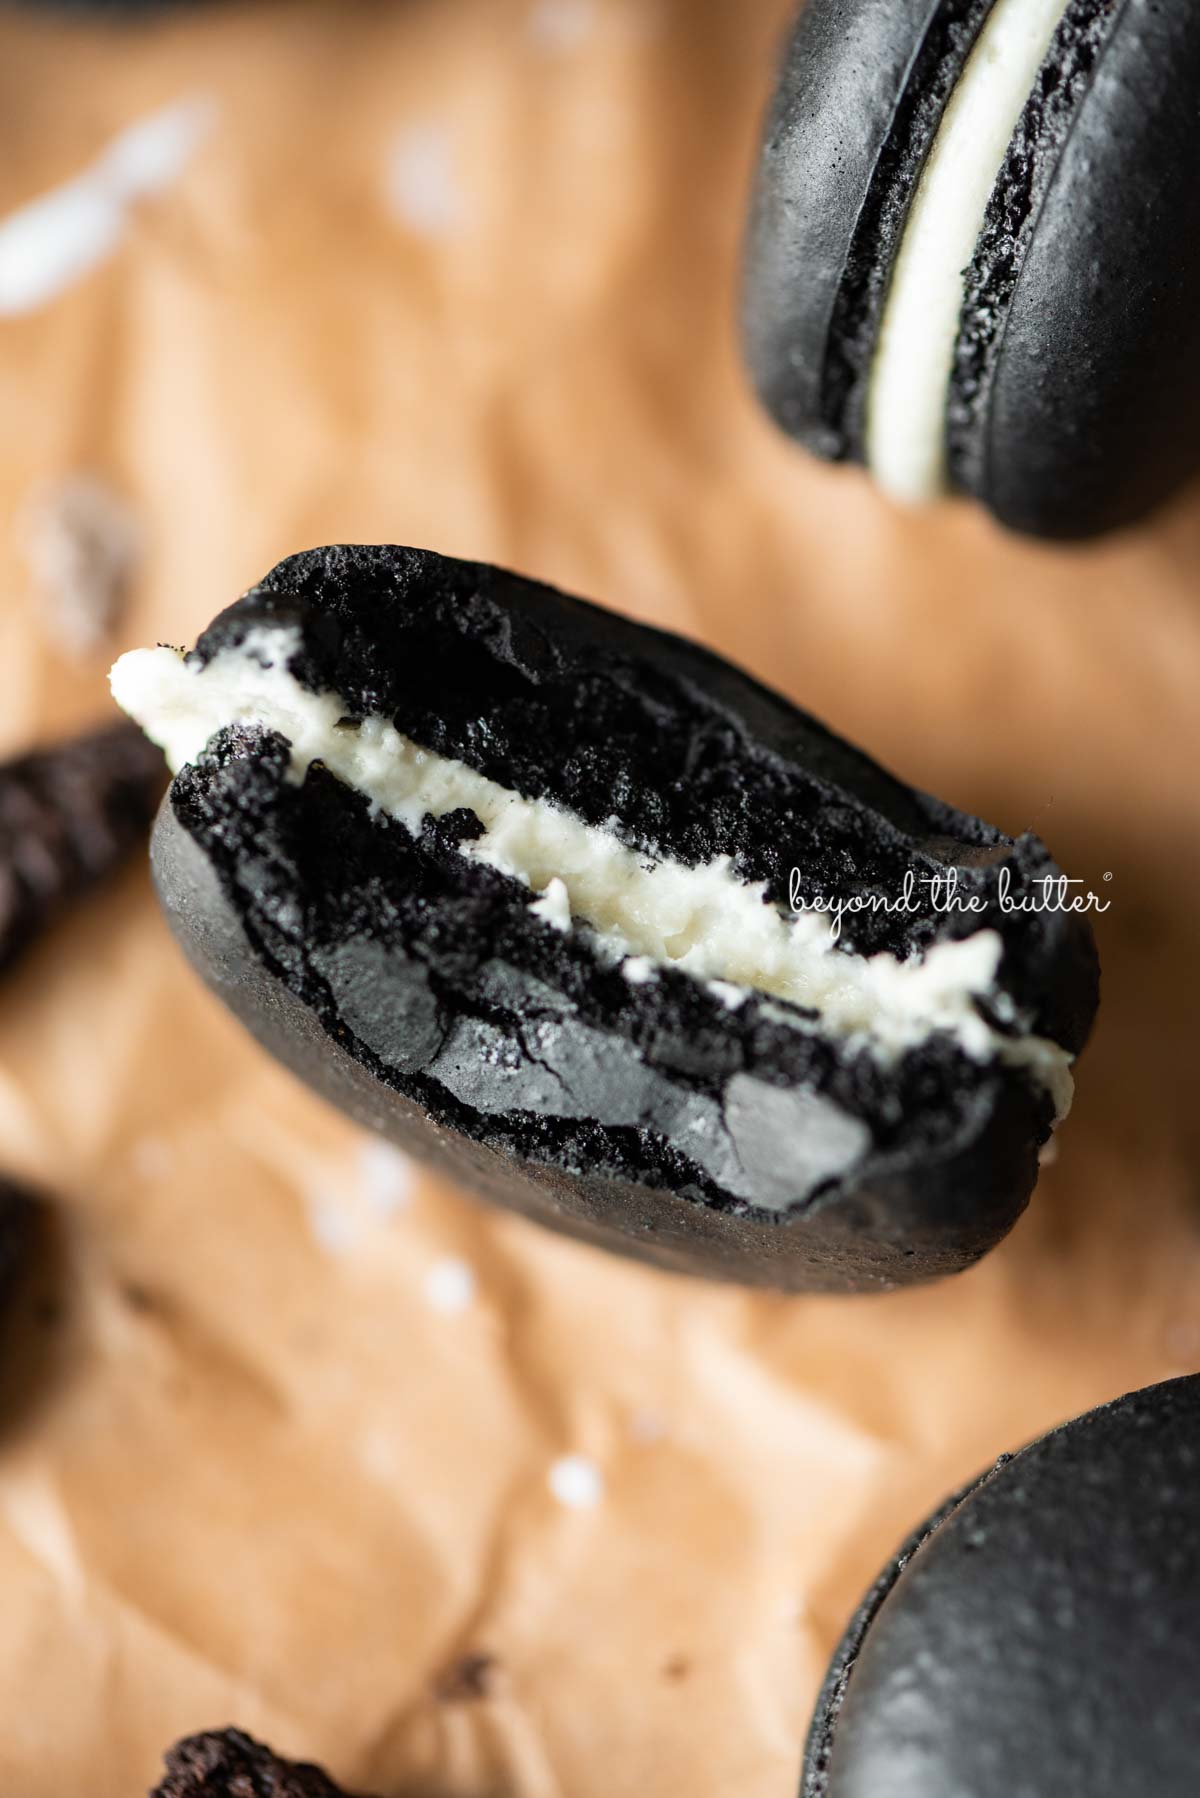
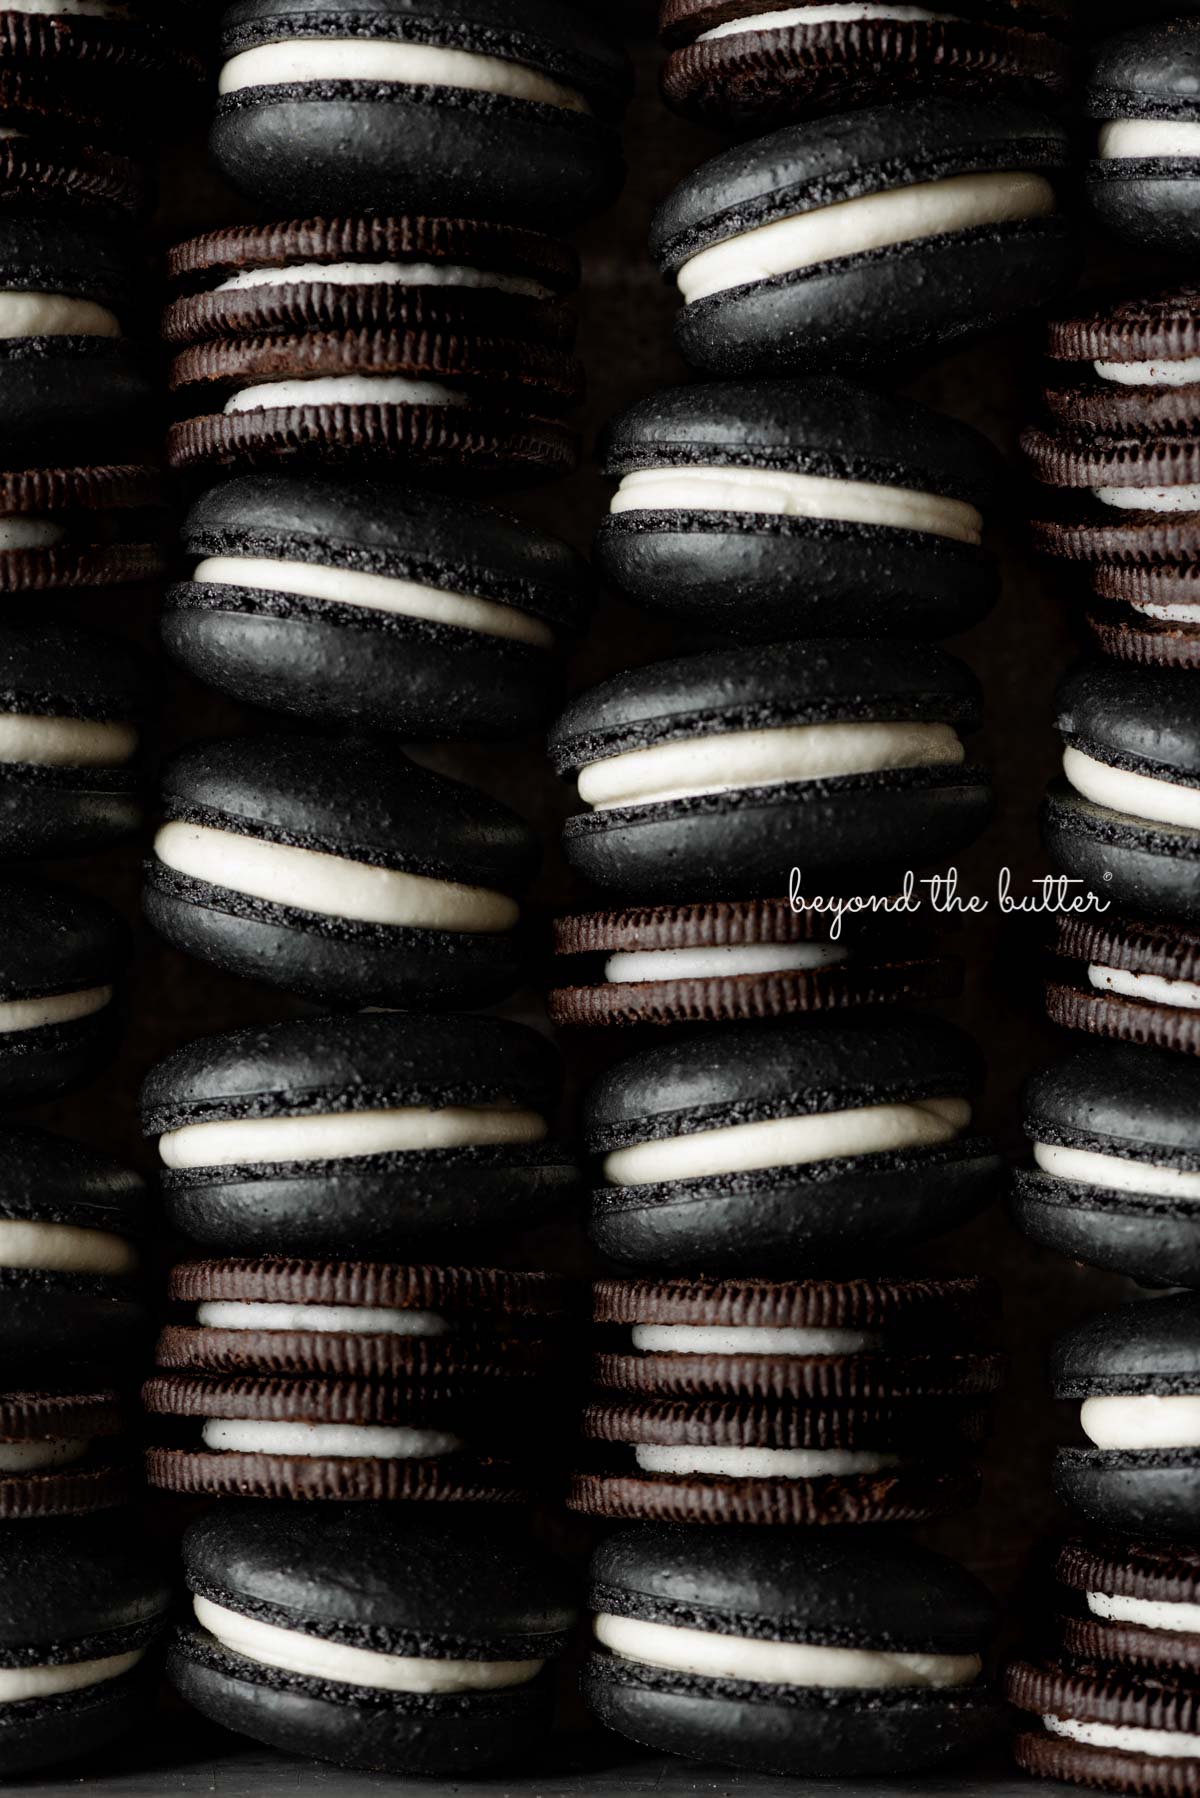
This Oreo Macarons recipe gives you rich, chocolatey macaron shells sandwiched together with a simple vanilla cream filling that tastes just like the classic cookie we know and love! It’s a delicious treat that’s perfect for enjoying any time of the year!
This Oreo Macarons recipe uses the Swiss method. This method is a good way to introduce yourself to making macarons if you’re a beginner or if you’re familiar with making Swiss meringue buttercream.
My dark chocolate macarons, lemon bar macarons, and robin’s egg macarons are also made using the Swiss method.
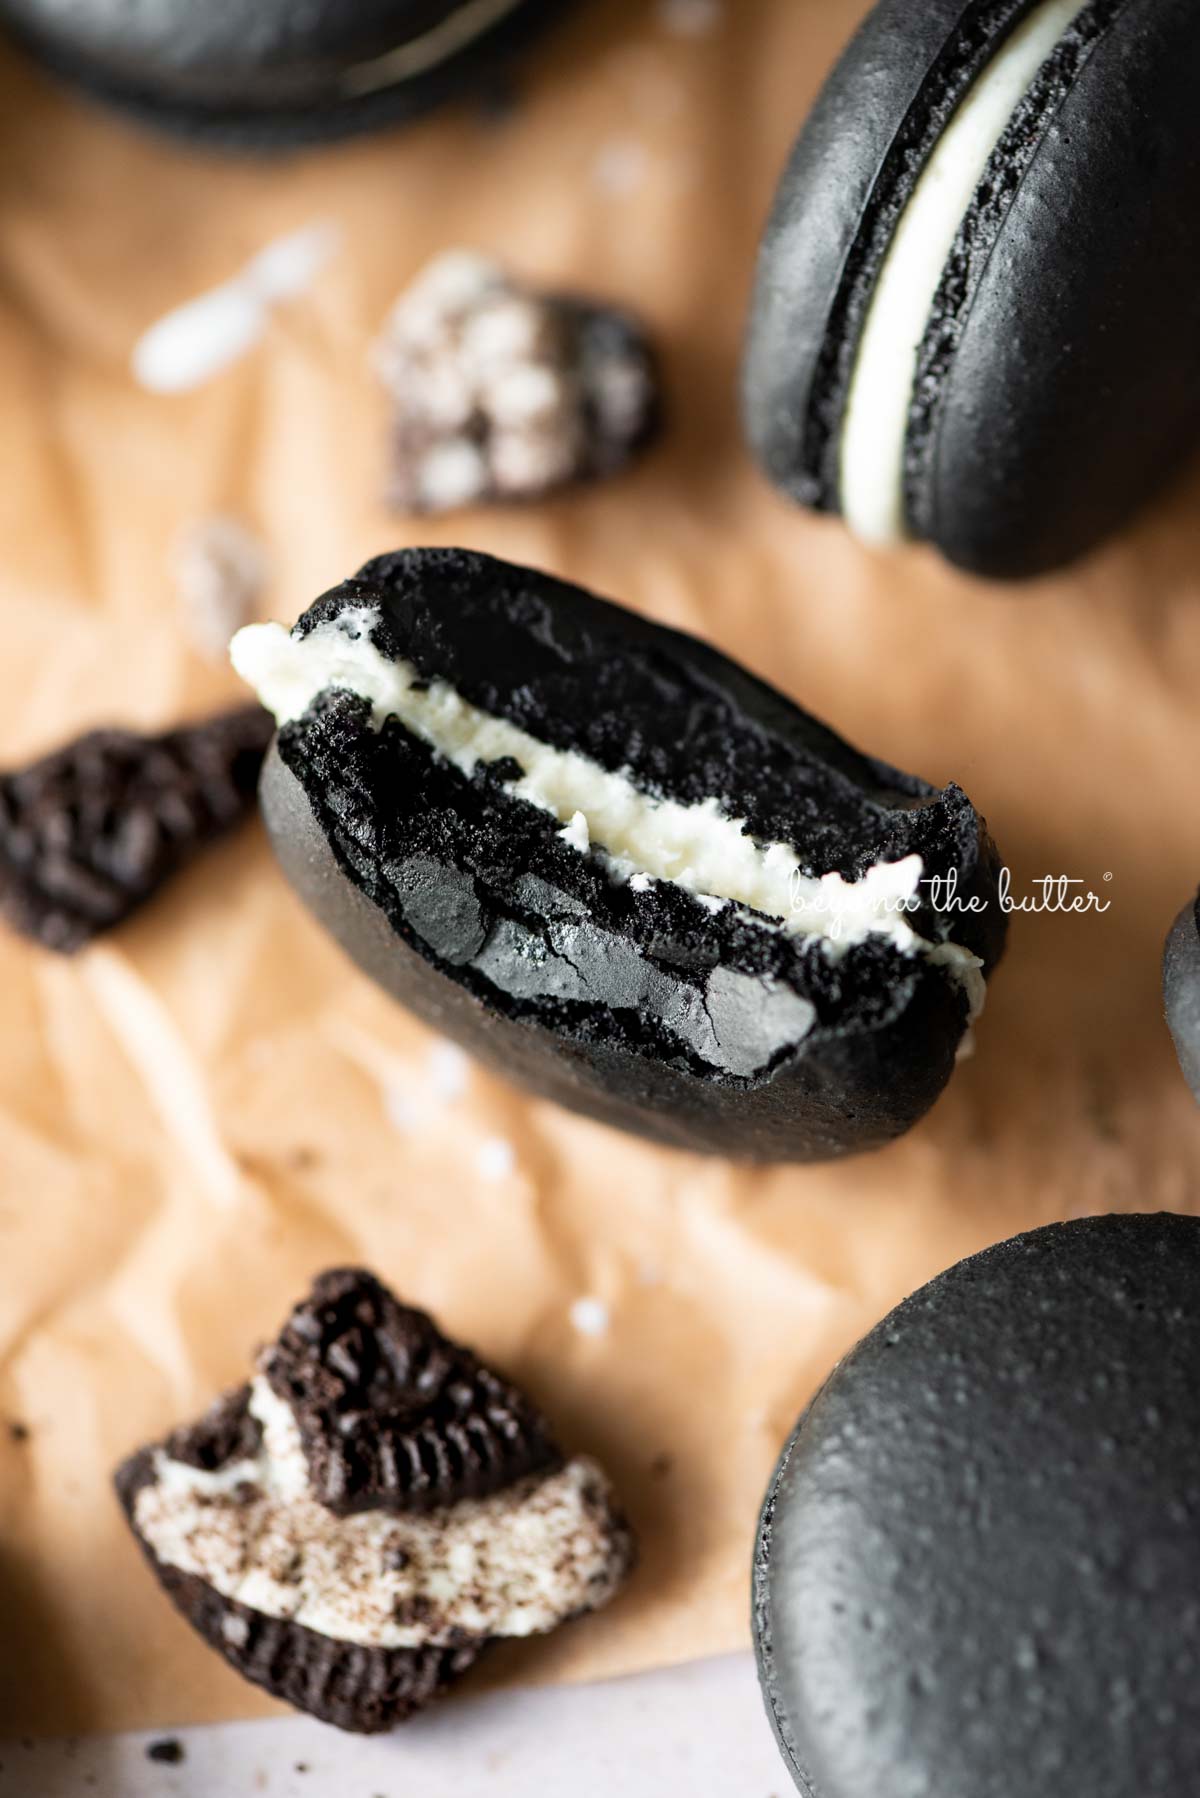
The macaron shells use almond flour, powdered sugar, egg whites, granulated sugar, salt, vanilla extract, and the key ingredient to give it that nice super dark color—black cocoa powder. I also used a few drops of black gel food coloring, but this is optional. They have crispy outer shells and chewy centers and have that classic Oreo cookie taste.
The vanilla cream-filled centers that bring it all together are a simple vanilla buttercream frosting that’s made up of unsalted butter, vegetable shortening, powdered sugar, and vanilla extract.
Table of Contents
Ingredients Needed
Want to know what ingredients you’re going to need for these Oreo macarons? Check out the list below, or you can scroll down to the recipe card.
- Almond Flour. Also known as almond meal, this flour should be sifted at least twice and then whisked to remove any lumps.
- Powdered Sugar. Same as the almond flour, the powdered sugar should be sifted at least twice then whisked. Don’t push the lumps through the sifter either—toss them.
- Black Cocoa Powder. This is the key ingredient that helps give the Oreo macarons their signature dark brown-black color.
- Egg Whites. A key thing to remember with your egg whites—they should be at room temperature. I recommend letting them sit out for at least 1 hour before starting this recipe.
- Granulated Sugar. You can use regular white granulated sugar or pure cane organic sugar which has a slight golden brown color to it.
- Salt. Just a pinch is needed.
- Vanilla Extract. For the oreo macaron shells I recommend using pure vanilla extract. For the cream filling you can use pure vanilla extract or clear imitation vanilla extract to help keep the cream filling white.
- Unsalted Butter. Used only for vanilla cream filling. It should be at room temperature for it to blend well with the other ingredients.
- Vegetable Shortening. Also used just for the vanilla buttercream. I suggest using the plain vegetable shortening and not the butter flavored version because of yellow tint and we’re already getting enough butter flavor from the butter. Having it at room temperature is recommended too.
- Black Food Coloring. This is an optional ingredient for this oreo macarons recipe. In the first two tests of the recipe I used 4-5 drops of Wilton black gel food coloring and 9-10 in the last test. I prefer the latter amount, but again, this is an optional step.
Substitutions
Vegetable Shortening. I recognize that not everyone likes to use vegetable shortening in their frosting, so you swap it out for more unsalted butter. It should be a 1:1 swap making the total butter amount 1/2 cup.
Unsalted Butter. I didn’t try this, but you could swap out the unsalted butter for plant-based butter.
I do not recommend using any other type of flour with this recipe or using egg whites from a carton. Egg whites from a carton can have traces of yolk in them which will kill your meringue.
Helpful Macaron Baking Tools to Use
Below are a few helpful tools I recommend for making these robin’s egg macarons.
Food Scale. This one is at the top because out of all the tools listed here, this one is the most important and makes a world of difference! I highly, HIGHLY recommend using a food scale versus using measuring cups for this recipe—for any recipe, really.
Large, flat baking sheets. The flat style baking sheets allow for more airflow around the macaron shells as they bake. If you only have rimmed sheets, I recommend flipping them and baking the shells this way.
Double Boiler. This tool is essential in dissolving the granulated sugar with egg whites. Take a heat-proof glass bowl and place it over a saucepan filled with 1 – 1 ½ inches of simmering water.
Silicone baking mats. Some bakers use parchment paper when making macarons, but I prefer to use silicone mats. They never give me issues when pulling the macarons off the mat and I can reuse them over and over.
Hand Crank Sifter. The almond flour, powdered sugar, and black cocoa powder need to be sifted at least 2 times in order to remove any lumps.
Oven Thermometer. They’re inexpensive and always good to use when baking, especially if your oven temperature tends to be off!
Piping Bags and Decorating Tips. For the amount of oreo macaron batter used, a medium to large size piping bag will work well. A small to medium size piping bag can be used for the vanilla cream filling.
And for the decorating tips, I used a large open tip (Wilton 2A) for the macaron batter and a smaller version (Wilton 10) for the vanilla cream filling.
In addition to the above, here are some other helpful baking tools when making your Oreo macarons!
10 Helpful Tips for Making the Best Oreo Macarons
Below are a few helpful tips for making your cookie and cream macarons experience a better, less stressful one!
Keep everything clean. Thoroughly clean any baking tools that will be used for making these oreo macarons. This includes the mixing bowl, whisks, silicone baking sheets, and spatulas.
A paper towel soaked with little white vinegar is a great way to remove any traces of grease that may have been left behind!
Sift, sift, and sift again. Do not skip sifting the almond flour, powdered sugar, and black cocoa powder when making macarons. The finer the dry ingredients are the smoother your macaron shells will be!
I sift everything twice, then whisk everything together one more time at the end. You can also use a food processor to pulse the ingredients together until well blended.
Use room temperature egg whites. Room temperature egg whites form a better meringue and don’t take quite as long to come together either. Bring your eggs out at least 1 hour before starting, then separate out the egg whites.
Save the yolks to make these super easy lemon bars or lemon bar macarons!
Leave no yolk behind. When separating your egg whites, make sure there are no traces of the yolks. It’s the quickest way to kill your meringue. To remove any broken pieces of eggshell, you can use one half of the shell or you can use your clean hands.
Test the sugar egg white mixture. An easy way to make sure the sugar has completely dissolved into the egg whites is to run a little bit of the mixture between your thumb and pointer finger.
If you feel any sugar granules at all, keep whisking. And with the simmering water—you won’t burn your fingers when testing. I do not recommend skipping this test—it will leave your macarons with a gritty texture.
Macaronage test. When your macaron batter is ready for piping it can form ribbons or a figure 8 shape without breaking. Keep folding until you get to this point. Stop immediately once you can.
Keep it perpendicular. Hold your piping bag perpendicular to the mat as you pipe out the circles. Piped at an angle and you will more than likely end up with lopsided macarons.
Tap lightly. Gently tap or bang the baking sheets 3-4 times on the kitchen counter to bring any air bubbles to the surface. Pop those babies with a toothpick or a needle scriber tool. The latter is also used with royal icing cookies.
Let them dry. Drying time for your oreo macarons will vary depending upon how humid it is where you live. Your macaron shells will be ready when they are dry on top and no longer sticky to the touch. I recommend 35-45 minutes for drying. Having a ceiling fan to help speed up the drying is also helpful.
Piping bag pint glass. For those of us not skilled enough to use just your hand as the piping bag holder, a pint glass works wonders! After fitting the bag with your decorating tip (and coupler, depending on the size of the decorating tip), place the bag inside the pint glass and drape the bag over the sides.
Recipe FAQs
This could be due to your mixing bowl and whisk attachment not being thoroughly cleaned (traces of grease or fats can be left behind from previous baking projects) or your egg whites were not at room temperature. It can take up to 10 minutes to form stiff peaks. Make sure your mixer speed is set to high.
I used 4 all the way up to 10 drops of gel food coloring. It depends on how black you want to make the shells. Adding the food coloring is optional.
You can take a teaspoon of the batter and place it on a tiny piece of parchment paper or a silicone mat. If it stays stiff and doesn’t spread, you will need to fold the batter a few more times.
It’s more than likely due to not sifting and blending the dry ingredients enough. Any lumps leftover from sifting should be removed instead of trying to push them through the sifter.
This can be due to a number of reasons: over-mixing, how you piped the batter onto the mats, disrupting baking by continually opening and closing the oven door, or your baking sheets did not allow good airflow during baking.
This is more than likely due to the granulated sugar not fully dissolving with the egg whites. Make sure to do the finger test before moving forward.
You should let your macarons cool completely before trying to remove them. If you find they are still being stubborn after you’ve let them cool, place them in the freezer for about 15-20 minutes.
Keep any macaron shells stored in an airtight container in either the refrigerator or freezer until ready to use.
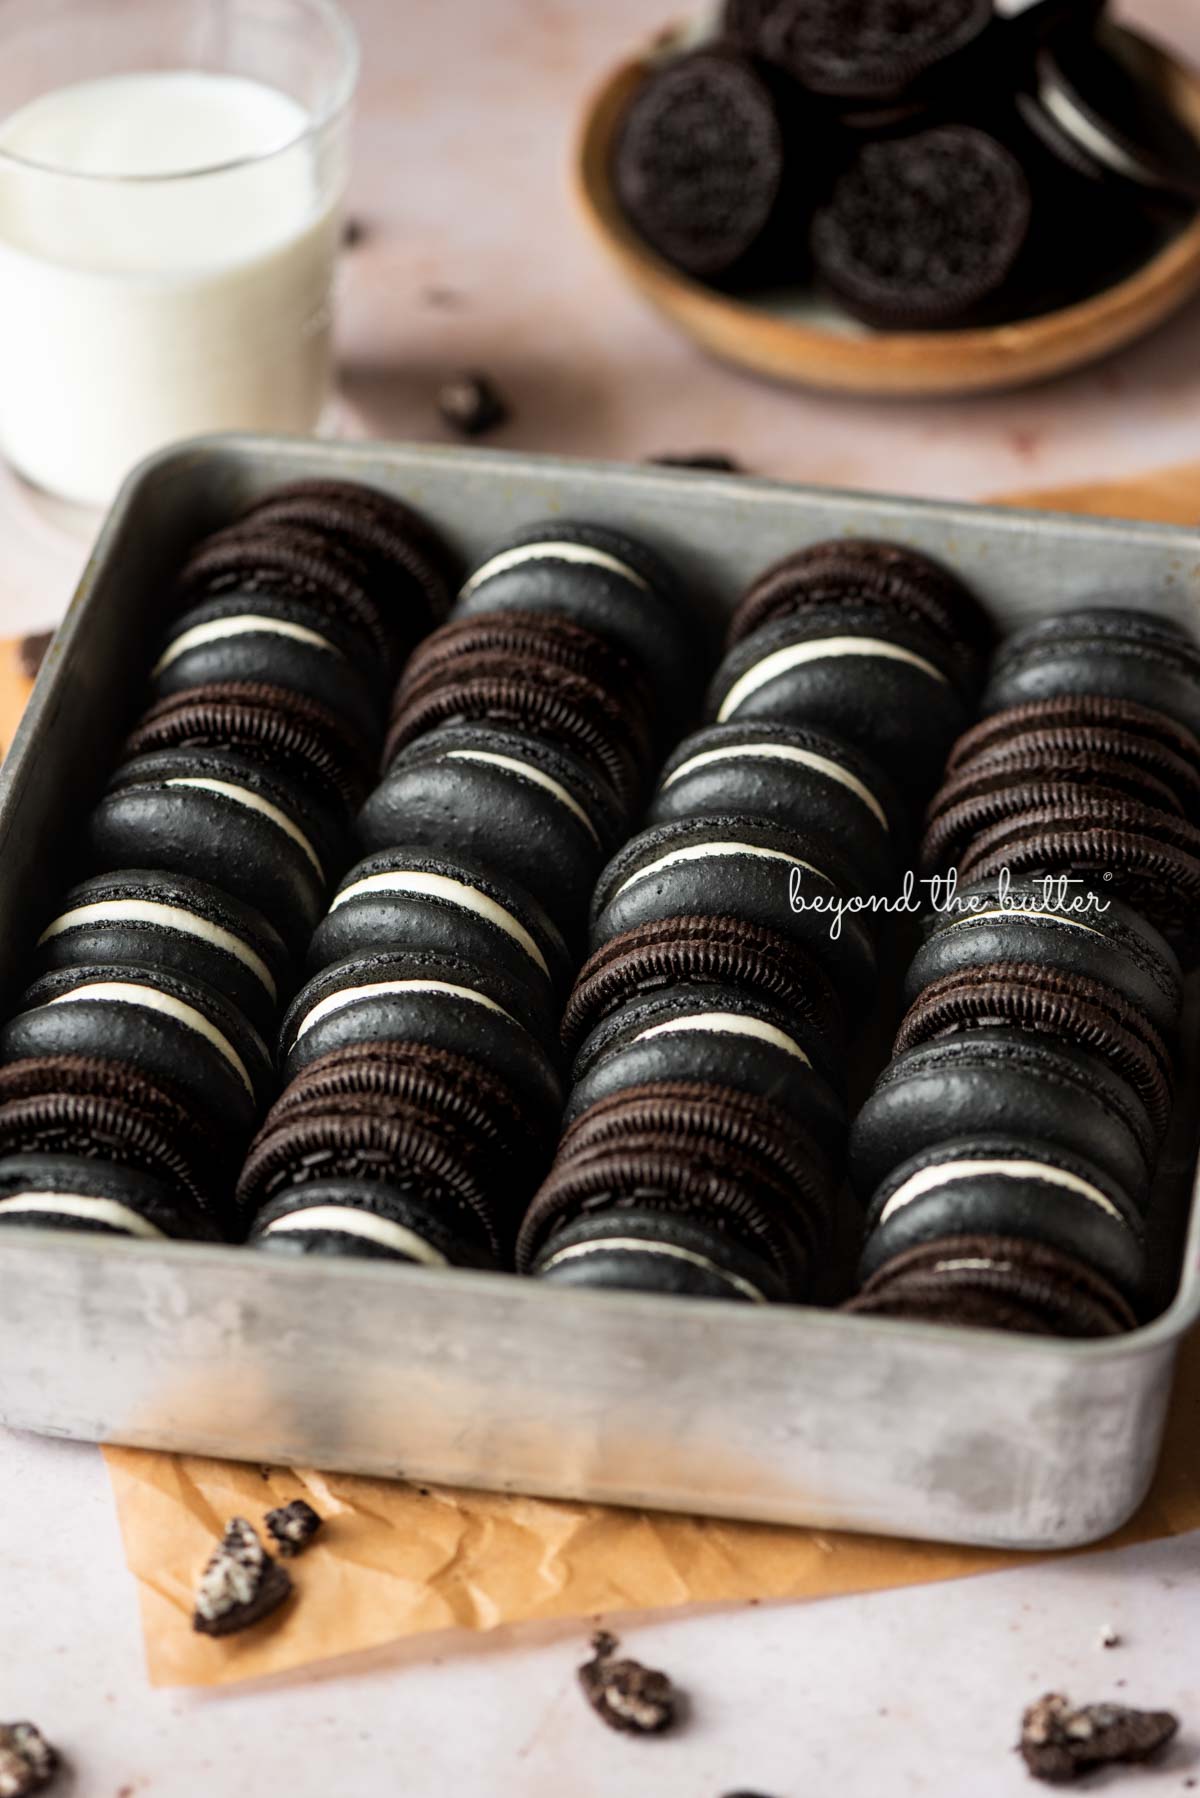
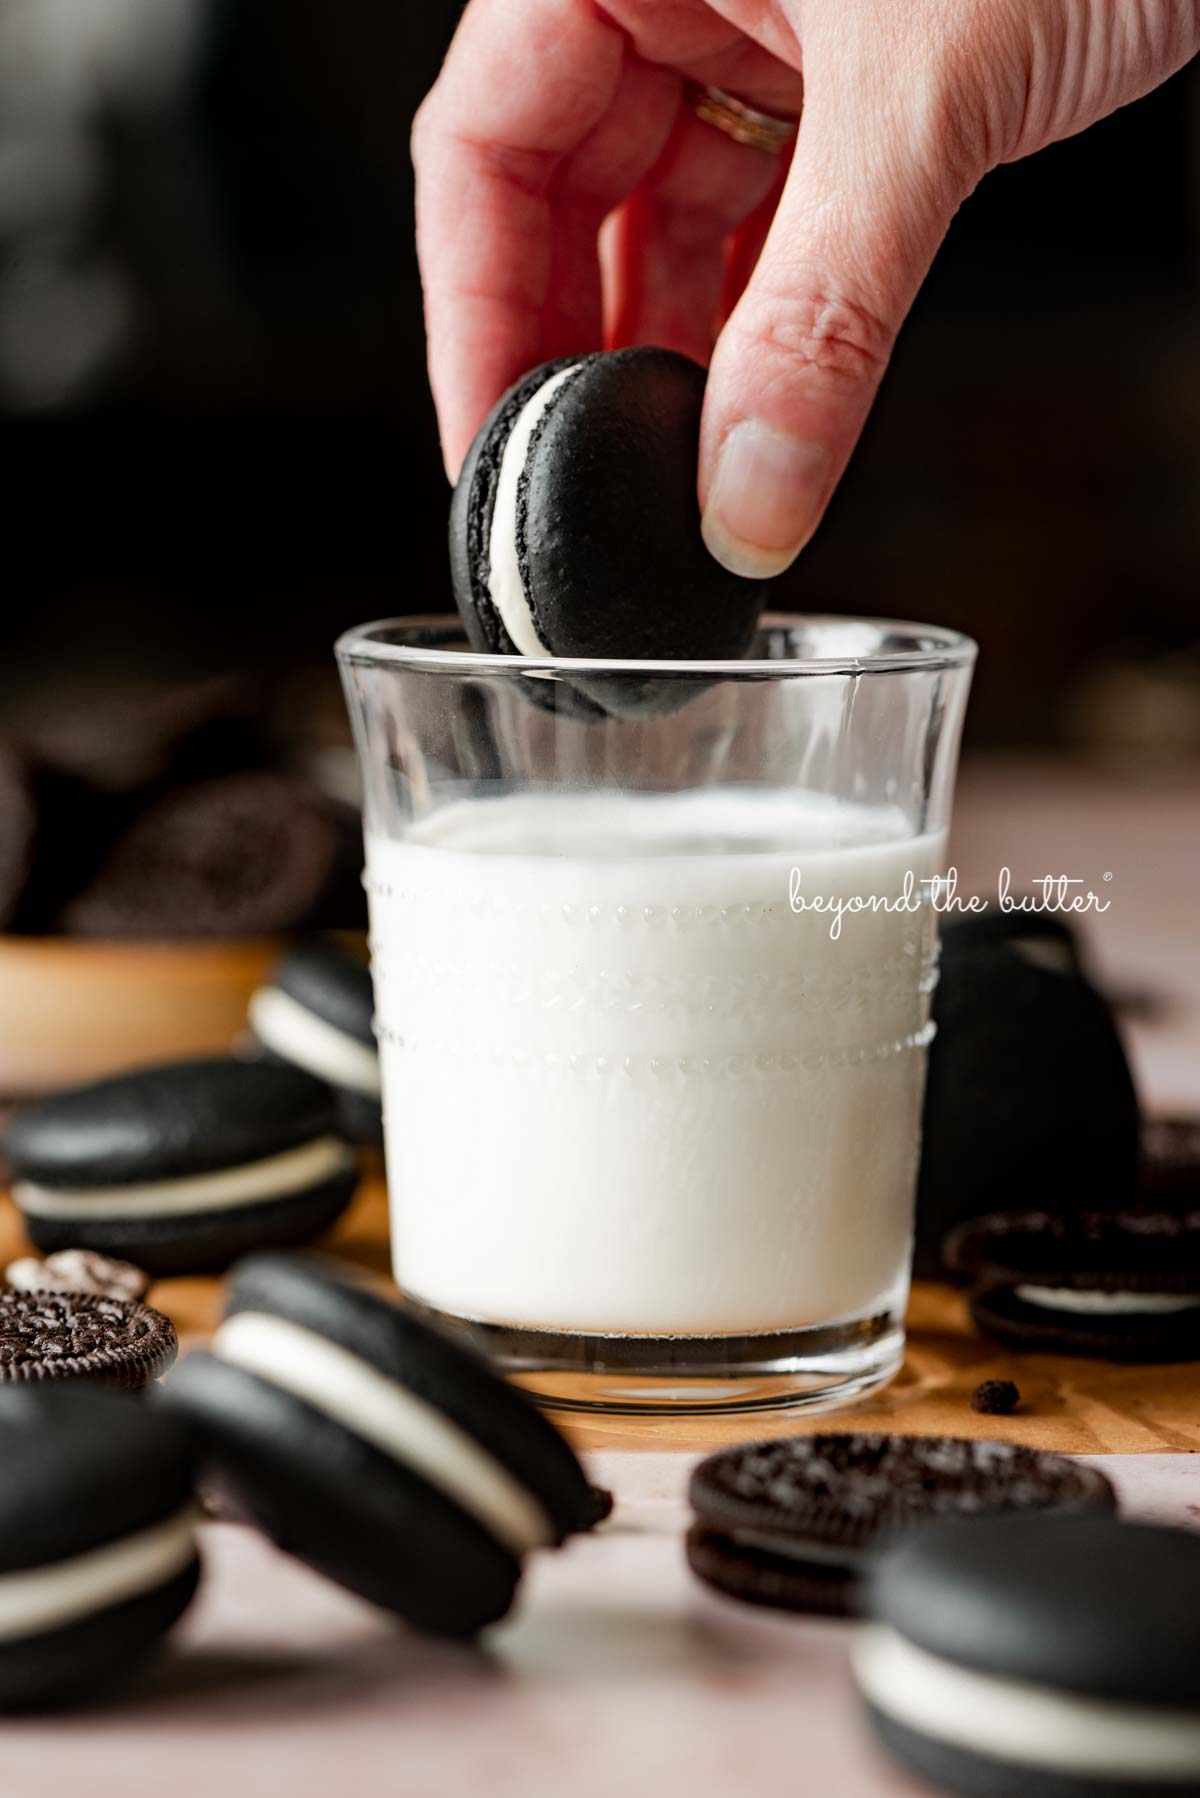
Fully assembled macarons are best kept stored in an airtight container in the refrigerator. They are at their best after sitting in the refrigerator for 2-3 days.
Yes, this frosting can be made 2-3 days in advance. Bring the frosting out to room temperature about 1 hour before using. Give it a few passes with a hand mixer to bring it back to its smooth and creamy texture.
Looking for More Macarons?


If you tried this Oreo Macarons Recipe or any other recipe on my website, please leave a 🌟 star rating and let me know what you thought in the 📝 comments below. Thanks for visiting!
Oreo Macarons

Ingredients
oreo macaron shells
- 1 cup Almond Flour, sifted
- 3/4 cup Powdered Sugar, sifted
- 3 tbsp Black Cocoa Powder, sifted
- 3 Egg Whites, room temperature
- 1/2 cup Granulated Sugar
- 1/8 tsp Salt
- 2 tsp Vanilla Extract
- 10-12 drops Black Gel Food Coloring
vanilla cream filling
- 1/4 cup Unsalted Butter, room temperature
- 1/4 cup Vegetable Shortening, room temperature
- 2 cups Powdered Sugar, sifted
- 1 tsp Vanilla Extract, can also use clear imitation vanilla
Instructions
oreo macaron shells
- Prep your work area by cleaning your mixing bowls, whisks, and any other baking tools that will be used for making the macarons. Use a little white vinegar on a paper towel will help remove any grease left behind.
- Line 2 baking sheets with either macaron silicone mats (my preference) or parchment paper with circles drawn on the opposite side. Fit a large piping bag with a round decorating tip (like the Wilton 2A). Set to the side.
- In a medium bowl, sift the almond flour, powdered sugar, and black cocoa powder together twice, removing any bits left behind from the sifter. Then whisk to fully blend together (or use a food processor).1 cup Almond Flour, 3/4 cup Powdered Sugar, 3 tbsp Black Cocoa Powder
- Using a double boiler, heat the granulated sugar and egg whites over 1 – 1.5 inches of simmering water, continually whisking until the sugar has fully dissolved and the mixture is frothy in appearance (about 5-6 minutes). Test the mixture by rubbing a little of it between your pointer finger and thumb to make sure all sugar granules have dissolved.1/2 cup Granulated Sugar, 3 Egg Whites
- Carefully transfer the mixture to a mixing bowl of a stand mixer fitted with the whisk attachment and set the speed to high. When the mixture initially reaches the soft peaks stage, add in the salt and vanilla extract. Continue to mix at high speed right until stiff peaks form (about 10 minutes). The meringue should look glossy and be able to hold its shape when you invert the whisk attachment.1/8 tsp Salt, 2 tsp Vanilla Extract
- Using a spatula, gently fold in the sifted dry ingredients with the stiff meringue. As you continue to fold, press the batter against the side of the bowl. Midway through folding, add anywhere from 4-10 drops of black gel food coloring (optional). Keep folding until the batter is the consistency of lava. If the batter falls easily off the spatula in ribbons (or can make a figure 8 pattern) with no breaking, it's time to pipe! If not, fold 2-3 more times, then test again.10-12 drops Black Gel Food Coloring
- When ready, carefully scoop the batter into the piping bag. Holding your bag perpendicular to the silicone mat (or parchment paper), pipe out a circles close to 1.5 inches in diameter. When you tap/bang the baking sheets on the counter after piping they should spread out just a little.
- Gently bang your baking sheets on the counter 3-4 times to release the air bubbles. Use a toothpick or needle scriber tool to carefully remove them.
- Set the trays of oreo macaron shells to the side, somewhere cool and dry, where they can rest/dry for 35-45 minutes. The oreo macarons are ready to be baked when the tops are dry to the touch and no longer sticky. Use a ceiling fan to help dry them, if you have one. Drying times will vary based on where you live. The higher the humidity, the longer the rest time.
- When you’re close to the end of the resting time, preheat your oven to 300ºF and place your oven rack on the 2nd level mark (just above the center).
- Bake only 1 tray of the oreo macarons at a time for 16 minutes at 300ºF, rotating the baking sheet at the 8-minute mark. Do not skip this step!
- When done, remove from the oven and allow to cool completely before trying to remove them from the mats. If your shells are still a little sticky after this time frame, you can pop them in the freezer for 15-20 minutes.
- If not making/piping the frosting until the next day, keep the macaron shells stored in an airtight container either in the refrigerator or freezer.
vanilla cream filling
- Using your hand mixer or stand mixer fitted with a paddle attachment, mix together the unsalted butter, vegetable shortening, sifted powdered sugar, and vanilla extract on low speed until fully blended and smooth. Use a spatula to scrape down the sides of the bowl as needed.1/4 cup Unsalted Butter, 1/4 cup Vegetable Shortening, 2 cups Powdered Sugar, 1 tsp Vanilla Extract
assembling the oreo macarons
- Fit a medium-size piping bag with a coupler and open or round decorating tip (like the Wilton 10), then fill the bag with the frosting.
- In a circular motion, starting from the center, pipe the vanilla cream filling onto a macaron shell, then gently press another macaron shell on top. Repeat until you have used all the macaron shells. Store any leftover filling in the refrigerator for up to 1 week. It will need to be brought to room temperature for piping.
- Keep the oreo macarons stored in an airtight container in the refrigerator. Macarons taste their very best after 2-3 days of sitting in the refrigerator. They taste like a thicker, fancier version of the classic Oreo. YUM!
Nutrition
Nutritional information provided above is an estimate only and will vary based on specific ingredients used. See Nutritional Disclaimer for more info.


I’m unable to find black cocoa powder locally. Can I use regular cocoa powder in a 1:1 substitution as color won’t be a deal breaker?
The color and taste will be slightly different, but yes, that would be fine to use as a substitute!
I have tried a different macaron recipe twice now and they did not turn out how they were supposed to. I do quite a bite of baking and have for many years, so I know how to follow a recipe. I am going to try your recipe since the process is a little different, and black macaron, let’s be honest, they just look cool. 😎 It’s not even spring and I’m thinking about fall/Halloween cakes.
My question to you is…does this recipe need any adjustments for high altitudes? I’ve adjusted canning and baking for this, but I’m not sure if I need to adjust anything for macarons. What do you think?
Hey Sarah! I’m so glad you found my recipe (and totally understand thinking about fall/Halloween already)! I wish I could answer your question, but I don’t have any experience with baking at high altitudes being from PA. You might want to check out my friend Camila’s blog, Pies and Tacos or Bake Toujours. Both focus on macarons and have in-depth posts and videos; they might have one on this topic.
Can I melt the granulated sugar prior to adding into the egg whites ?
To avoid gritty and lumpy batter ?
No, you should combine the two, whisking until the sugar has completely dissolved with the egg whites. You can rub the mixture between your pointer finger and thumb to check and make sure the sugar has dissolved. This is the best way to avoid grittiness.
The macarons look really good! But can’t measurements in grams be provided?
Hi, thank you! They are actually! You have to click on the “metric” link (above the list of ingredients) in the recipe card to get them.