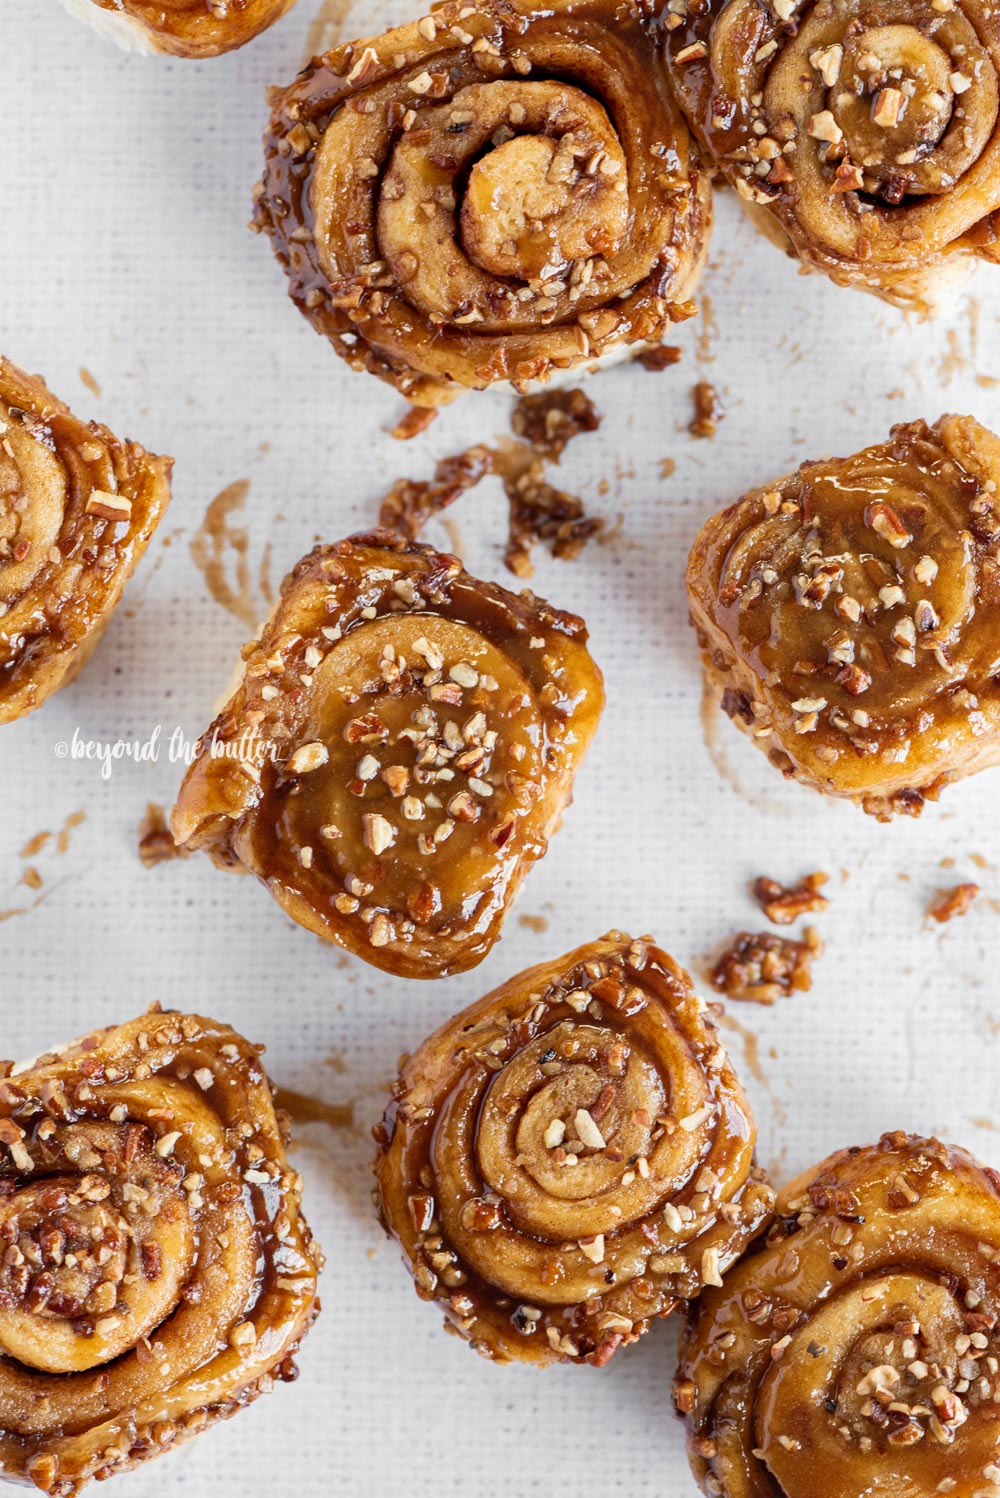
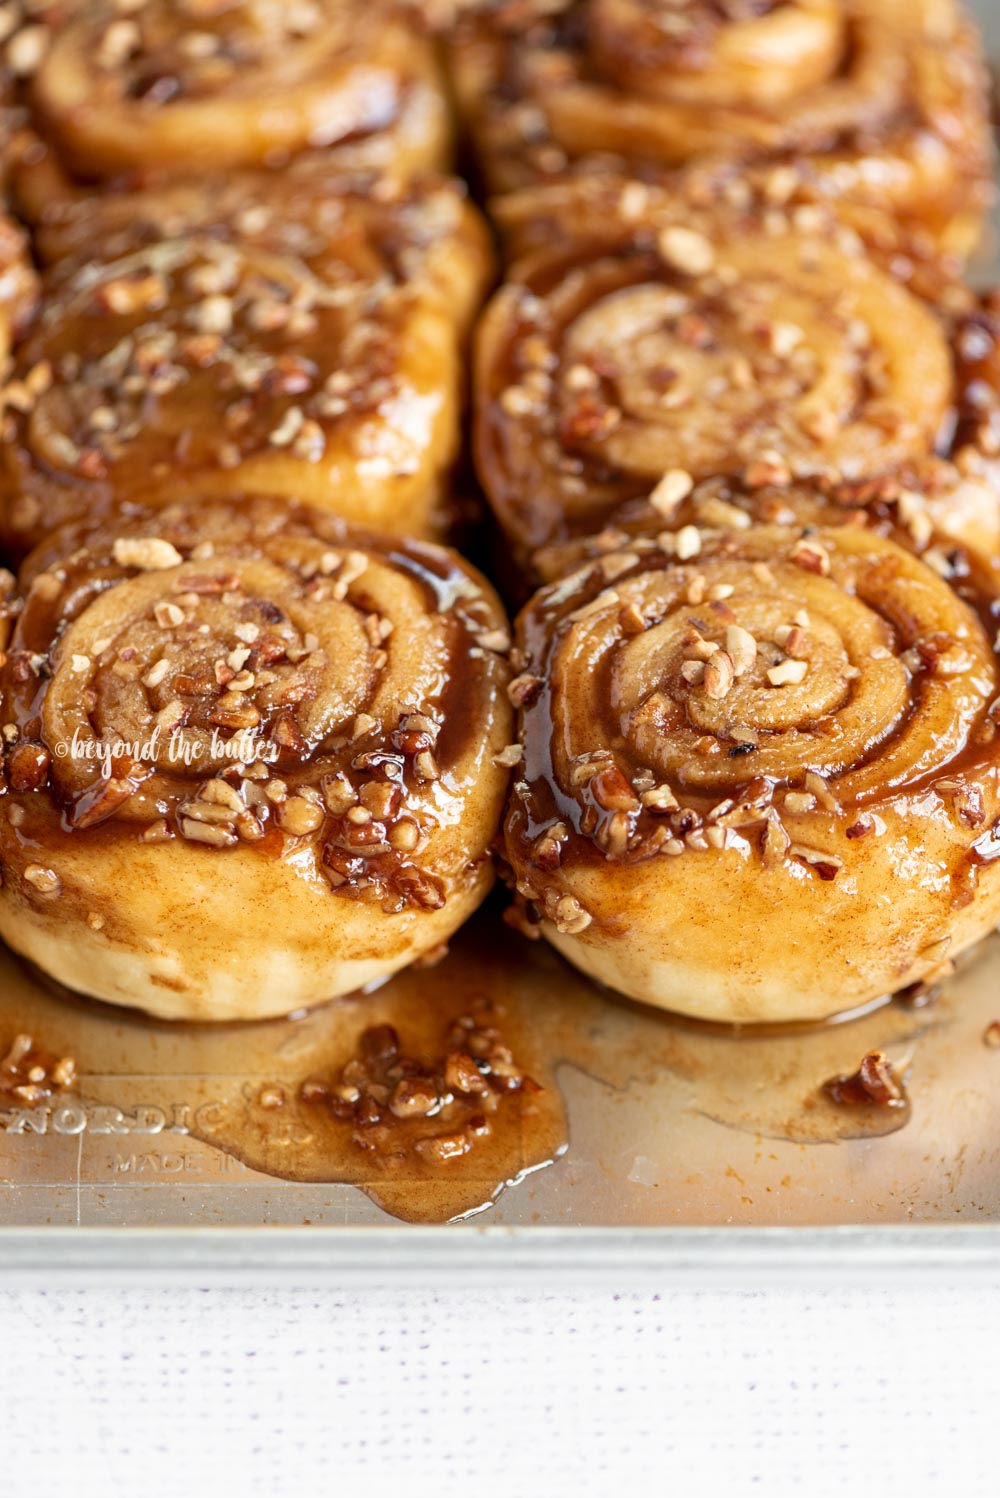
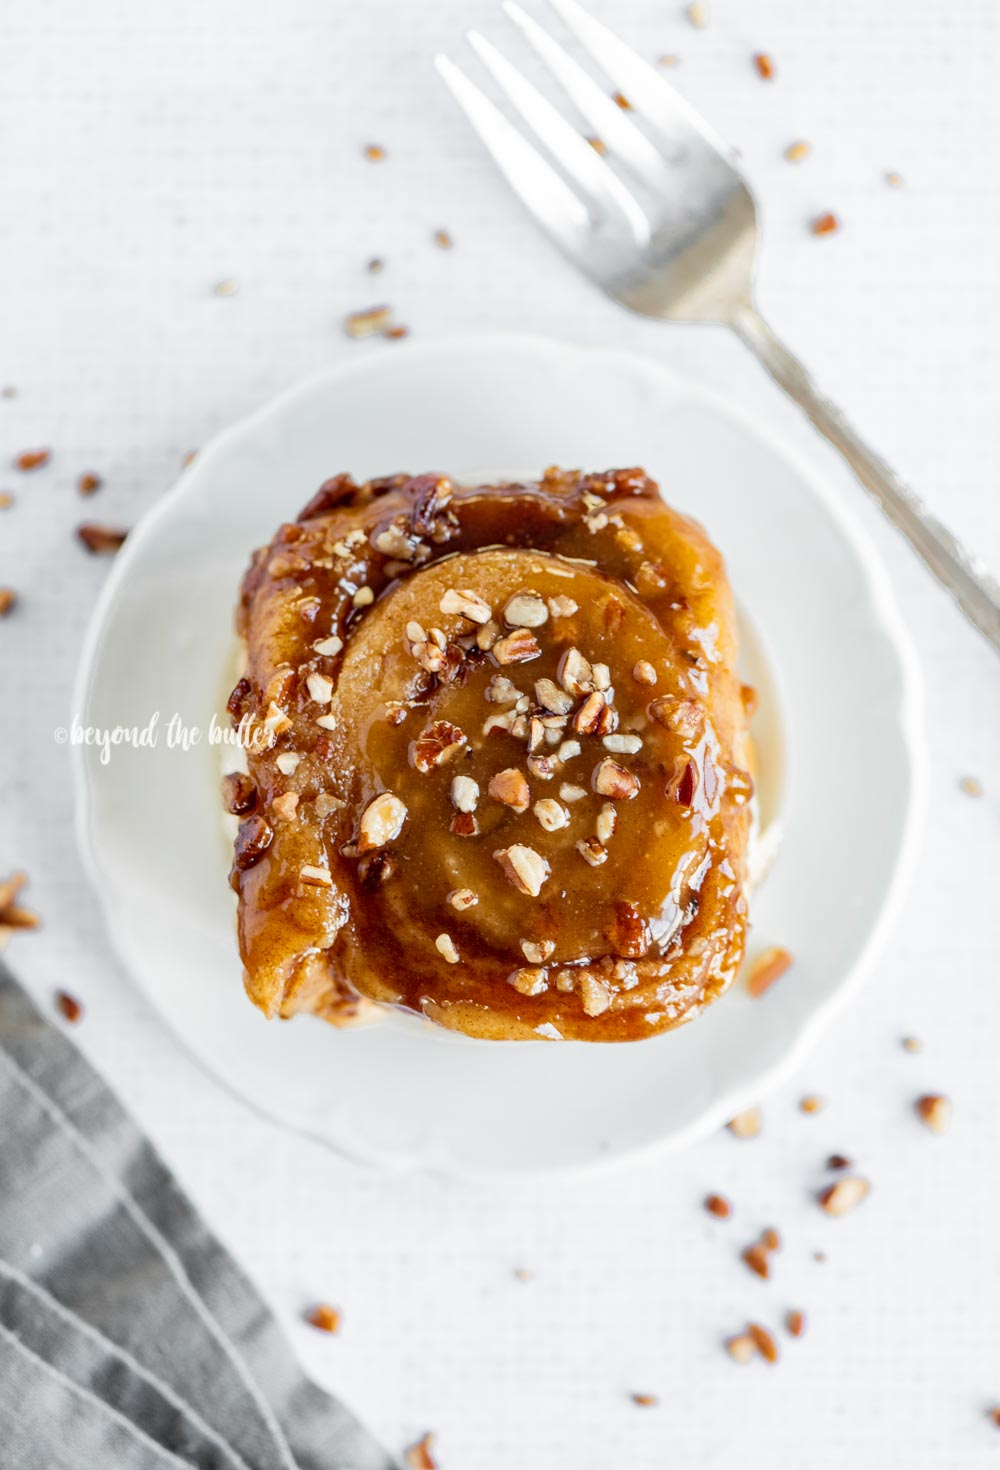
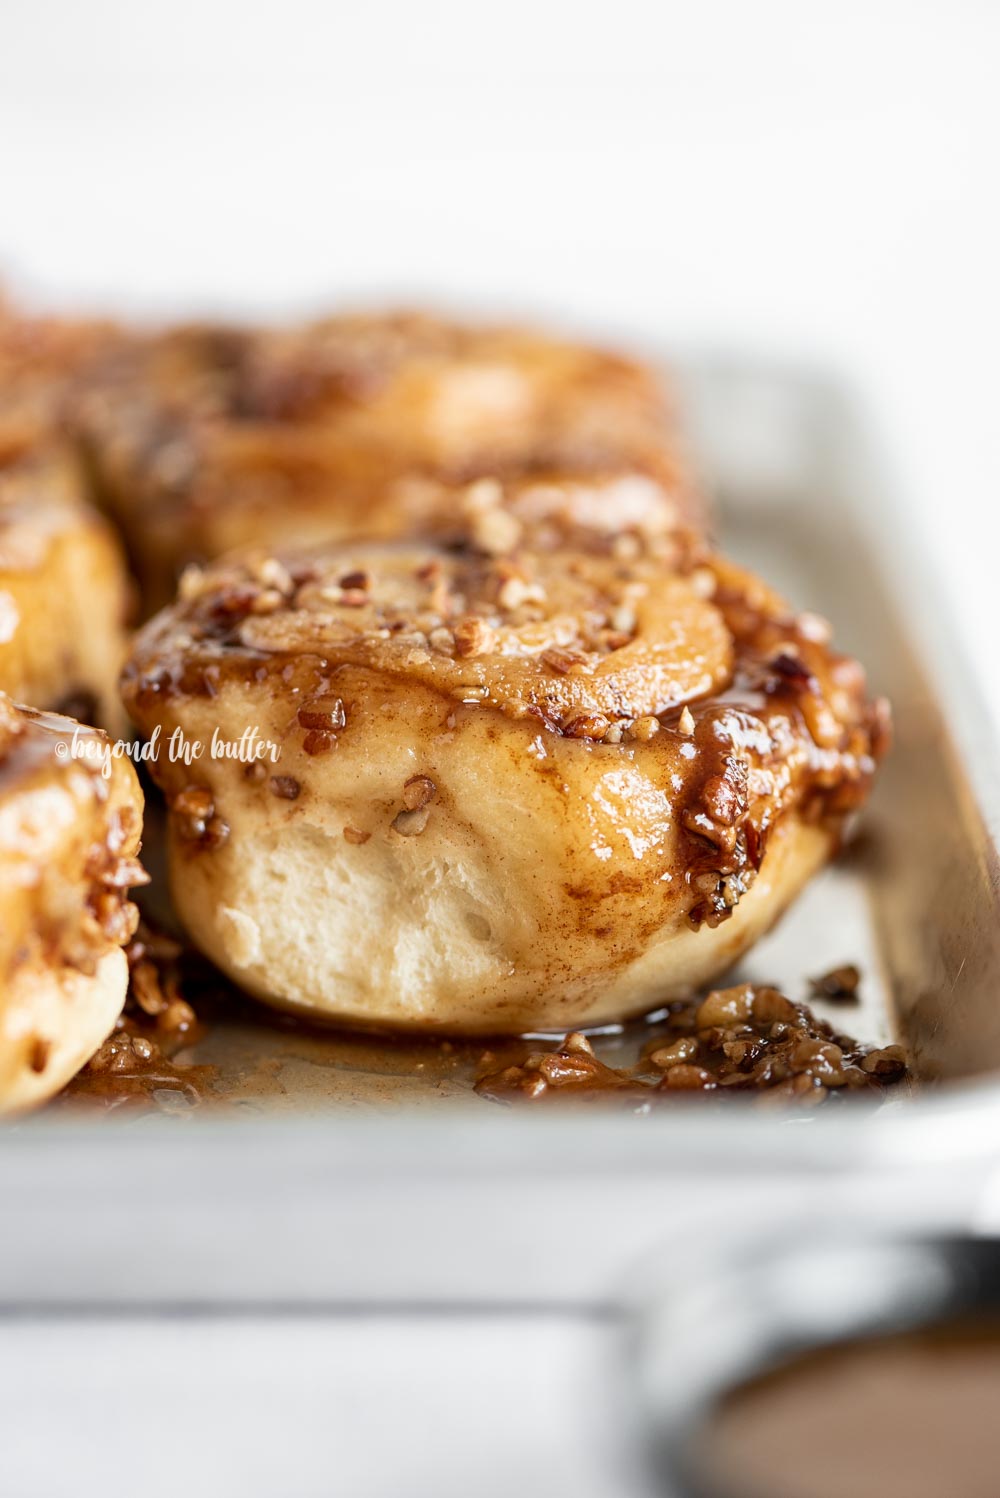
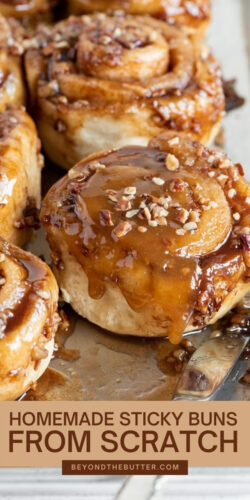
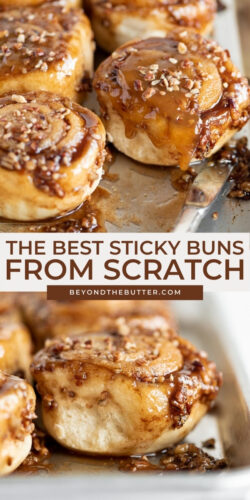
These Homemade Sticky Buns from Scratch combine a simple dough that’s slathered in buttery cinnamon sugar, and topped with a warm, gooey caramelized pecan glaze. They will melt in your mouth the minute you take that first bite!
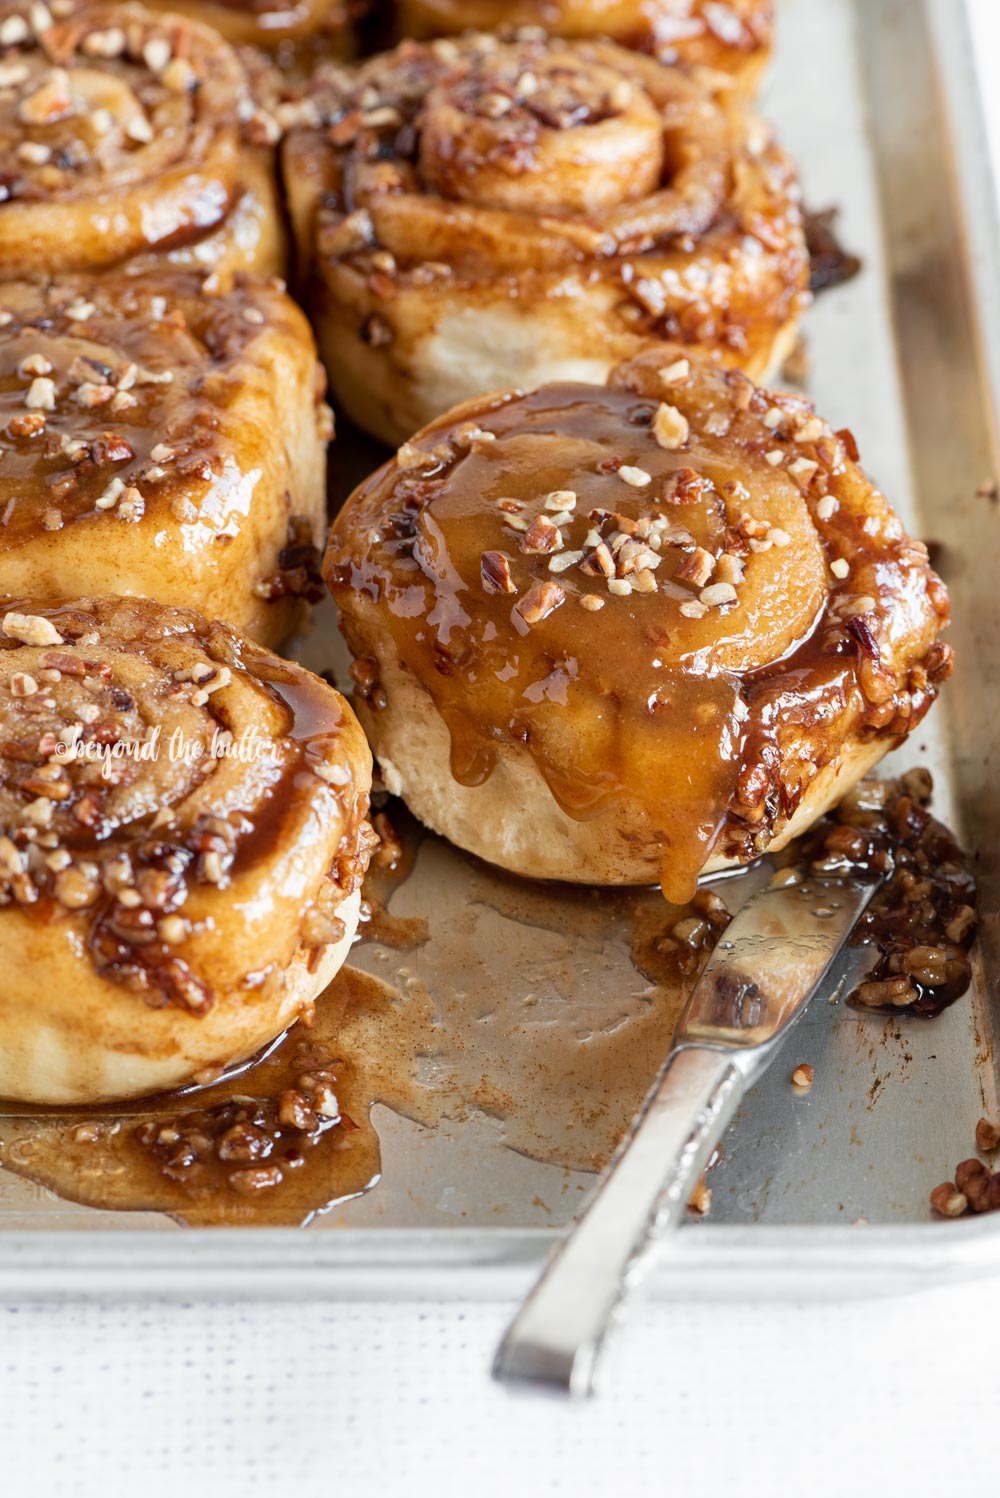
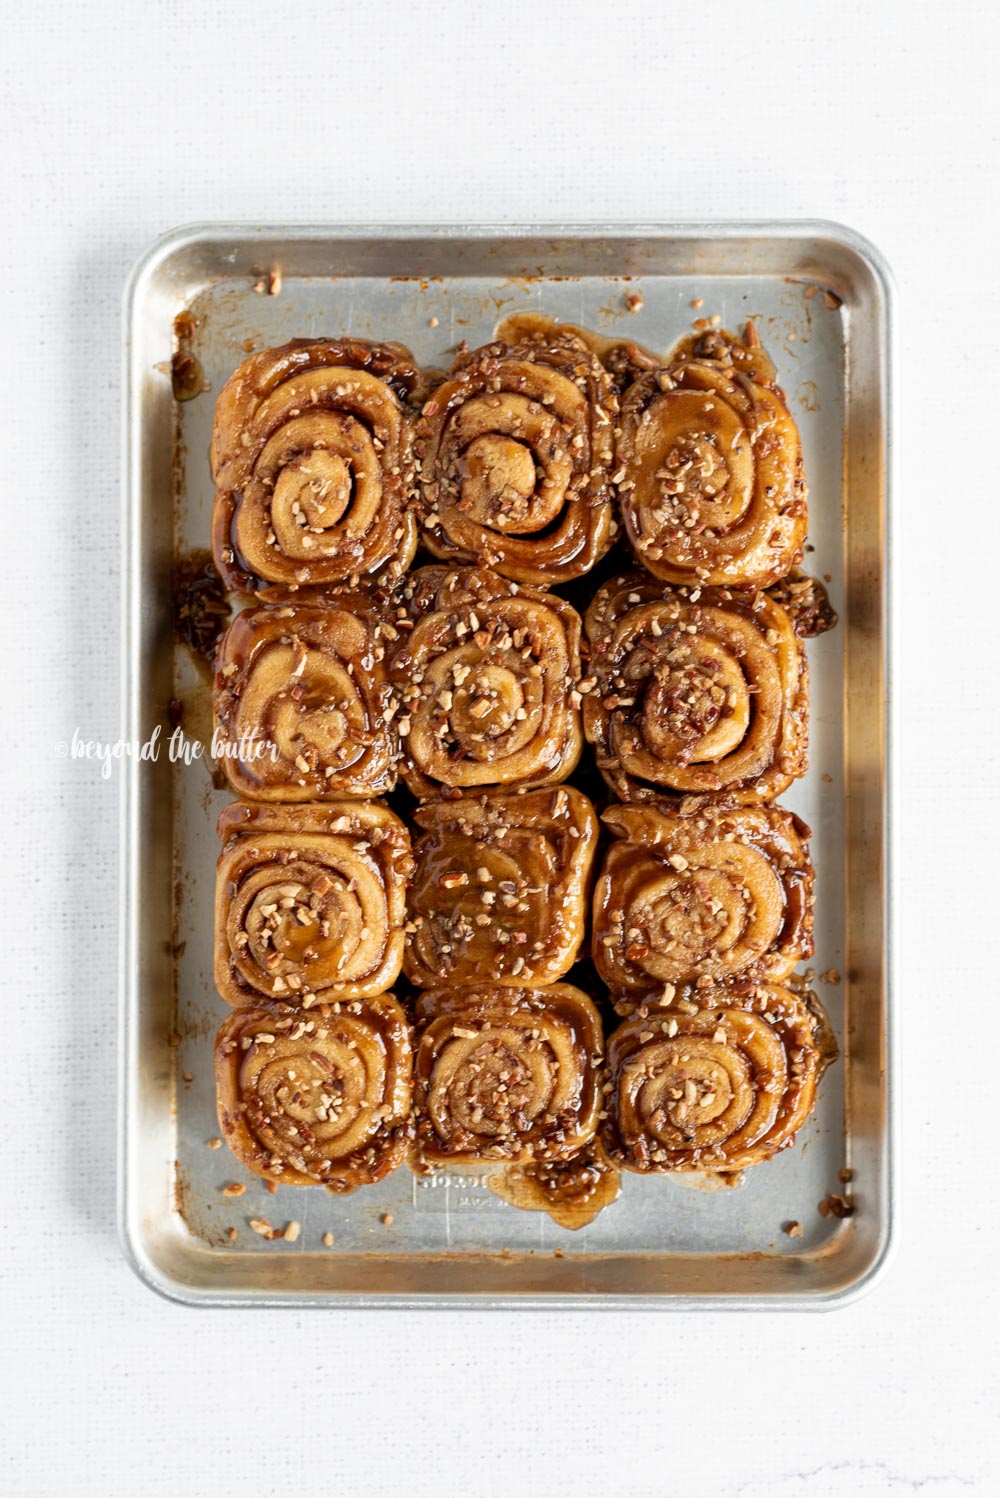

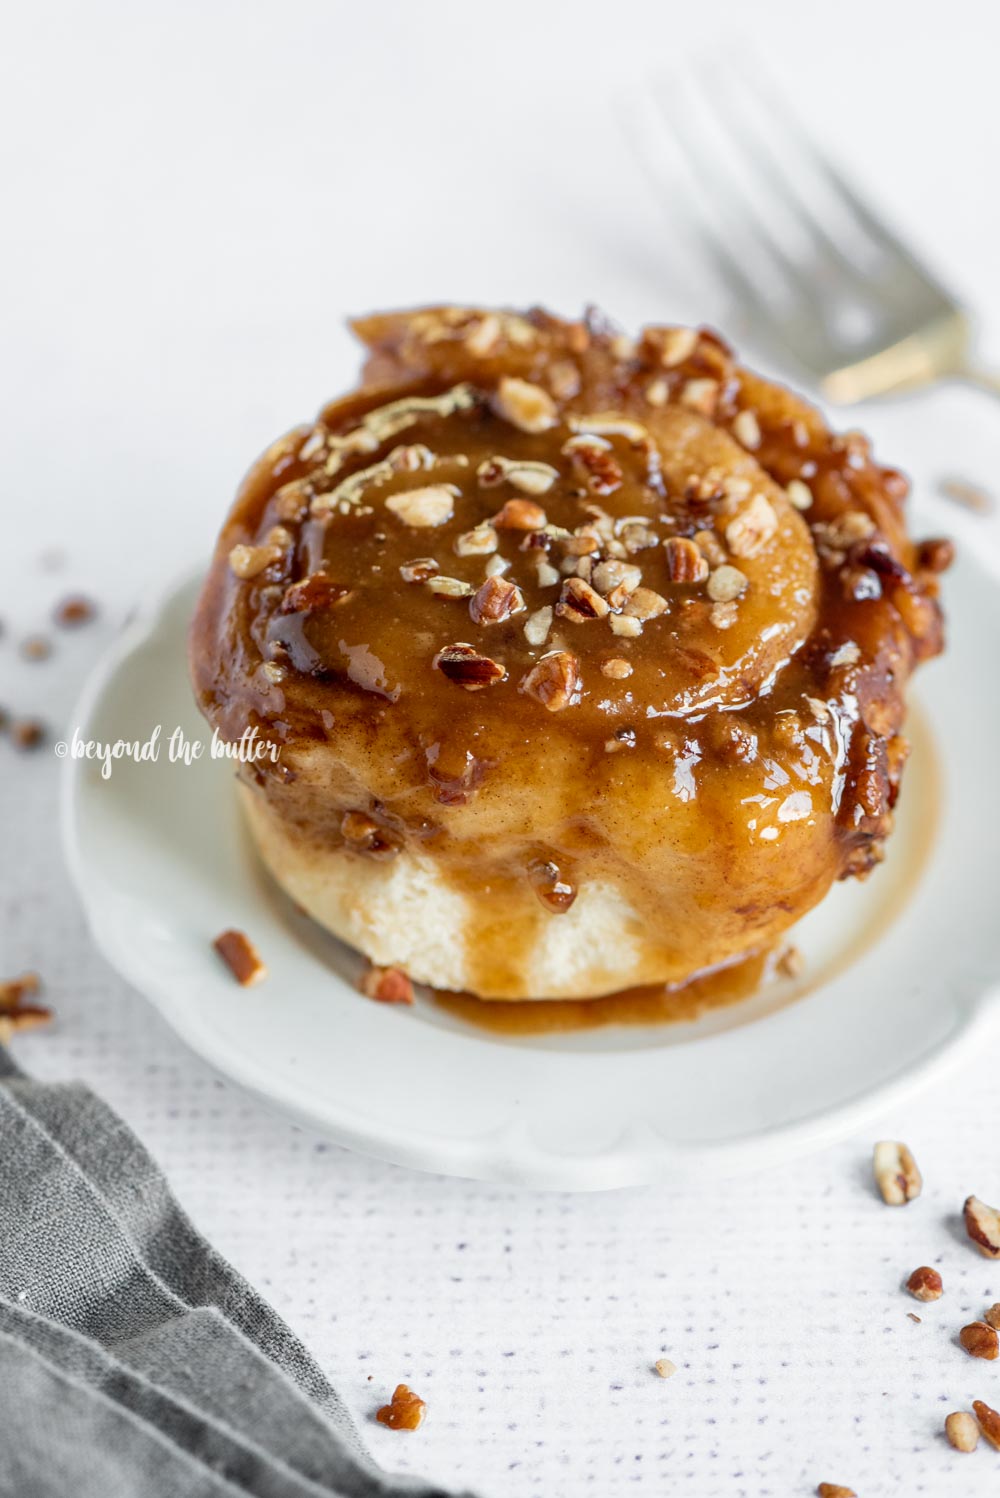
Table of Contents
How to Make the Best Homemade Sticky Buns from Scratch
This homemade sticky buns recipe is quite easy to make! I’ve broken down the recipe into 3 parts: the dough, the cinnamon-sugar mixture, and the caramelized topping.
The Dough
Ingredients needed: active dry yeast, warm water, unsalted butter, an egg, granulated sugar, buttermilk, salt, and all-purpose flour
The dough is your standard leavened dough (meaning, it requires yeast to rise) and it comes together very quickly. The hard part? The rise times—there are two of them with this recipe and they’re each for about an hour, or until the dough has doubled in size.
I know the waiting is the hardest part, but I promise you that when you take your first bite of one of these homemade sticky buns from scratch, it will be totally worth it! Plus, think of all the other things you can get done in those 2 hours! Haha!
Cinnamon Sugar Mixture
Ingredients needed: unsalted butter, granulated sugar, cinnamon
This part of the recipe is the absolute easiest to make and requires only 2 ingredients. Well, 3 if include the melted butter which is what you brush on first prior to sprinkling the cinnamon sugar over top.
You can buy cinnamon sugar in most grocery stores and online or you can very easily make it at home. I always like to make a good amount and keep it on hand for recipes like this and for my Chocolate Chip Sour Cream Coffee Cake recipe—so good!
Caramelized Pecan Topping
Ingredients needed: unsalted butter, dark brown sugar (light brown sugar is fine too), light corn syrup, cinnamon, and chopped pecans
The caramelized pecan topping comes together easily in a saucepan over low heat. And I always like to make it within the last few minutes of the first rise time, that way everything is ready to go after you’ve punched down and rolled out the dough.
After the mixture is well blended you can remove it from the heat, pour it into the prepared 13″ x 9″ pan, then sprinkle on the pecans.
Easy Homemade Sticky Buns – VIDEO
Helpful Tips for Making Pecan Sticky Buns
- I used my Nordic Ware 13″ x 9″ pan for this sticky buns recipe.
- I usually will recommend using either a handheld mixer or a stand mixer, but for these homemade sticky buns from scratch, I’d really suggest just using the stand mixer because you’ll use both the paddle and hook attachments.
- Kneading the dough for a good 5-7 minutes on a clean, lightly floured surface is important. The dough should be nice and smooth before you place it into the greased bowl.
- There are two rise times for these sticky buns. The first rise is for after making the dough. The second is for after you’ve prepared the sticky buns and before you bake them.
- Recommended bake times for this homemade sticky buns from scratch recipe is 20-25 minutes at 375ºF. They should be a nice golden brown color.
- Spray the pan generously with a flour-based baking spray. I always swear by Bakers Joy. I have yet to have a recipe not come cleanly out of a pan thanks to this baking spray!
- If you’d rather not use the oven and a bowl of boiling water to proof your dough, you can also cover the top of the bowl with plastic wrap (or a clean kitchen towel) and place it in a warm spot of your house.
- It may seem a little odd to pour the caramelized pecan topping in first before adding the rolled pieces of dough, but after baking them, you’ll invert the pan onto a serving plate.
- You can swap out the pecans for walnuts, if you’d like. And yes, raisin lovers, you can add raisins in as well!
- This homemade sticky buns recipe is best served the same day, but you can keep them stored in an airtight container in the refrigerator for 1, maybe 2 days tops. Re-heat them in the microwave before serving.
Enjoy these Other Beyond the Butter Breakfast Sweets!
- Chocolate Chip Sour Cream Coffee Cake
- Easy Homemade Donuts from Scratch
- Apple Coffee Cake
- 5 Ingredient Butterscotch Bundt Rolls
- Bakery Style Lemon Blueberry Muffins – a Beyond the Butter reader favorite!
Homemade Sticky Buns from Scratch

Ingredients
homemade sticky buns
- 2 1/4 tsp Active Dry Yeast, 1 packet
- 1/2 cup Warm Water
- 1 Large Egg, room temperature
- 1/2 cup Granulated Sugar
- 1/4 cup Unsalted Butter, room temperature
- 1 tsp Salt
- 1 cup Buttermilk
- 4 1/2 – 5 cups All-Purpose Flour, (2 cups, then 2 1/2-3 cups)
cinnamon sugar filling
- 1/4 cup Granulated Sugar
- 1-2 tbsp Ground Cinnamon
- 3 tbsp Unsalted Butter, melted
caramelized pecan topping
- 1/4 cup Unsalted Butter
- 1/2 cup Dark Brown Sugar
- 1/2 cup Light Corn Syrup
- 1 tsp Cinnamon
- 1/2 cup Chopped Pecans
Instructions
homemade sticky buns
- In a small bowl, dissolve the active dry yeast in the warm water for about 5-10 minutes. Set to the side.2 1/4 tsp Active Dry Yeast, 1/2 cup Warm Water
- Using your stand mixer fitted with the paddle attachment, combine the egg, granulated sugar, unsalted butter, and salt until combined. Add in the dissolved yeast mixture, buttermilk, and 2 cups of the all-purpose flour until well blended.1 Large Egg, 1/2 cup Granulated Sugar, 1/4 cup Unsalted Butter, 1 tsp Salt, 1 cup Buttermilk, 4 1/2 – 5 cups All-Purpose Flour
- Switch out the paddle attachment for the hook attachment and continue to add in the remaining 2 1/2 – 3 cups of all-purpose flour until a soft dough forms.
- Place the soft dough onto a clean, lightly floured surface and knead for about 5-7 minutes or until the dough is nice and smooth.
- When ready, place the dough into a greased bowl, making sure all sides of the dough are coated. Cover loosely with a clean kitchen towel and set in a warm, draft free spot of your kitchen for an hour, or until the dough has doubled in size. You can also adjust the oven rack to the middle to third mark, then preheat your oven to lowest temperature. Turn off the oven once preheated, place your bowl of dough in the oven with a medium-size bowl of boiling water on the rack below with the door closed. After 1 hour, open the door and remove the dough (and the bowl of water).
cinnamon sugar filling
- In a small bowl, whisk together the granulated sugar and cinnamon until well blended. Set to the side. In a small microwaveable bowl, melt the butter in the microwave and set to the side (you'll apply this first before the cinnamon sugar).1/4 cup Granulated Sugar, 1-2 tbsp Ground Cinnamon, 3 tbsp Unsalted Butter
caramelized pecan topping
- Generously spray the 13 inch x 9 inch pan with a flour-based baking spray and set to the side.
- In a medium-size saucepan, melt the unsalted butter, dark brown sugar, light corn syrup, and cinnamon over low heat until the mixture is well combined.1/4 cup Unsalted Butter, 1/2 cup Dark Brown Sugar, 1/2 cup Light Corn Syrup, 1 tsp Cinnamon
- Pour the mixture into the prepared 13 inch x 9 inch pan, then sprinkle the chopped pecans over top. Set to the side.1/2 cup Chopped Pecans
assembling the sticky buns
- Remove the kitchen towel from over top of the bowl with the dough, and (this is the most satisfying part) punch it down once with your fist. Then place the dough on to a clean, lightly floured surface.
- Using a rolling pin, roll the dough out into an 18 inch x 12 inch rectangle. Then, using a pastry brush, brush on the melted butter, leaving about 1/2 inch of space from the edge. Sprinkle the cinnamon sugar mixture over top.
- Starting with the long side, roll up the dough like you would for a jelly roll, pinching the seams to seal.
- Cut the roll into approximately 12 equal sizes and place into the pan cut side down on top of the caramelized pecan topping, leaving about a 1 inch space in between each roll. Cover loosely with a clean kitchen towel and set in a warm spot for about 1 hour, or until the sticky buns have doubled in size.
- When ready, adjust your oven to the 2nd level mark (just above center), and preheat your oven to 375ºF. Then bake for 20-25 minutes or until golden brown.
- Allow the sticky buns to cool for 5-10 minutes before turning the pan over onto a large serving plate or jelly roll pan.
Video
Notes
- I used my Nordic Ware 13″ x 9″ pan for this sticky buns recipe.
- I usually will recommend using either a handheld mixer or a stand mixer, but for these homemade sticky buns from scratch, I’d really suggest just using the stand mixer because you’ll use both the paddle and hook attachments.
- Kneading the dough for a good 5-7 minutes on a clean, lightly floured surface is important. The dough should be nice and smooth before you place it into the greased bowl.
- There are two rise times for these sticky buns. The first rise is for after making the dough. The second is for after you’ve prepared the sticky buns and before you bake them.
- Recommended bake times for this homemade sticky buns from scratch recipe is 20-25 minutes at 375ºF. They should be a nice golden brown color.
- Spray the pan generously with a flour-based baking spray. I always swear by Bakers Joy. I have yet to have a recipe not come cleanly out of a pan thanks to this baking spray!
- If you’d rather not use the oven and a bowl of boiling water to proof your dough, you can also cover the top of the bowl with plastic wrap (or a clean kitchen towel) and place it in a warm spot of your house.
- It may seem a little odd to pour the caramelized pecan topping in first before adding the rolled pieces of dough, but after baking them, you’ll invert the pan onto a serving plate.
- You can swap out the pecans for walnuts, if you’d like. And yes, raisin lovers, you can add raisins in as well!
- This homemade sticky buns recipe is best served the same day, but you can keep them stored in an airtight container in the refrigerator for 1, maybe 2 days tops. Re-heat them in the microwave before serving.
Nutrition
Nutritional information provided above is an estimate only and will vary based on specific ingredients used. See Nutritional Disclaimer for more info.


The bread recipe is great. However, I made the syrup recipe exactly as written. It appeared too thick before baking and this proved to be true. the syrup baked too hard around the outer edge. ???? I cannot find a syrup recipe that bakes up nicely!
i made this recipe today. the rise times did take longer..well the first rise did..the second was just an hour but they turned out amazing. I wish I could post a photo! Thank you for the recipe. this is the first one from you I have made..but i have gotten a few more to try!
Reading this made my day, Scott! Thank you for making them! I hope you enjoy my other recipes!
Well there out of the oven and look and smell amazing!! Do not know how to add a picture..
Love to hear that! I always love the smell of them! If you’re on social media like Instagram or Facebook you can share a picture of them that way, but unfortunately not on here.
First time ever making Sticky Buns !! I’ve been trying to try new things to bake as I’m not a Baker but want to learn .. so far they look good ..waiting on the second rise … wish me luck !!
Very delicious and much quicker than other recipes I looked at. They did take a bit longer than stated in recipe tho, with mix and roll time, etc.
I also added raisins. And did half whole-wheat flour.
Will definitely be making these again!
Thanks!
Thank you so much for making them Camilla and for your feedback on the timing!
I LOVED this recipe! It turned out so gooey and delicious. Exactly what you would want from sticky buns. Just don’t let your toddler rub them into the carpet like I did 😅 (Thank you carpet cleaners! hahaha Can’t wait to try more of your recipes!
So glad you enjoyed them (your toddler too)!