• Skip to primary navigation
  • Skip to main content
  • Skip to primary sidebar

Beyond the Butter logo

  • Home
  • Recipe Box
  • Christmas Favorites
  • Work with Me
  • Subscribe
menu icon
go to homepage
  • Home
  • Recipe Box
  • Christmas Favorites
  • Work with Me
  • Subscribe
    • Amazon
    • Facebook
    • Instagram
    • Pinterest
    • Twitter
    • YouTube
  • subscribe
    search icon
    Homepage link
    • Home
    • Recipe Box
    • Christmas Favorites
    • Work with Me
    • Subscribe
    • Amazon
    • Facebook
    • Instagram
    • Pinterest
    • Twitter
    • YouTube
  • ×
    Beyond the Butter >> Recipes >> Tutorials

    Published: Dec 15, 2019 · Modified: Sep 27, 2023 by Jennifer • This site generates income via ads and may contain affiliate links. See my privacy policy linked in the footer.

    How to Make Chocolate Curls

    Jump to Recipe Jump to Video Print Recipe
    Small pile of randomly stacked Chocolate Curls | All Images and Video © Beyond the Butter™

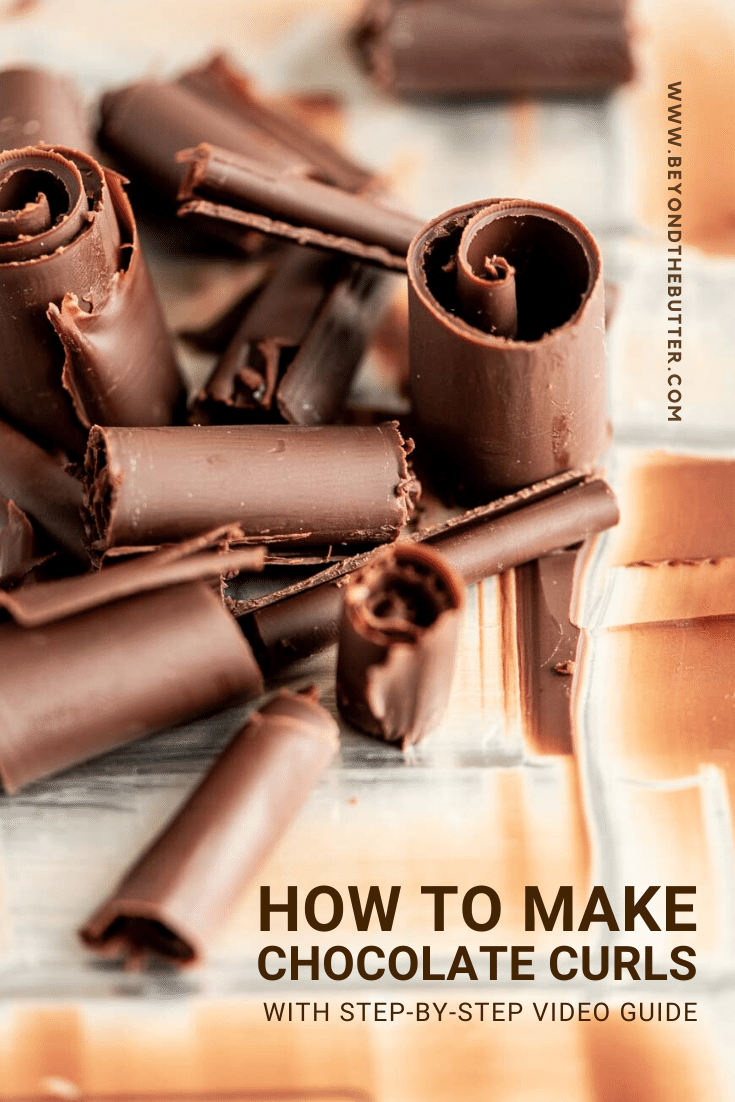
    This How to Make Chocolate Curls tutorial is an easy-to-follow guide with each step broken out with instructions and video, as well as what tools you will need.
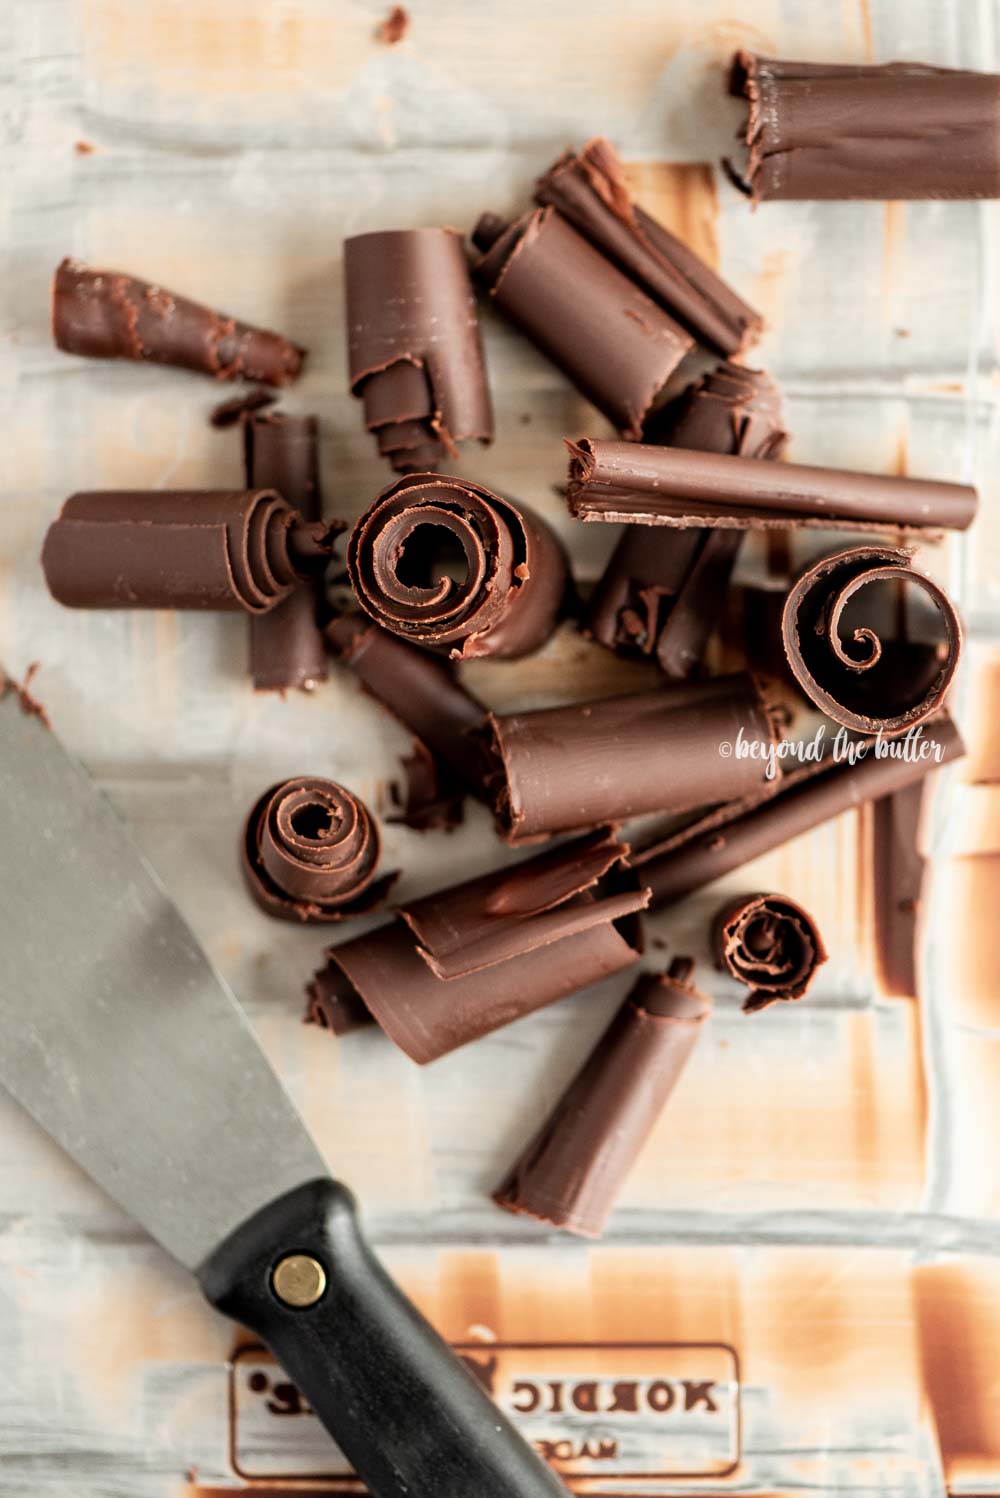
    How to Make Chocolate Curls | All Images and Video © Beyond the Butter, LLC
    Jump to:
    • How to Make Chocolate Curls Tutorial
    • Additional Tips Before Making Homemade Chocolate Curls
    • FAQs
    • Check Out A Few Popular Chocolate Beyond the Butter® Desserts!
    • 📖 Recipe
    • Reviews

    How to Make Chocolate Curls Tutorial

    Step 1 - Melt the chocolate and vegetable shortening.

    In a medium-size glass bowl, add the chocolate and vegetable shortening then microwave in 45-second increments at 50% power until the vegetable shortening is hot and has completely melted. Then using a small spatula, mix together until the chocolate is nice and smooth.

    Items needed: 3 ounces of a good quality bar of chocolate, 1 tablespoon of vegetable shortening, a medium glass bowl, and a small spatula
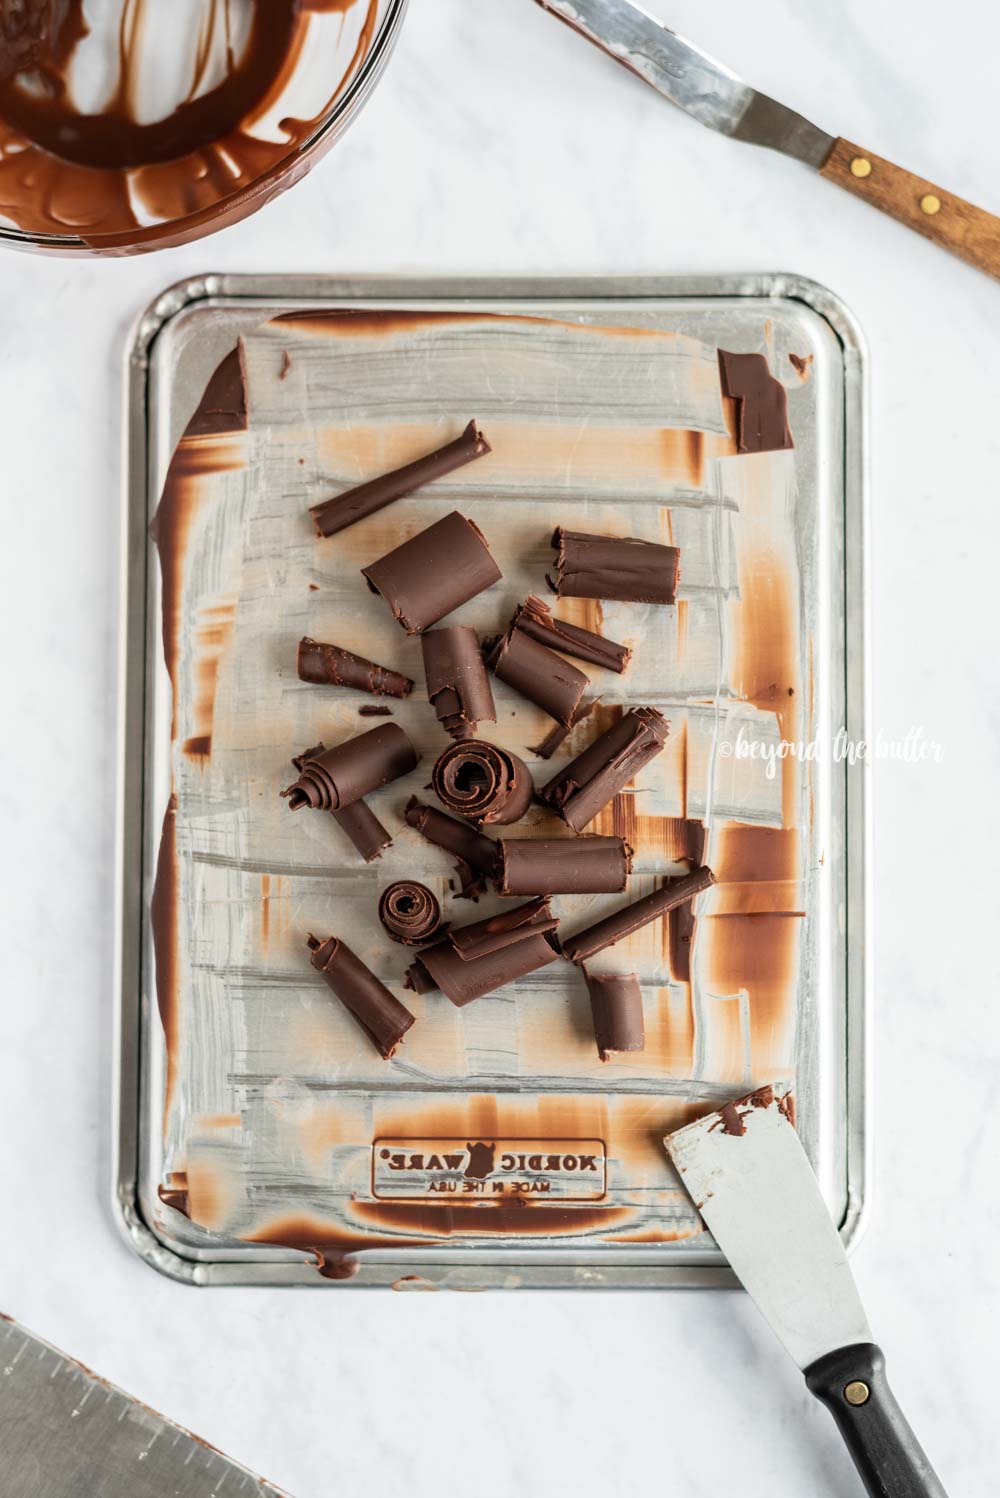
    Vegetable Shortening
    Vegetable Shortening
    Lindt Excellence Bar, 70% Cocoa - Pack of 4
    Lindt Excellence Bar, 70% Cocoa - Pack of 4
    GIR: Get It Right All Silicone Mini, Skinny & Ultimate Spatula 3 Pc Set
    GIR: Get It Right All Silicone Mini, Skinny & Ultimate Spatula 3 Pc Set
    Anchor Hocking 10pc Glass Mixing Bowl Set
    Anchor Hocking 10pc Glass Mixing Bowl Set
    Vegetable Shortening
    Vegetable Shortening
    Lindt Excellence Bar, 70% Cocoa - Pack of 4
    Lindt Excellence Bar, 70% Cocoa - Pack of 4
    GIR: Get It Right All Silicone Mini, Skinny & Ultimate Spatula 3 Pc Set
    GIR: Get It Right All Silicone Mini, Skinny & Ultimate Spatula 3 Pc Set
    Anchor Hocking 10pc Glass Mixing Bowl Set
    Anchor Hocking 10pc Glass Mixing Bowl Set
    Vegetable Shortening
    Vegetable Shortening
    Lindt Excellence Bar, 70% Cocoa - Pack of 4
    Lindt Excellence Bar, 70% Cocoa - Pack of 4
    GIR: Get It Right All Silicone Mini, Skinny & Ultimate Spatula 3 Pc Set
    GIR: Get It Right All Silicone Mini, Skinny & Ultimate Spatula 3 Pc Set
    Anchor Hocking 10pc Glass Mixing Bowl Set
    Anchor Hocking 10pc Glass Mixing Bowl Set

    Step 2 - Spread the melted chocolate out onto a cookie sheet or jelly roll pan.

    Using an offset spatula, immediately spread the melted chocolate out onto the underside of a cookie sheet or jelly roll pan. Continue to spread the chocolate out until it's a thin layer.

    Items needed: small offset spatula, small cookie sheet or jelly roll pan

    USA Small Cookie SheetUSA Small Cookie SheetAteco 1385 Offset SpatulaAteco 1385 Offset SpatulaNordic Ware Quarter Sheet Pan, 2-PackNordic Ware Quarter Sheet Pan, 2-Pack

    Step 3 - Freeze the Thin Layer of Chocolate.

    Carefully move the cookie sheet or jelly roll pan into the freezer, and leave it there for approximately 4 minutes. You want the chocolate to be in the sweet spot where it's not too soft and it's not rock hard where it will break the minute you try to create the curls. A good indication that it is ready is it will no longer be shiny in appearance and the tip of your finger, when gently touching the chocolate, will leave a subtle fingerprint and not a dent.

    Items needed: just your freezer and a timer!

    Step 4 - Carve out the curls.

    Here comes the fun part, but first take a deep breath! You can do this!

    Hold the putty knife or bench scraper in your dominant hand at about a 45-degree angle starting at the bottom of the pan. Then with your other hand, brace the back of the cookie sheet or jelly roll pan.

    Gently push forward to get the curl going and stop when you're satisfied with how the curl looks. You can push the whole way across the pan for a larger curl or you can stop every so many inches. It's up to you! Carefully transfer the curl to a plate using either your fingers or tweezers.

    Repeat until you have all your chocolate curls transferred over to a place, then place them in the freezer for 15-20 minutes to harden. You can also place them in the refrigerator as well, but it may take a smidge longer.

    Items needed: putty knife or a bench scraper, a plate or small pan to hold the chocolate curls, tweezers, knife to cut longer curls

    SK Curved Extra Fine Point Slim Tweezer
    SK Curved Extra Fine Point Slim Tweezer
    Warner 90127A ProGrip Full Flex Putty Knife, 1-½"
    Warner 90127A ProGrip Full Flex Putty Knife, 1-½"
    Nordic Ware Quarter Sheet Pan, 2-Pack
    Nordic Ware Quarter Sheet Pan, 2-Pack
    OXO Good Grips Multi-purpose Stainless Steel Scraper & Chopper
    OXO Good Grips Multi-purpose Stainless Steel Scraper & Chopper
    SK Curved Extra Fine Point Slim Tweezer
    SK Curved Extra Fine Point Slim Tweezer
    Warner 90127A ProGrip Full Flex Putty Knife, 1-½"
    Warner 90127A ProGrip Full Flex Putty Knife, 1-½"
    Nordic Ware Quarter Sheet Pan, 2-Pack
    Nordic Ware Quarter Sheet Pan, 2-Pack
    OXO Good Grips Multi-purpose Stainless Steel Scraper & Chopper
    OXO Good Grips Multi-purpose Stainless Steel Scraper & Chopper
    SK Curved Extra Fine Point Slim Tweezer
    SK Curved Extra Fine Point Slim Tweezer
    Warner 90127A ProGrip Full Flex Putty Knife, 1-½"
    Warner 90127A ProGrip Full Flex Putty Knife, 1-½"
    Nordic Ware Quarter Sheet Pan, 2-Pack
    Nordic Ware Quarter Sheet Pan, 2-Pack
    OXO Good Grips Multi-purpose Stainless Steel Scraper & Chopper
    OXO Good Grips Multi-purpose Stainless Steel Scraper & Chopper
    How to Make Chocolate Curls | All Images and Video © Beyond the Butter, LLC

    Additional Tips Before Making Homemade Chocolate Curls

    • Before starting, make sure you have the freezer space to hold a sheet pan or cookie sheet. Because my freezer space is limited, I used a quarter-size jelly roll pan.
    • You will also want to make sure the underside of your cookie sheet or jelly roll pan is smooth. I have some cookie sheets that have a ripple type of top and bottom to them, so they would not work well for something like this.
    • If you'd rather use both hands to guide the putty knife or bench scraper, I suggest placing your cookie sheet or jelly roll pan up against a wall to brace it. I've made these chocolate curls as you see in the video and also have my kitchen counter wall as a brace. Both methods get the job done, just go with what feels more comfortable to you!
    • I don't recommend doubling this unless you have the freezer space and a larger cookie sheet or pan.
    • If you know you like to top your desserts off with some chocolate curls, you can make a bunch of them in advance, then store them in the freezer inside a tightly sealed storage container for several months.
    How to Make Chocolate Curls Tutorial | All Images: © Beyond the Butter, LLC

    FAQs

    What type of chocolate did you use?

    I used 3 ounces of a Lindt 70% Cocoa Excellence Bar. You don't have to use dark chocolate or even this brand, but I do recommend getting a good bar of chocolate for these!

    What tool can you use to create the chocolate curls?

    The putty knife I used here in this video was 1.5 inches wide, and I bought it solely for the purpose of making chocolate curls. You can get a wider putty knife or you can use a bench scraper (used for cutting pie and bread dough), then cut them to your desired width with a good sharp knife.

    What should I do if my chocolate starts to get too soft?

    If your chocolate begins to get too soft as you curl it, just pop it back into the freezer for 1-2 minutes.

    Check Out A Few Popular Chocolate Beyond the Butter® Desserts!

    • Dark Chocolate Gingersnap Tart recipe | All Images © Beyond the Butter, LLC
      Dark Chocolate Gingersnap Tart
    • Salted pecan pie brownies placed on brown parchment paper with the center brownie placed on its side.
      The Best Salted Pecan Pie Brownies
    • Angled image of sliced no-bake chocolate cream pie with chocolate wafer crust and garnished with Cool Whip and chocolate curls.
      No Bake Chocolate Cream Pie with Chocolate Wafer Crust
    • Salted brownie cookies on abstract light brown background.
      Salted Brownie Cookies

    📖 Recipe

    How to Make Chocolate Curls | All Images and Video © Beyond the Butter™

    How to Make Chocolate Curls

    Author: Jennifer
    Learn how to make your own chocolate curls with this easy to follow step-by-step tutorial!
    5 from 1 vote
    (prevent your screen from going dark while making this recipe)
    Print Recipe Pin Recipe
    Prep Time 15 minutes minutes
    Course Chocolate
    Cuisine Dessert Topping

    Equipment

    • Small baking sheet or jelly roll pan
    • Medium-size mixing bowl
    • Spatula
    • Offset spatula
    • Putty knife or bench scraper

    Ingredients
     

    • 3 oz Chocolate (use a good quality bar of chocolate)
    • 1 tablespoon Vegetable Shortening

    Instructions

    • In a medium-size glass bowl, melt the chocolate and vegetable shortening together in 30-45 second increments until just the vegetable shortening has melted completely and is hot. Stir together until the chocolate is melted and smooth. If needed, microwave again for only 15 seconds.
      3 oz Chocolate, 1 tablespoon Vegetable Shortening
    • Pour the melted chocolate over the underside of a cookie sheet or jelly roll pan. Then spread out into a thin layer using an offset spatula.
    • Carefully place the cookie sheet or pan into the freezer for approximately 4 minutes. You want the chocolate to be in the sweet spot where it's not too soft and it's not rock hard where it will break the minute you try to create the curls. A good indication that it is ready is it will no longer be shiny in appearance and the tip of your finger—when gently touching the chocolate—will leave a subtle print and not a dent.
    • Hold the putty knife or bench scraper in your dominant hand at about a 45 degree angle starting at the bottom of the pan. Then with your other hand, brace the back of the cookie sheet or jelly roll pan. Gently push forward to get the curl going and stop when you're satisfied with how the curl looks. You can push the whole way across the pan for a larger curl or you can stop every so many inches. Carefully transfer the curl to a plate using either your fingers or tweezers.
    • Repeat until you have all your chocolate curls transferred over to a place, then place them in the freezer for 15-20 minutes to harden. You can also place them in the refrigerator as well, but it may take a smidge longer.

    Video

    Nutritonal information provided above is an estimate only and will vary based on specific ingredients used.

    Tried this recipe and loved it?Snap a pic and share it with me over on Instagram tagging @beyond.the.butter and #beyondthebutter in your caption or stories!
    « Homemade Oreo Snowflake Cookies
    Dark Chocolate Gingersnap Tart »
    1336 shares

    © All images & content on BeyondtheButter.com are copyright protected. You may not republish, redistribute, or otherwise use any images, recipes, or content, in part or in whole, without express written permission from the author. Beyond the Butter® is a registered trademark of Jennifer Switzer. All rights reserved. For more information, please read my Policies page.

    Reader Interactions

    Comments

      Leave a Review and Star Rating Cancel reply

      Your email address will not be published. Required fields are marked *


    1. camila says

      December 17, 2019 at 8:52 pm

      5 stars
      I've made this today! And it was a HUGE success!
      I've struggled with chocolate curls for years!!! Literally years! I have been trying to make them, I've watched youtube videos, tried tempering my chocolate, and had failed curls after failed curls!
      Who would have thought that the easiest way would be the most successful and beautiful curls I would ever make!!!
      Totally amazing. I completely recommend this chocolate curl recipe for anyone!!! You will see how super easy this is!!!
      I'd give it 10 stars if I could!

      Reply

    Primary Sidebar

    hello image.

    Welcome to my blog! I'm Jennifer, and I love creating and sharing dessert recipes that are sweet, simple, and fun to make and bring me—and hopefully you and your loved ones—wonderful memories! Learn more about me and my inspiration for starting Beyond the Butter!

    Christmas Favorites

    • Christmas themed dessert plate filled with soft and chewy gingerbread cookies with ornaments around it on a white marbled background.
      Soft and Chewy Gingerbread Cookies
    • Closeup of holiday themed cut out sugar cookies on a red and white dessert plate.
      The Best Cut Out Sugar Cookies
    • Randomly placed homemade butter cookies on a white background.
      Homemade Butter Cookies
    • Overhead image of classic peanut butter blossoms on a parchment lined blue dessert platter.
      Classic Peanut Butter Blossoms

    Beyond the Butter® Favorites

    • Baking tray filled with bakery style lemon blueberry muffins garnished with slices of lemons and blueberries.
      Bakery Style Lemon Blueberry Streusel Muffins
    • Slice of 2 layer chocolate chip cake on it's side on a brown paper background.
      Chocolate Chip Cake
    • Overhead image of small batch chocolate cupcakes in vintage metal baking tin.
      Small Batch Chocolate Cupcakes
    • Stack of three lemon bars on white background.
      Super Easy Lemon Bars
    • Salted brownie cookies on abstract light brown background.
      Salted Brownie Cookies
    • Sliced lemon cream cheese pound cake with a lemon glaze on a ceramic cake stand.
      Lemon Cream Cheese Pound Cake

    Featured On

    Beyond the Butter features

    Footer

    ↑ back to top

    Resources

    • Privacy Policy
    • Accessibility Policy
    • Recipes
    • Shop

    Newsletter

    • Subscribe
    • Instagram
    • Facebook
    • Pinterest

    Contact

    • Work with Me
    • About

    © 2023 Beyond the Butter®, All Rights Reserved.