
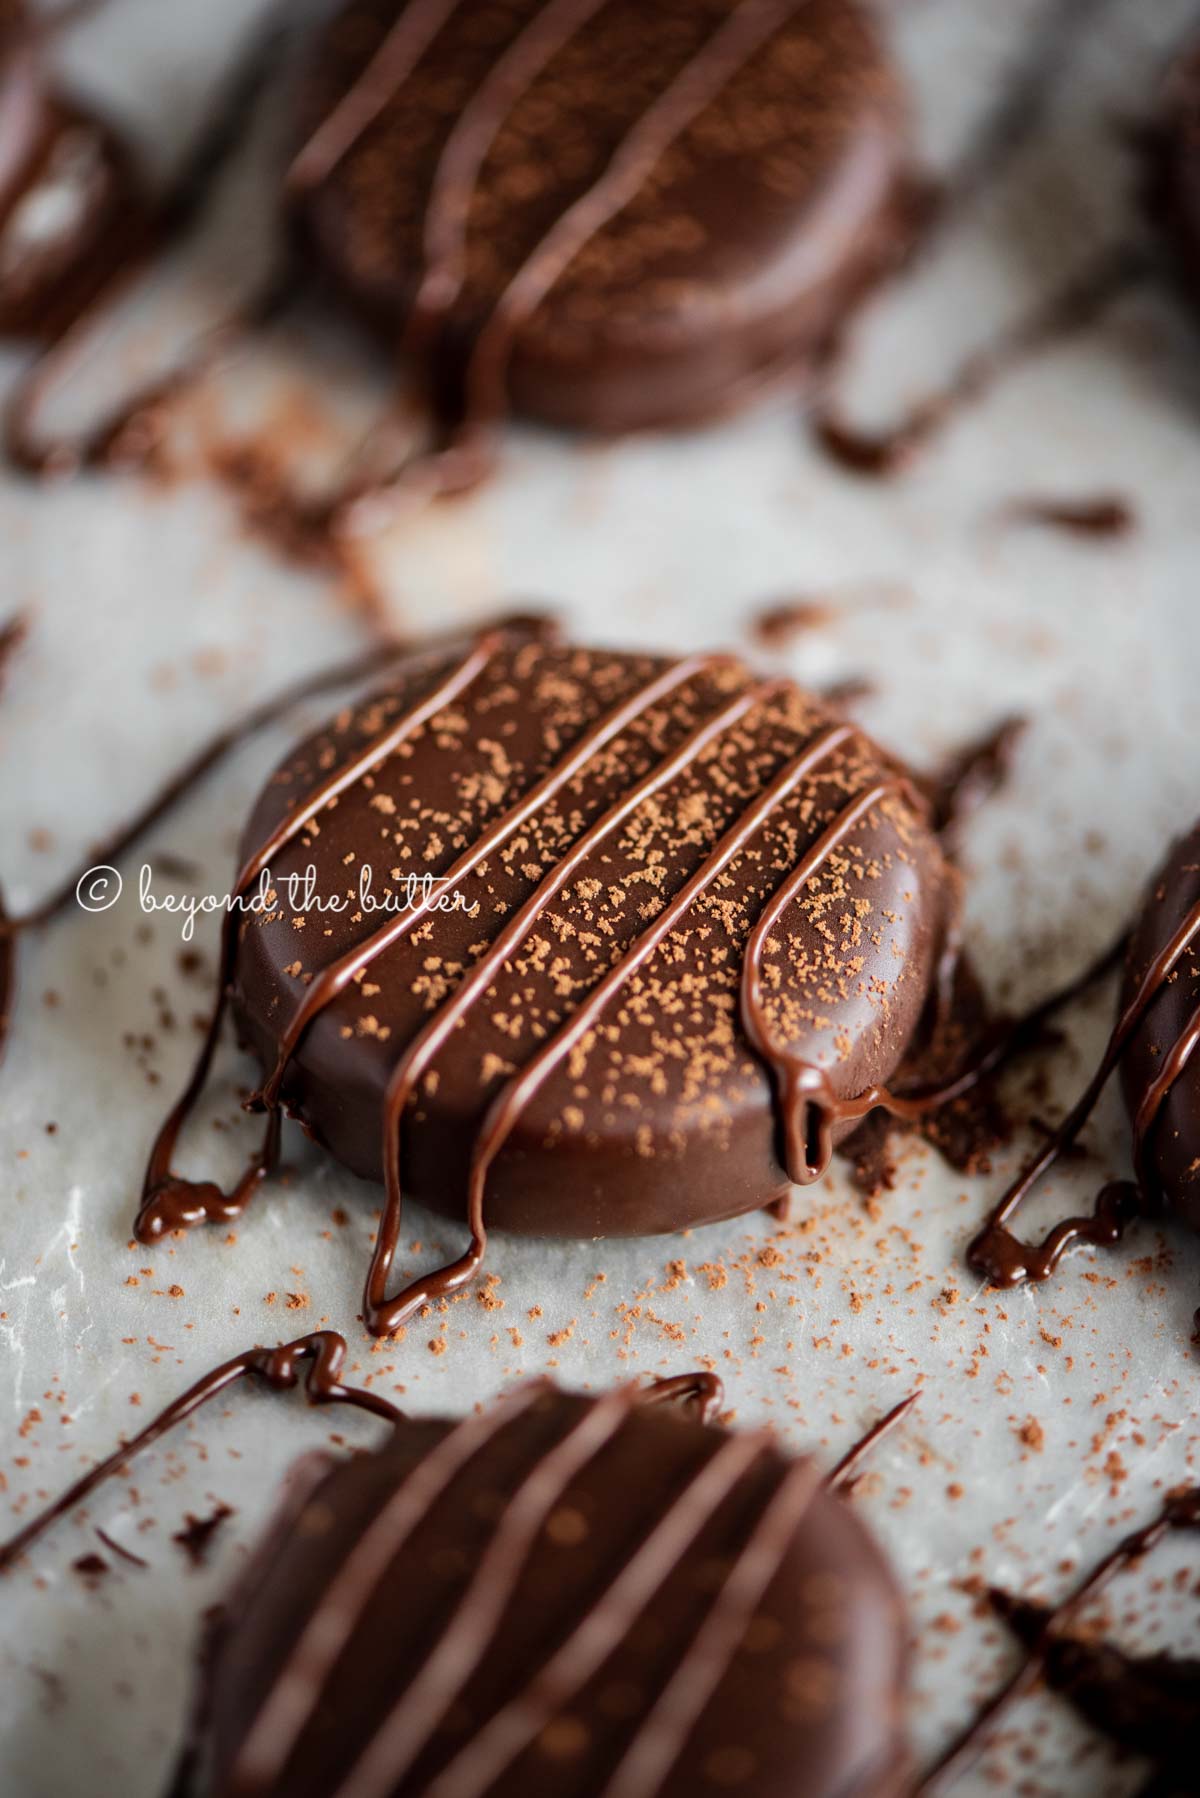
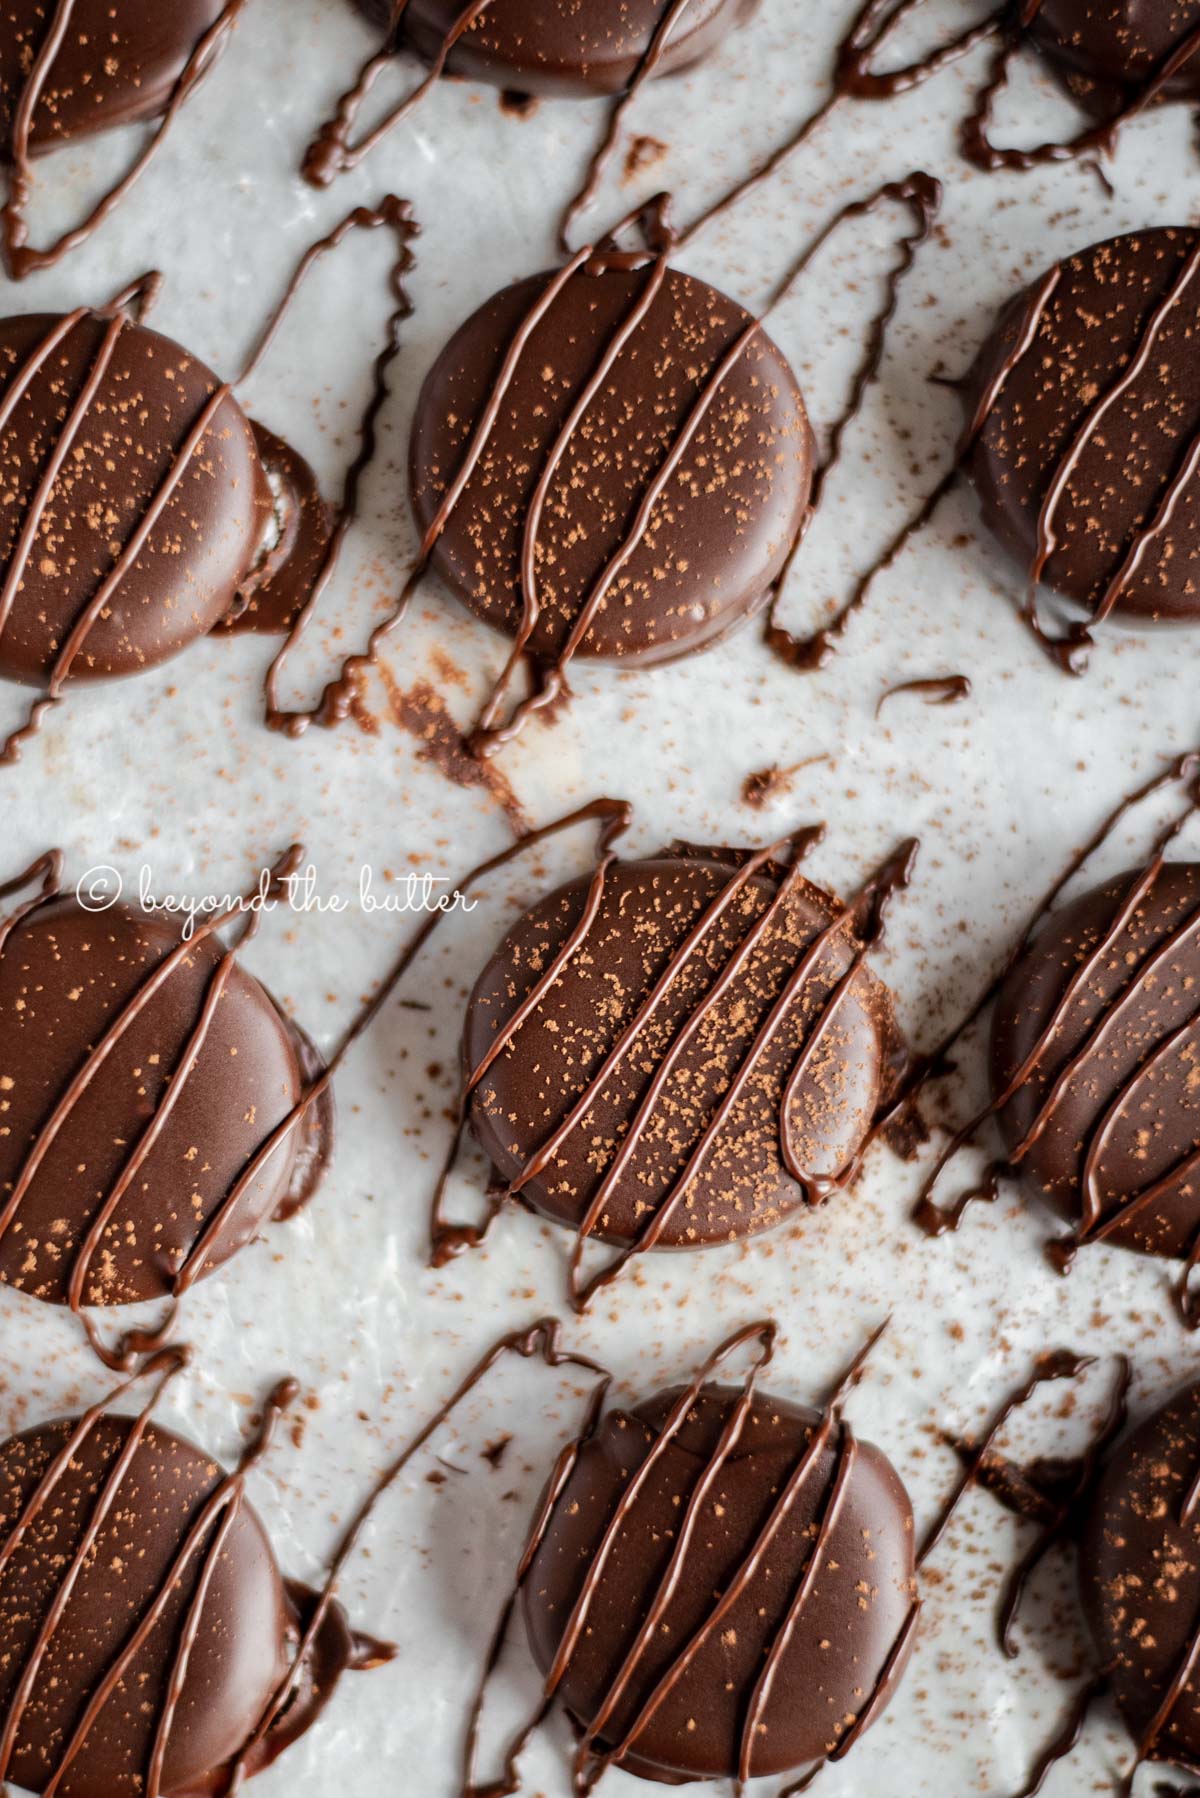
You will never want to return to store-bought once you’ve tried these Homemade Peppermint Patties! They have a creamy peppermint center that’s chilled and then dipped into rich, melted chocolate. They’re easy to make and are absolutely delicious!
Chocolate and mint desserts have long been a favorite of mine. Like my homemade thin mints, mint chocolate cupcakes, or no bake mint chocolate pie the refreshing coolness of the mint, paired with rich chocolate, gives you a satisfying treat that hits the spot every single time.
This homemade peppermint patties recipe is the ultimate year-round dessert that’s easy to make, uses only 7 ingredients, and is the perfect after-dinner treat. And when stored in the freezer, they’ll last up to a year or more—if they’re not already eaten up by then!
Table of Contents
Ingredients Needed
I recommend using the following ingredients below to make these easy homemade peppermint patties. The brands mentioned below are favorites of mine, but please use what you have on hand or what is readily available in your area.
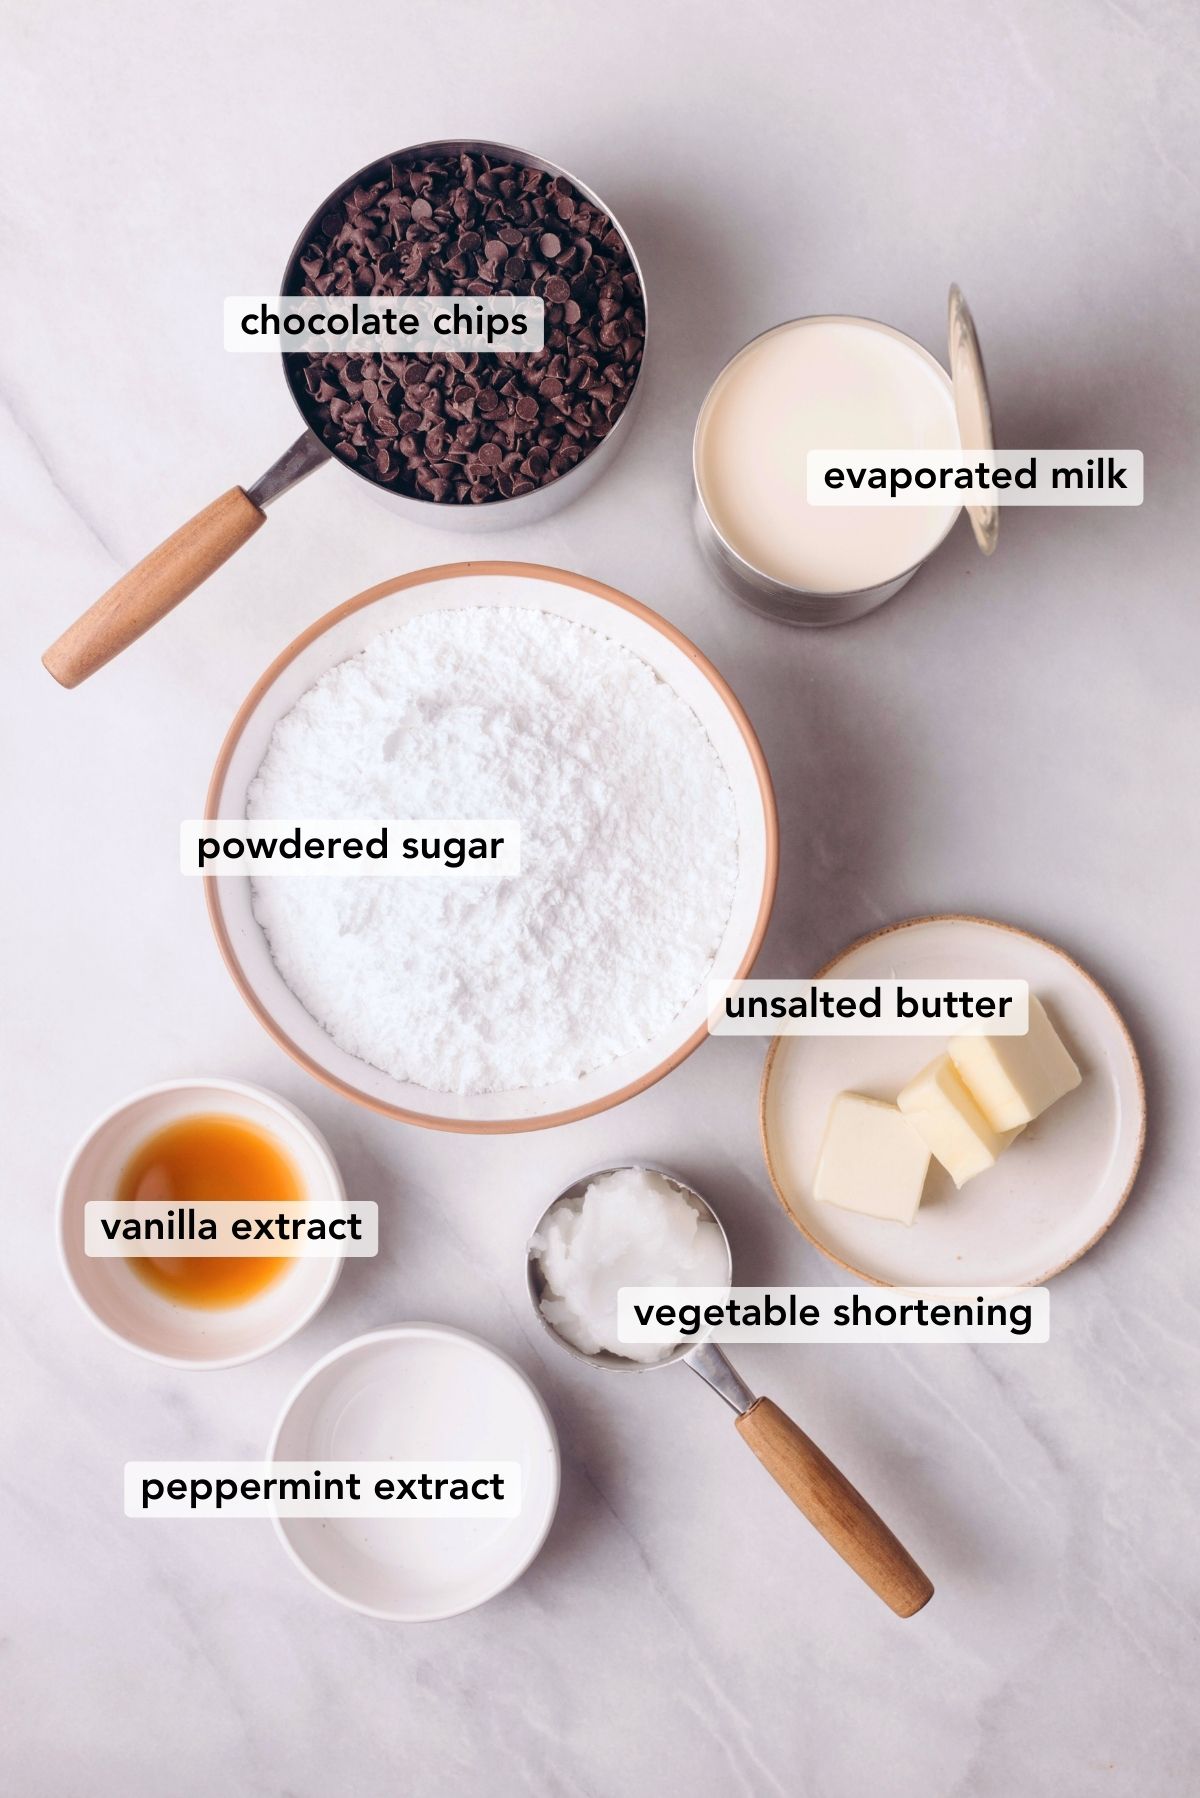
- Evaporated Milk. Not to be confused with heavy cream or sweetened condensed milk. I used a 4-ounce can of Carnation evaporated milk—the smallest I could find.
- Peppermint Extract. Not to be confused with mint extract (that stuff tastes like fresh mint). I used McCormick’s brand, but any brand will work.
- Semi-Sweet Chocolate Chips. Milk chocolate doesn’t quite work with the peppermint filling here, so I recommend semi-sweet chocolate chips. And a good quality brand like Ghirardelli or even Guittard (if I feel like spending a bit more) is perfect.
- Vegetable Shortening or Coconut Oil. Both will do a good job of thinning the chocolate, but the coconut oil will help give it a little more shine after the chocolate has set. You will not taste the coconut at all.
For quantities and instructions, please see the recipe card below.
Substitutions
Dark Chocolate Chips. I have also used Ghirardelli’s 72% dark chocolate baking chips instead of the semi-sweet chocolate chips, which taste fantastic!
Paraffin Wax. Used as a substitute for vegetable shortening or coconut oil, it does a fabulous job of thinning the chocolate, adding some shine after the melted chocolate has set, and preventing the chocolate from melting if the peppermint patties are left out at room temperature. I still recommend keeping them chilled, though. I understand it can weird people out, but it does work well!
How to Make the Recipe ![]()
Below is a quick overview of how to make these copycat York peppermint patties. For the full printable recipe, which can be made using US customary or metric measurements, visit the recipe card below.
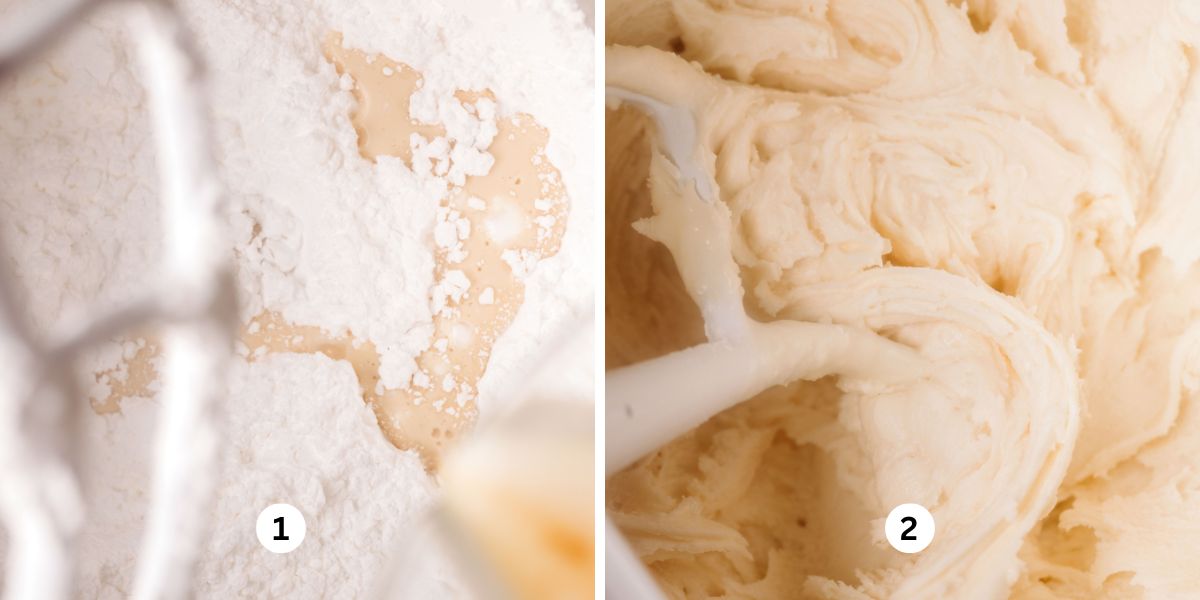
Step 1. Mix up the peppermint filling. A stand mixer or hand mixer can be used for making the creamy peppermint filling. Beat together the powdered sugar and softened unsalted butter over low speed. Add in the evaporated milk and the peppermint and vanilla extracts (Images 1 and 2).
Step 2. Roll out, then chill the peppermint patty filling. Generously sprinkle powdered sugar over a sheet of wax paper, then the peppermint patty filling, topped with a little more powdered sugar, and another sheet of wax paper. Roll it out to about a 1/4-inch thickness. Chill the dough in the freezer for 45 minutes to 1 hour.
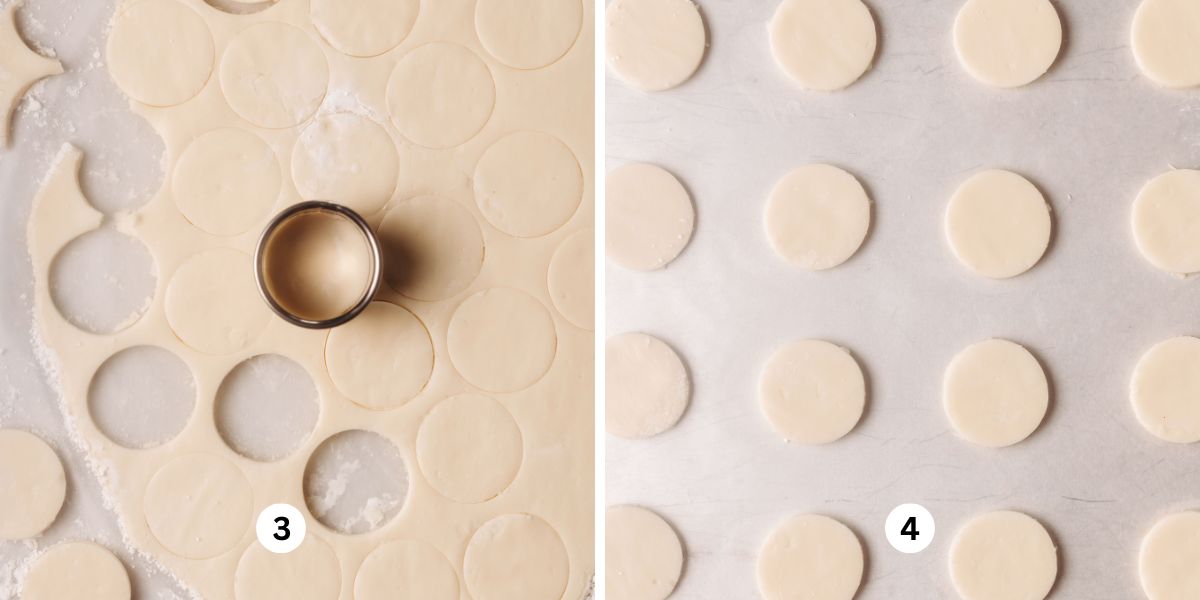
Step 3. Cut out the rounds and freeze. You’ll need a circle cookie cutter or something similar to cut out the peppermint patty rounds. I found that using a 1.5-inch size circle cookie cutter works best. Mine are the 11 piece Ateco circle cookie cutters set. Freeze the rounds for another 20-30 minutes. Keep them in the freezer until you’re ready for chocolate dipping (Images 3 and 4).
Quick Tip: After you cut out the rounds, you’ll have leftover peppermint patty filling. I recommend repeating steps 2 and 3 until only a tiny amount of filling is left. You can shape the small bit of filling in your hand and freeze it with the rest of the peppermint patty rounds.
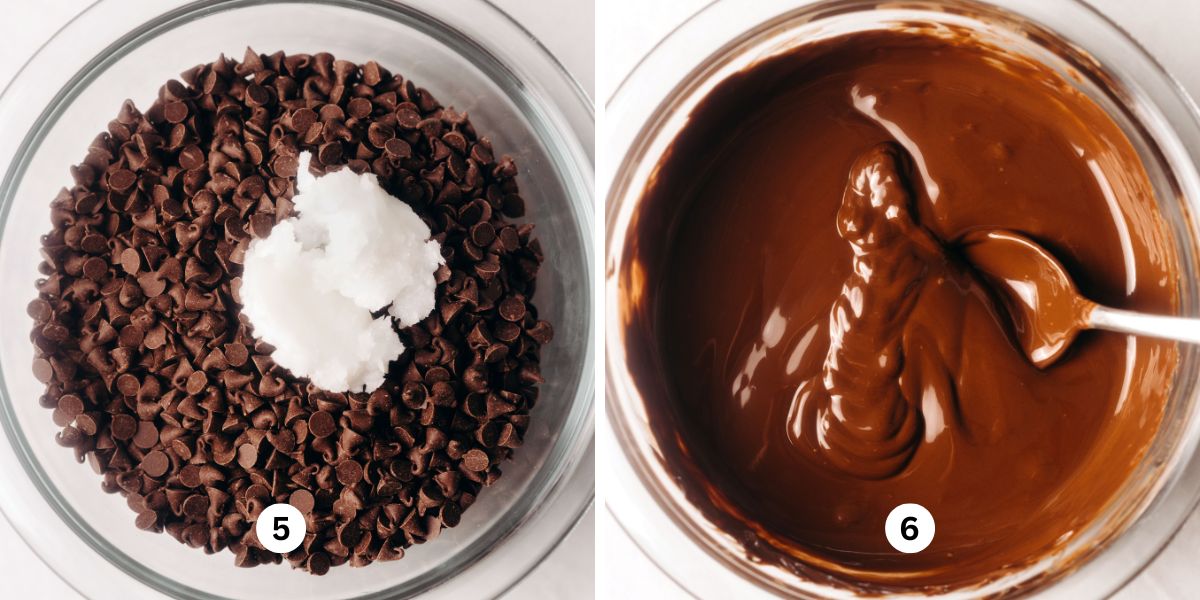
Step 4. Melt the chocolate. Place the chocolate chips and vegetable shortening (or coconut oil) into a medium or large microwaveable bowl. Microwave for 1 minute at full power, then stir. Microwave once more for 45 seconds to 1 minute, stir again (Images 5 and 6).
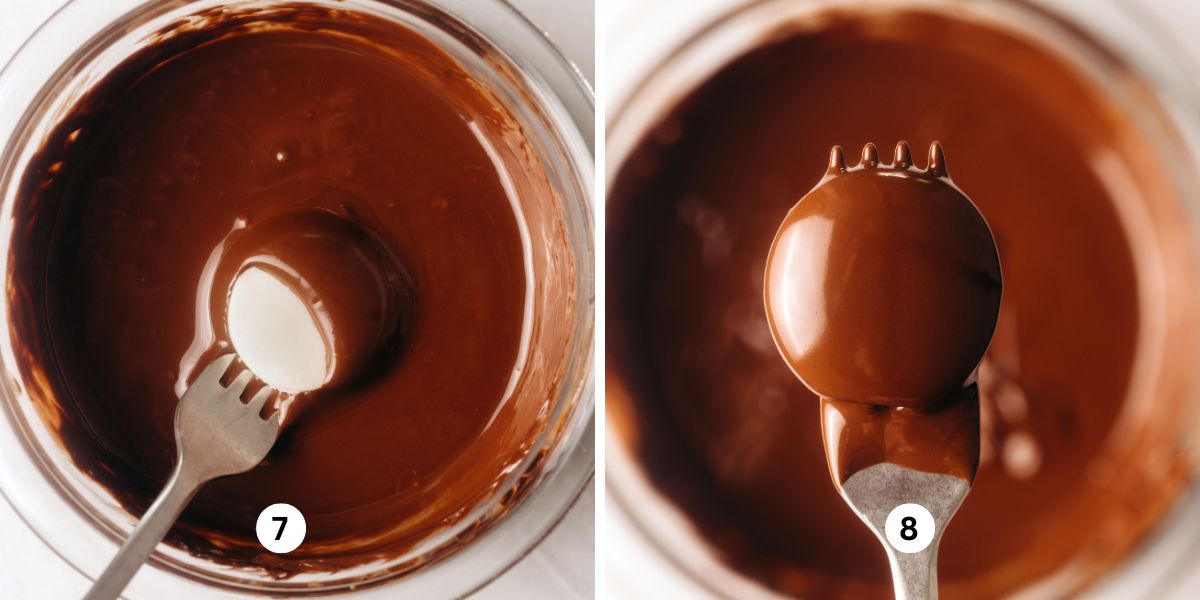
Step 5. Dip the peppermint patty rounds. Working as quickly as possible, with a fork or candy-making tools, take a peppermint patty round and dip it in the melted chocolate. Lift up, then gently tap the fork on the edge of the bowl a few times to allow any excess chocolate to drip back into the pan (Images 7 and 8). Carefully place it on a baking sheet lined with wax paper. Repeat until you’ve covered each peppermint patty round in the chocolate.
Step 6. Refrigerate or freeze. Place in the refrigerator or freezer for about 15-20 minutes to let the chocolate set. Then enjoy! Keep them stored in the refrigerator or (better option) freezer.
Quick Tip: With any leftover chocolate you have, you can drizzle some over the tops of each peppermint patty or take some of your favorite pretzels and coat them in the chocolate! You can also dust the tops with a little cocoa powder.
Recommended Tools
You probably have most of the tools used to make these homemade peppermint patties. But here are a few you may not have that I highly recommend using for this recipe.
- Forks or Candy Dipping Tools. The latter is nice, but the forks do just as good of a job. The candy dipping tool set I have is from Wilton.
- Circle Cookie Cutter. The recommended size is 1/4 inch. I have the 11-piece Ateco circle cookie cutters set.
- Wax Paper. It works perfectly when rolling out the peppermint patty filling, removing the peppermint patty rounds, and finishing peppermint patties after they have been dipped in the chocolate.
- Silicone Mat. I use my Tovolo silicone mat for rolling out the peppermint patty filling. Having this non-stick surface underneath the wax paper helps prevent everything from moving around too much. It’s equally great for rolling out pie crust for my strawberry rhubarb pie or homemade apple pie!
- Paring Knife. Run it under hot water, dry off, then cut off any excess hardened chocolate around the peppermint patties. You can also do the same with the circle cookie cutter if you want a more rounded cut.
Top Tips
Tip 1. Cold is Key. Keeping the peppermint patty filling cold for as long as possible will help you throughout this process. I do this with my chocolate covered peanut butter eggs and chocolate covered cookie dough hearts too. Freezing the filling for 45 minutes to 1 hour will help when it comes time to cut out the peppermint patty rounds. Several hours or—my preference—overnight in the freezer is even better. Freezing them again for about 20-30 minutes after you have cut out the rounds is also helpful because it helps to keep peppermint patty rounds from falling apart as you dip them into the melted chocolate.
Tip 2. Coat your Tools. Sprinkle some powdered sugar on top of the wax paper, which will help prevent the peppermint patty filling from sticking to everything as you roll it out. It’s also a good idea to coat your circle cutter with powdered sugar.
Tip 3. Prep Your Dipping Station. Before dipping the peppermint patty rounds into the melted chocolate, ensure you have prepped your area. Doing so will allow you to work quickly through this part of the recipe.
I place a baking sheet lined with wax paper to the side where I’ll be dipping my peppermint patty rounds into the chocolate. I also keep a sheet or two of paper towels to place my fork onto or wipe off.

Recipe FAQs
The best way to keep your homemade peppermint patties fresh is in the freezer in an airtight container, separated by sheets of wax paper. The wax paper is to prevent them from sticking together.
I recommend using a small 1.5-inch round cookie cutter. If you don’t have round cookie cutters, you can roll the peppermint patty filling into 1-inch balls and flatten to about 1/4 inch with the bottom of a glass. Coat the bottom of the glass with some powdered sugar to prevent the peppermint patty round from sticking to the glass.
You can use a fork (or two, if needed) or candy-dipping tools. The latter is nice, but if you’re only planning to use them for the peppermint patties and nothing else, you can get away with just using the forks.
In the freezer, they’ll last for a year or sometimes longer. But they’re so good, they’ll be long gone before then!
More Mint Chocolate Treats to Enjoy!
Love these homemade peppermint patties? Then give these other delicious mint chocolate treats from Beyond the Butter® a try!


If you tried this Homemade Peppermint Patties Recipe or any other recipe on my website, please leave a 🌟 star rating and let me know what you thought in the 📝 comments below. Thanks for visiting!
The Best Homemade Peppermint Patties

Ingredients
- 3 3/4 cup Powdered Sugar, firmly packed (plus extra for coating your rolling pin, cookie cutter, and wax paper)
- 3 tbsp Unsalted Butter, room temperature
- 1/4 cup Evaporated Milk
- 2 tsp Peppermint Extract
- 1/2 tsp Vanilla Extract
- 12 oz bag Semi-Sweet Chocolate Chips
- 2 tbsp Coconut Oil or Vegetable Shortening
Instructions
peppermint patty filling
- Using your hand mixer or stand mixer fitted with the paddle attachment, beat the powdered sugar and unsalted butter together on low speed.3 3/4 cup Powdered Sugar, 3 tbsp Unsalted Butter
- Add in the evaporated milk, peppermint extract, and vanilla extract. Switch the mixer to medium speed and beat together until well blended.1/4 cup Evaporated Milk, 2 tsp Peppermint Extract, 1/2 tsp Vanilla Extract
- Generously sprinkle powdered sugar over a sheet of wax paper and roll out the peppermint patty filling to 1/4 inch or to the thickness of your liking. You can add another sheet of wax paper over the top of the peppermint patty filling to make it easier to roll out.
- Place the rolled out peppermint patty filling onto a baking sheet and freeze for 45 minutes to 1 hour. Overnight freezing is fine as well. The colder the filling is, the easier it will be to cut out the rounds.
- Remove the filling from the freezer and cut out each round with a circle cookie cutter that's been coated in confectioners sugar. Place the rounds on a sheet of wax paper and freeze again for about 20-30 minutes.
melting the chocolate
- Place the semi-sweet chocolate chips and coconut oil into a medium or large-size microwaveable bowl and heat for 1 minute on full power. Stir, then heat again for another 45 seconds to 1 minute. Stir until completely melted.12 oz bag Semi-Sweet Chocolate Chips, 2 tbsp Coconut Oil or Vegetable Shortening
assembling the peppermint patties
- Working as quickly as possible, with a fork or candy making tools, take a chilled peppermint patty round and dip it in the melted chocolate. Lift up then gently tap the fork on the edge of the bowl a few times to allow any excess chocolate to drip back into the pan. Carefully place on a baking sheet lined with wax paper. Repeat until you've covered each peppermint patty round in the chocolate.
- Place in the freezer for about 20-30 minutes to allow the chocolate to set.
- Peppermint patties can be stored in the refrigerator or in (my preference) the freezer stored in an airtight container, layered with wax paper. They will pretty much keep indefinitely in the freezer!
Video
Notes
- Keeping the peppermint patty filling cold for as long as possible will help you throughout this process. Freezing the filling for 45 minutes to 1 hour will help when it comes time to cut out the peppermint patty rounds. Several hours or—my preference—overnight in the freezer is even better.
- Freezing them again for about 20-30 minutes after you have cut out the rounds is also helpful. While not required, it does help keep peppermint patty rounds from falling apart as you dip them into the hot, melted chocolate.
- For rolling out the peppermint patty filling, having a non-stick surface underneath the wax paper will help prevent everything from moving around too much. I like to use my Tovolo Mat for recipes like this. It’s equally great for rolling out pie crust too!
- Sprinkle some powdered sugar on top of the wax paper, which will help the peppermint patty filling from sticking to everything as you roll it out. It’s also a good idea to coat your circle cutter with powdered sugar.
- Before dipping the peppermint patty rounds into the melted chocolate, ensure you have prepped your area. Doing so will allow you to work quickly through this part of the recipe.
- I place a baking sheet lined with wax paper to the side where I’ll be dipping my peppermint patty rounds into the chocolate. I also keep a sheet or two of paper towels to place my fork onto or wipe them off.
- Recipe adapted from A Taste of Bedminster Elementary cookbook.
Nutrition
Nutritional information provided above is an estimate only and will vary based on specific ingredients used. See Nutritional Disclaimer for more info.


These are pretty good. Be sure if you use peppermint oil instead of extract, cut the amount in half.
We tried them dipped in butterscotch too.
These were so good. A lot of work, but tasty and folks really liked them. I made them dairy free using evaporated coconut milk, margarine, and allergen free semi sweet / dark chocolate (50/50 mixture based on what I had on hand). Coating them was better when they were frozen. By the end, I had a couple trays and was rotating them as they warmed up with one that had been in the freezer.
Thank you so much for making them and for taking the time to leave your feedback!
These are the best and super easy to make. I make them every year.
Thank you so much, Angel!
I always have trouble dipping a chilled candy piece into warm melted chocolate, yet I see those instructions frequently. Any tips?
The dipping part can definitely be tricky sometimes, depending on the size of the candy too. But chilling it beforehand definitely helps to keep it together for a bit longer. I always like do one piece of candy at a time and roll it around quickly using either forks or candy dipping tools. Then when I lift up, I tap the fork or candy dipping tool alongside of the saucepan to take off any excess. Then I carefully place it on the wax paper. Hope this helps!
For a mint & chocolate lover, this recipe is dangerously good! I used a chest freezer all afternoon for the slab and then overnight for the rounds so they were thoroughly frozen. Literally my only note is that next time I’ll split the rounds between 2 pans so I could keep half frozen while dipping half in the chocolate. I drizzled with white chocolate but they are super delicious no matter how you finish them (or even without chocolate honestly lol). Huge thumbs up! Also – I did have a few daydreams about other flavors that could be good…raspberry? coconut?
Ooh I like the idea of both of those flavors! Especially the raspberry! Will work on that one soon!! I’m so glad you loved these Sarah! Stay warm!