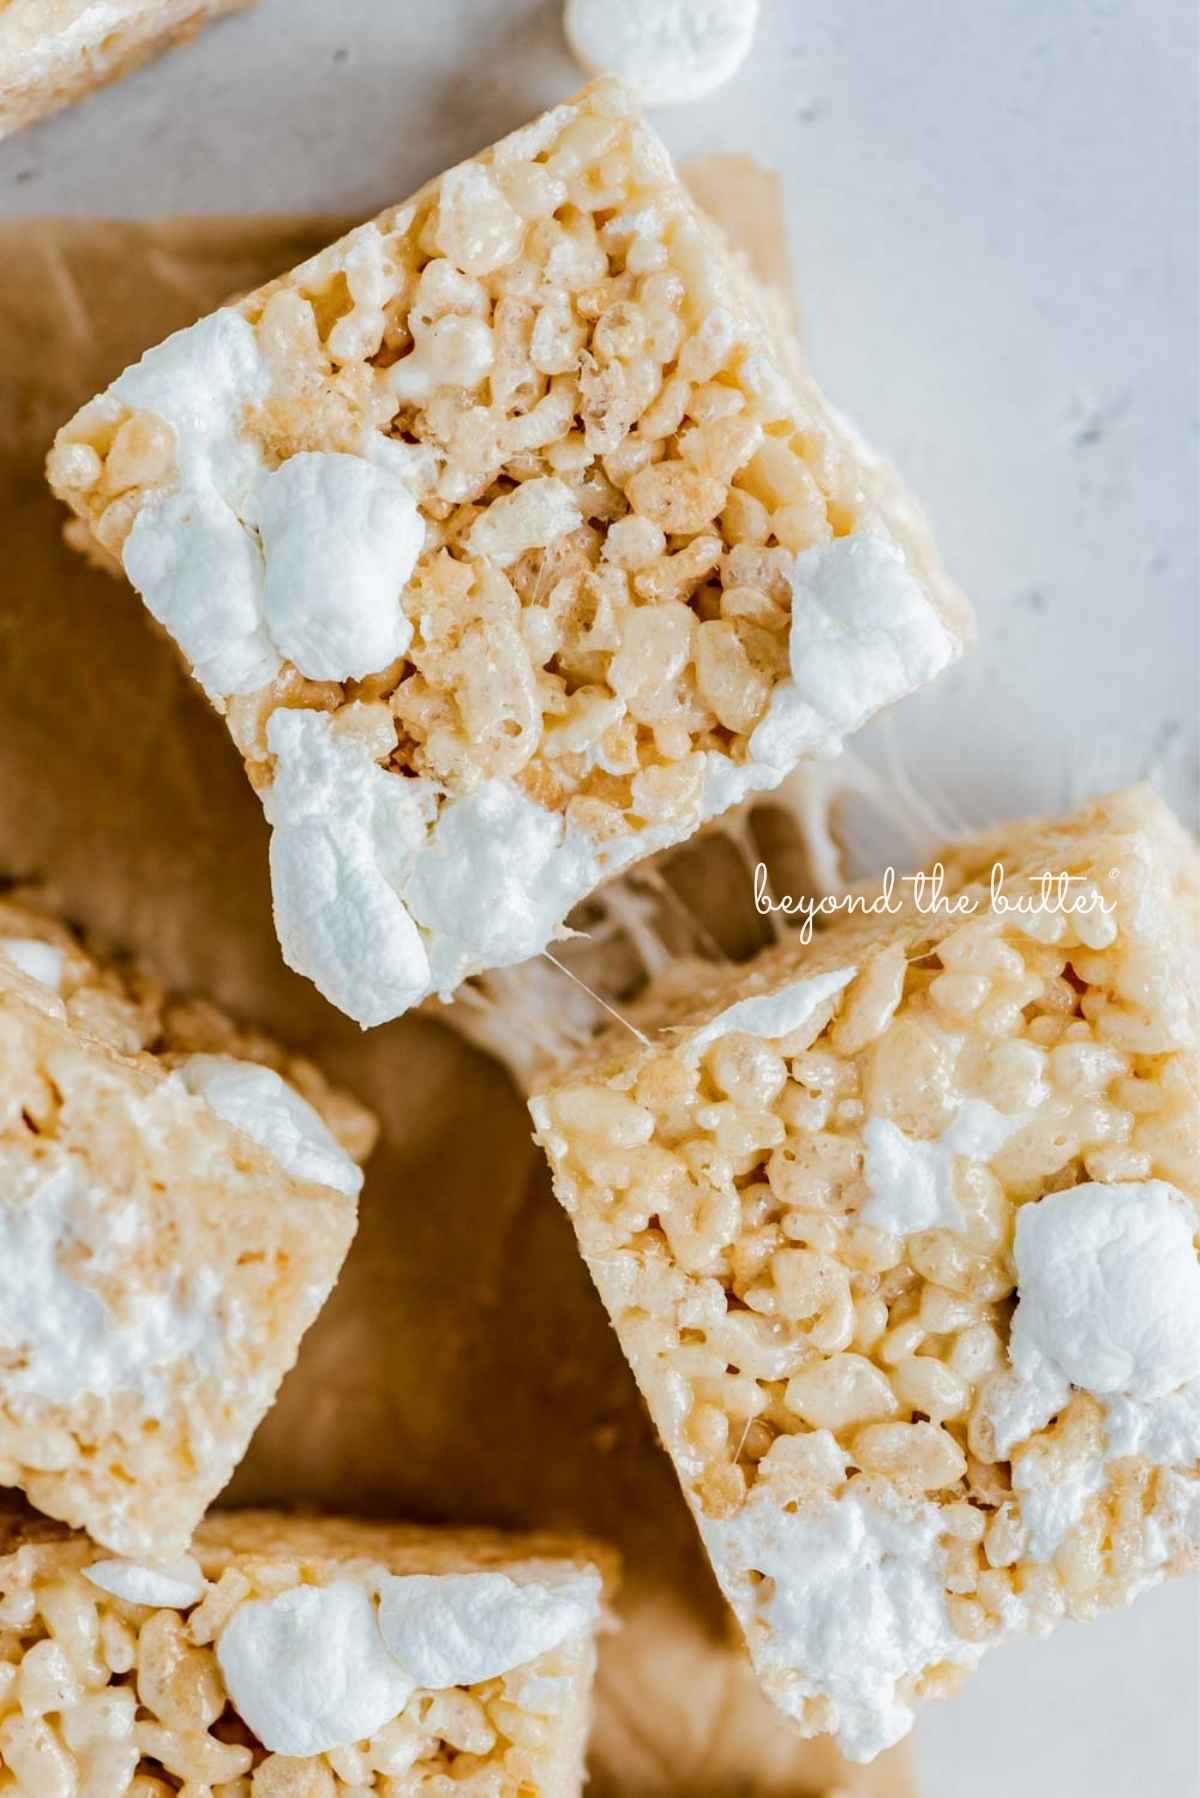
This is the best Rice Krispie Treats recipe for good reason—they’re ooey-gooey, buttery, and loaded with lots of marshmallowy goodness! They take less than 20 minutes to whip up, with a minimum of 1 hour to set, then it’s time to eat!
Why You’ll Love This Recipe

I know that just about everyone says their rice krispie treats are the best, but guys—these really, truly are the best—no joke! My family, my husband, his co-workers, and our neighbors can all attest to how good these really are!
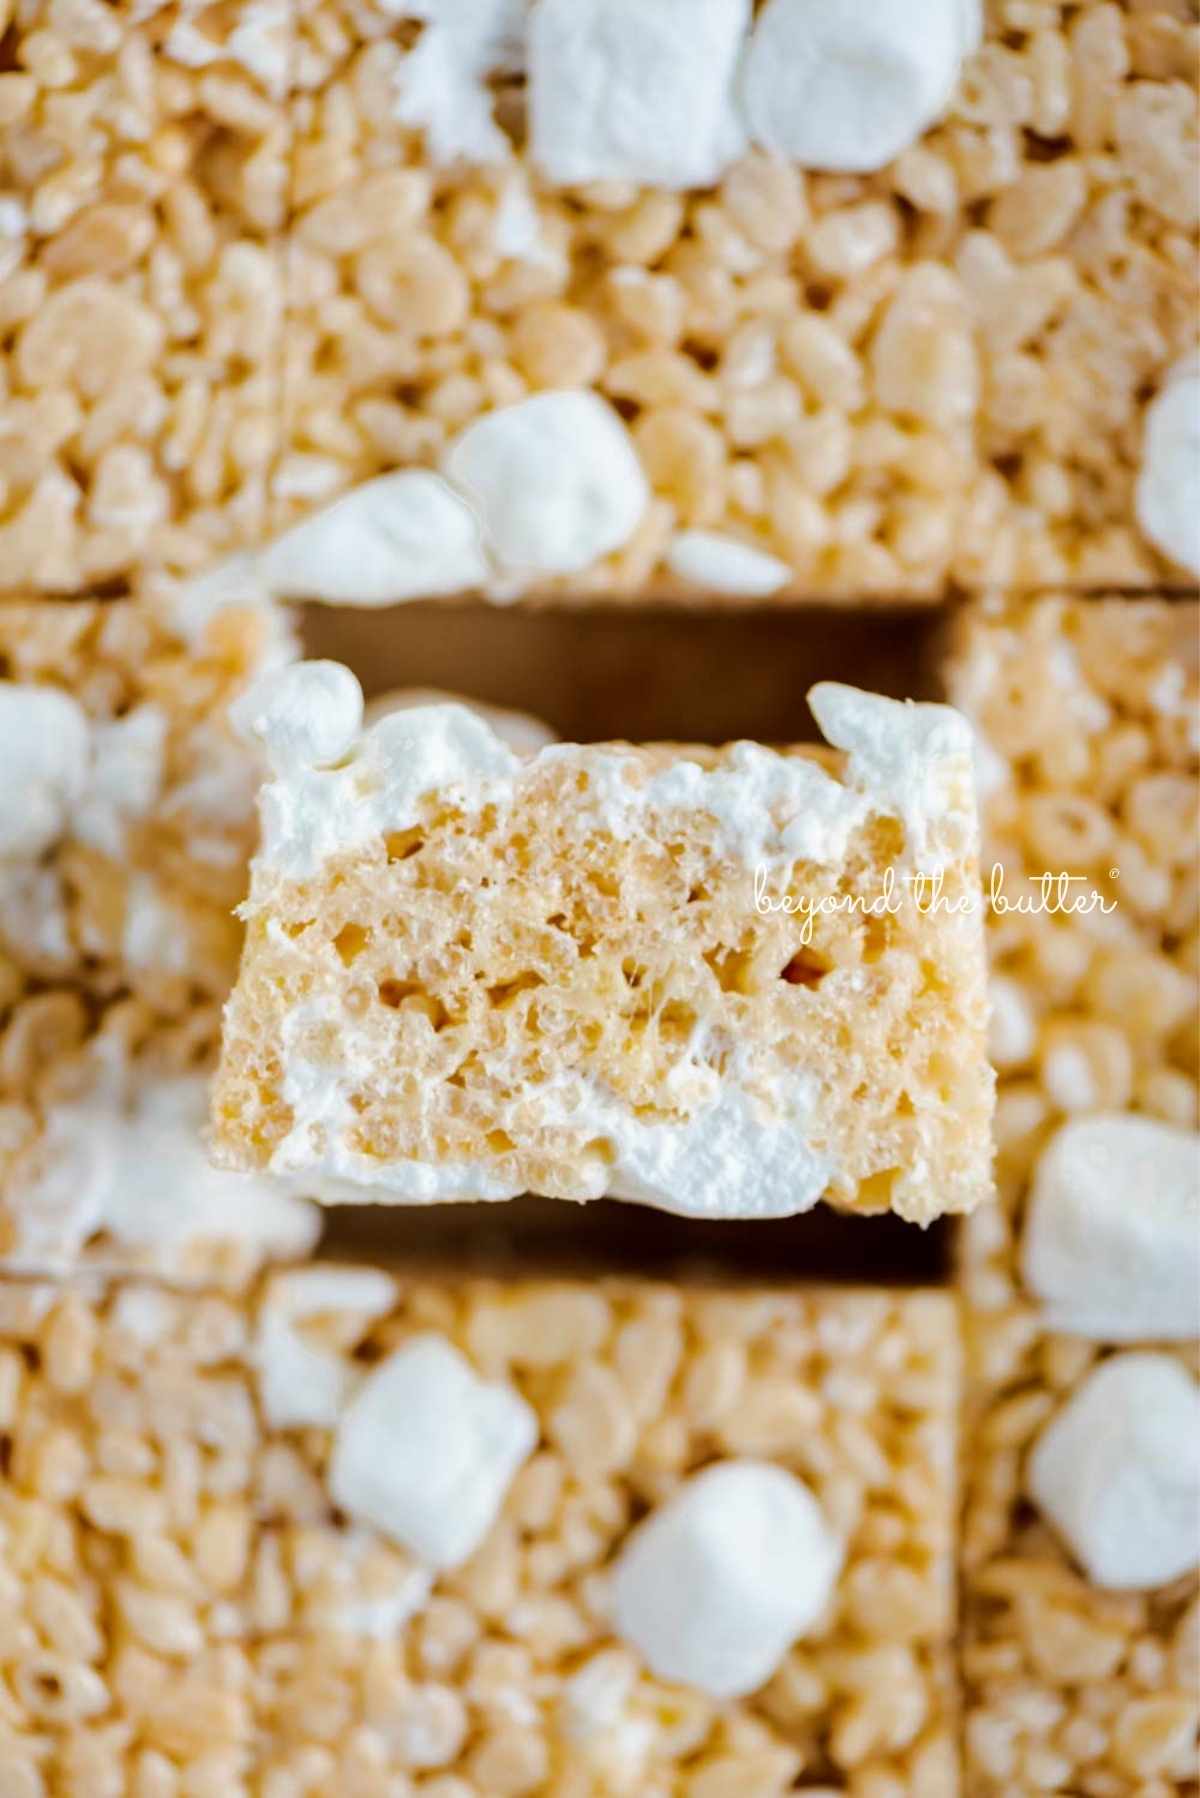
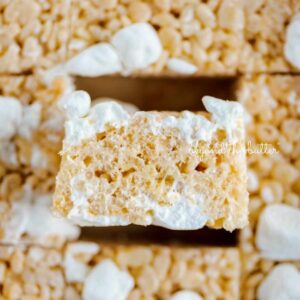
They’re soft and gooey, buttery, and loaded with mini marshmallows! And speaking of marshmallows, the key step in this recipe is adding extra mini marshmallows after you’ve stirred in the crispy rice cereal! It’s what gives them that classic rice krispie treat texture!
They come together in less than 20 minutes, take a minimum of one hour to set, then you can slice them into squares and enjoy! They’re great for summer picnics, holiday parties (like the 4th of July!), birthdays, or whenever!
Enjoy!
Table of Contents
Ingredients Needed
The ingredients below are used to make these easy rice krispie treats. Items noted in the bulleted list are key ingredients that need a bit more explanation.
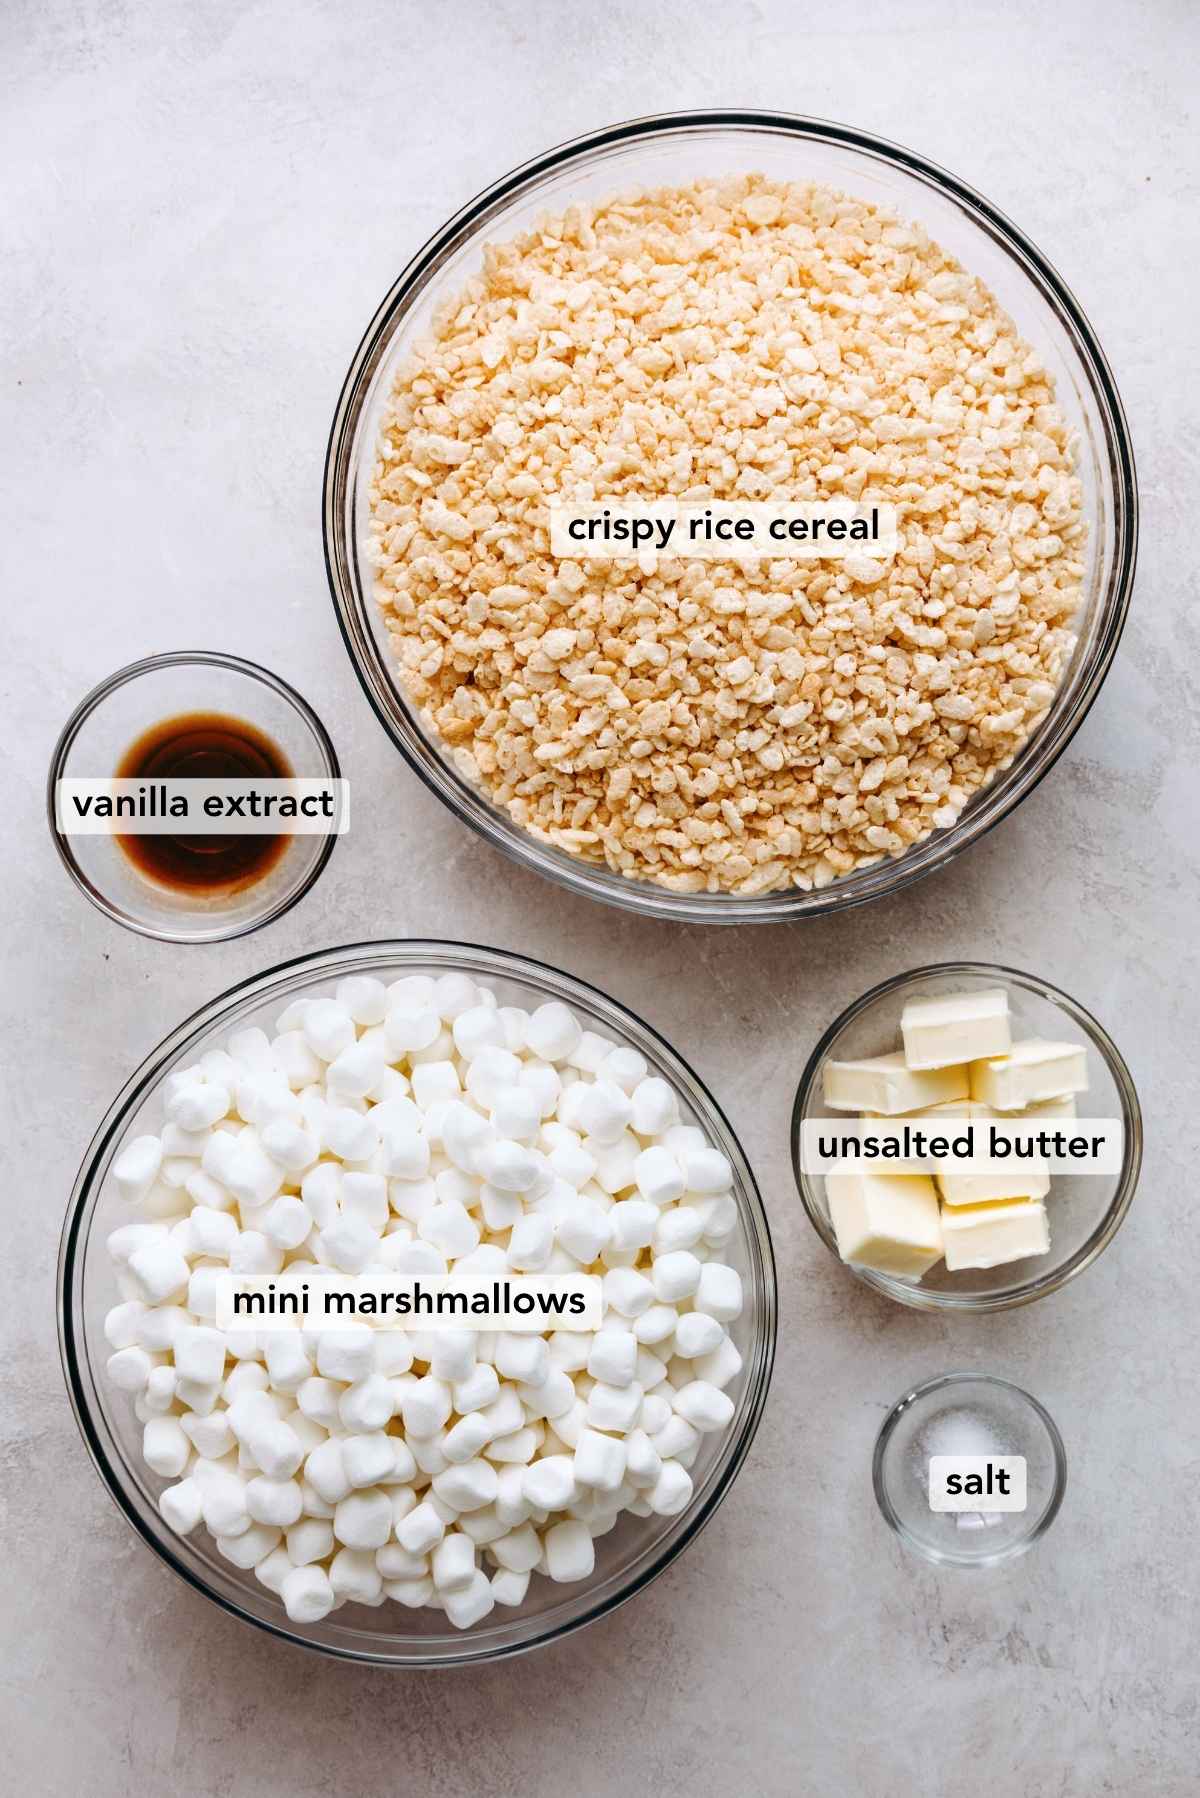
- Unsalted Butter. I typically use unsalted butter, but you can also use salted butter to cut down on the sweetness more. If you use salted butter, omit the salt that’s called for in the recipe.
- Vanilla Extract. You can also use vanilla extract paste. And on occasion, I’ve also added 1/4 teaspoon of almond extract, but this is optional.
- Mini Marshmallows. This probably goes without saying, but make sure the bags of mini marshmallows you use are fresh. Stale mini marshmallows won’t melt as well. You can tell if the mini marshmallows are stale by how thick and dry their exterior feels. Mini marshmallows are preferred over the large marshmallows.
- Crispy Rice Cereal. I’ve used both generic crispy rice cereal and the name-brand Rice Krispies cereal—both are fine! I usually like to get whatever is on sale at my grocery store that week.
For quantities and instructions, please see the recipe card below.

How to Make the Recipe
Below is a quick overview of how to make this classic Rice Krispies treat recipe. For the full printable recipe, with US customary or metric measurements, visit the recipe card below.
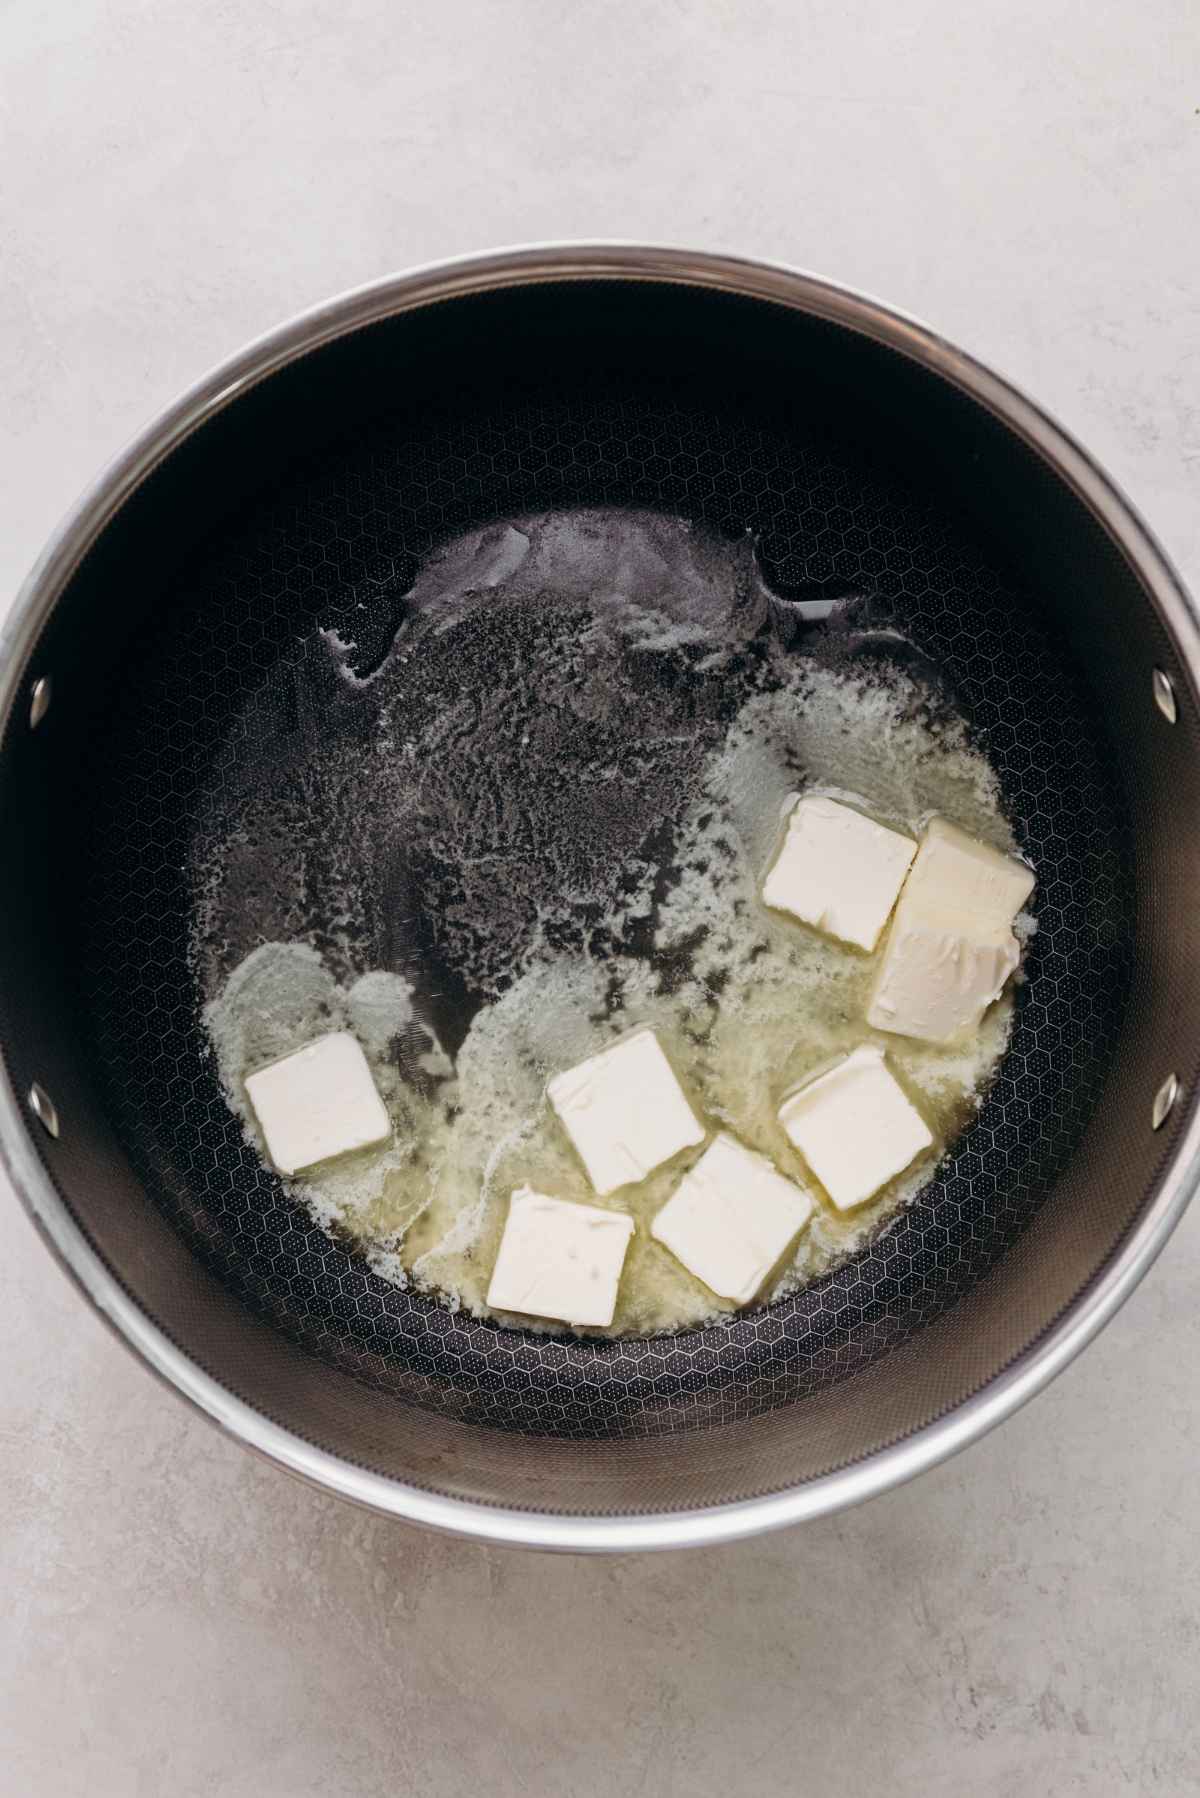
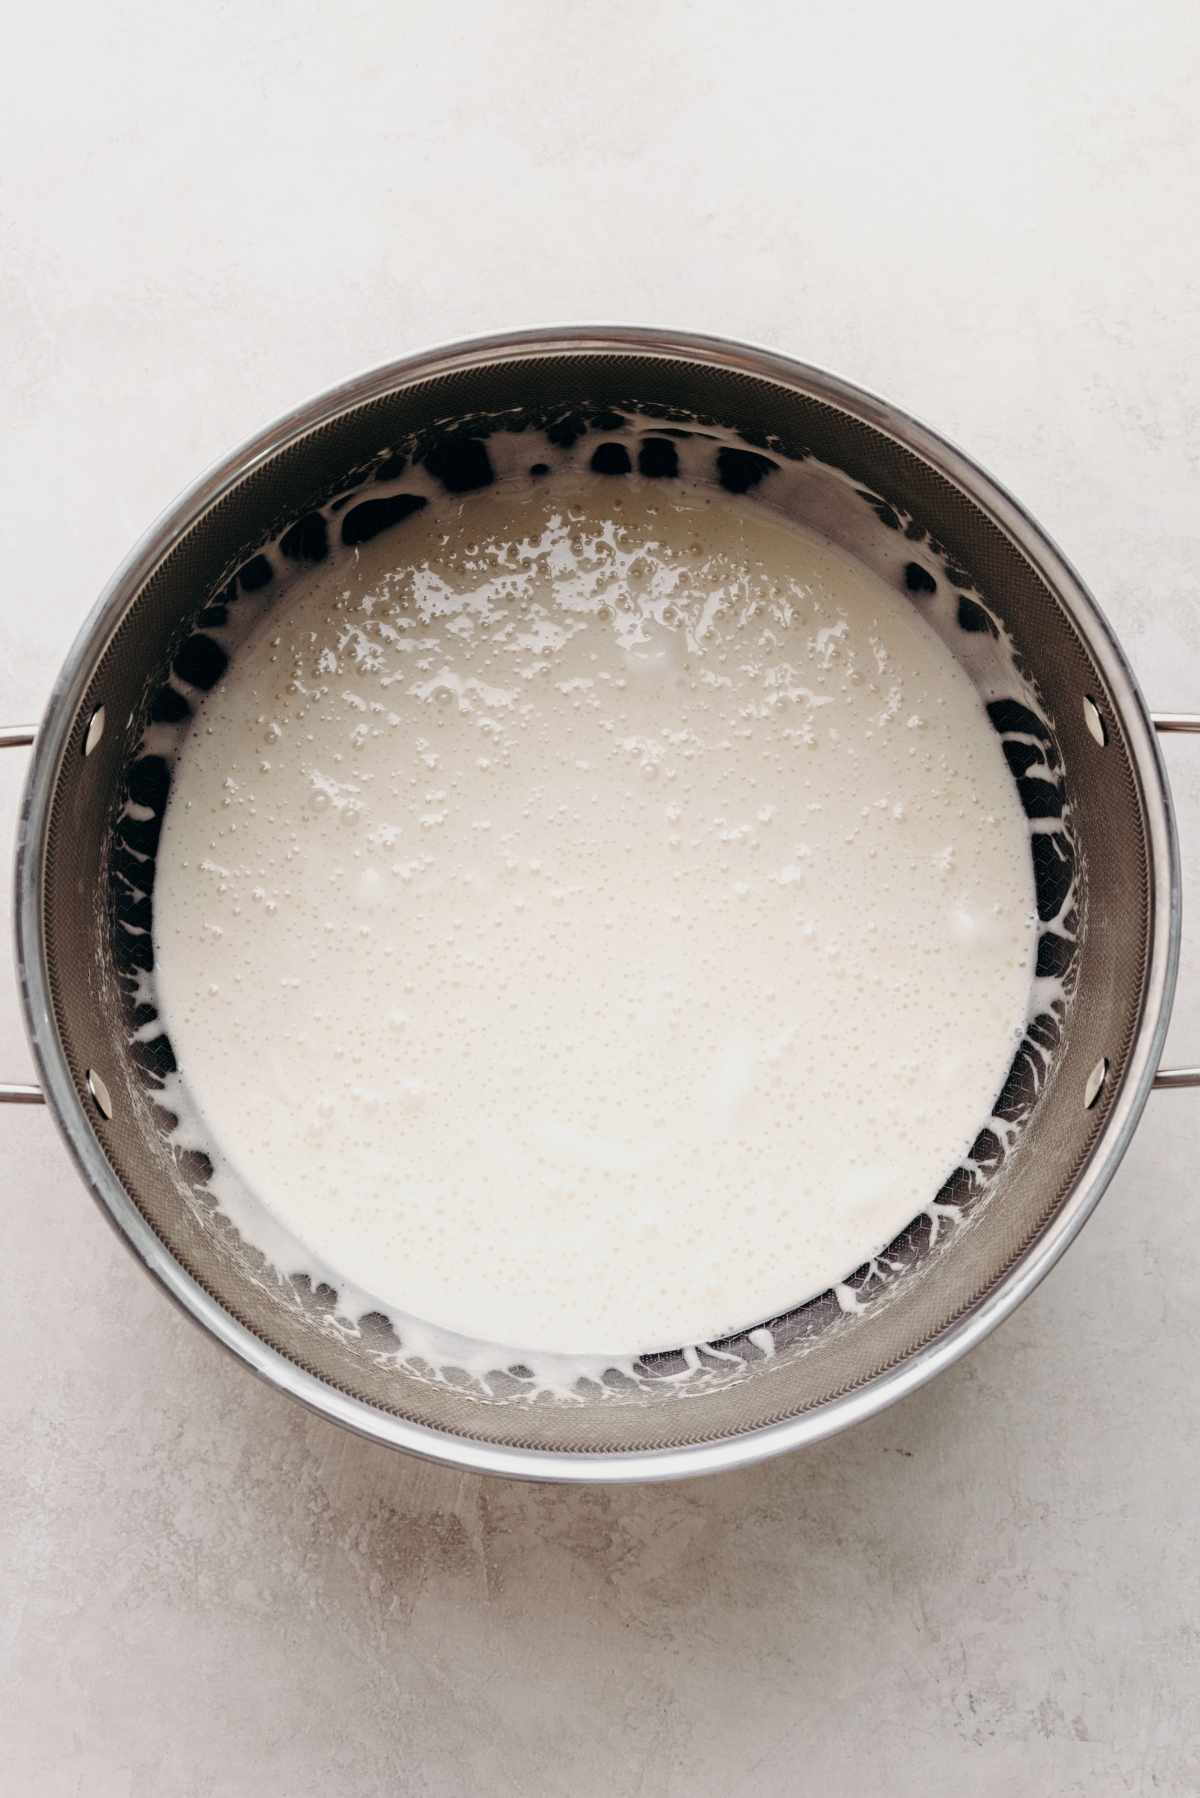
Step 1. Melt the butter in a large stockpot (4-5 quarts) over medium heat.
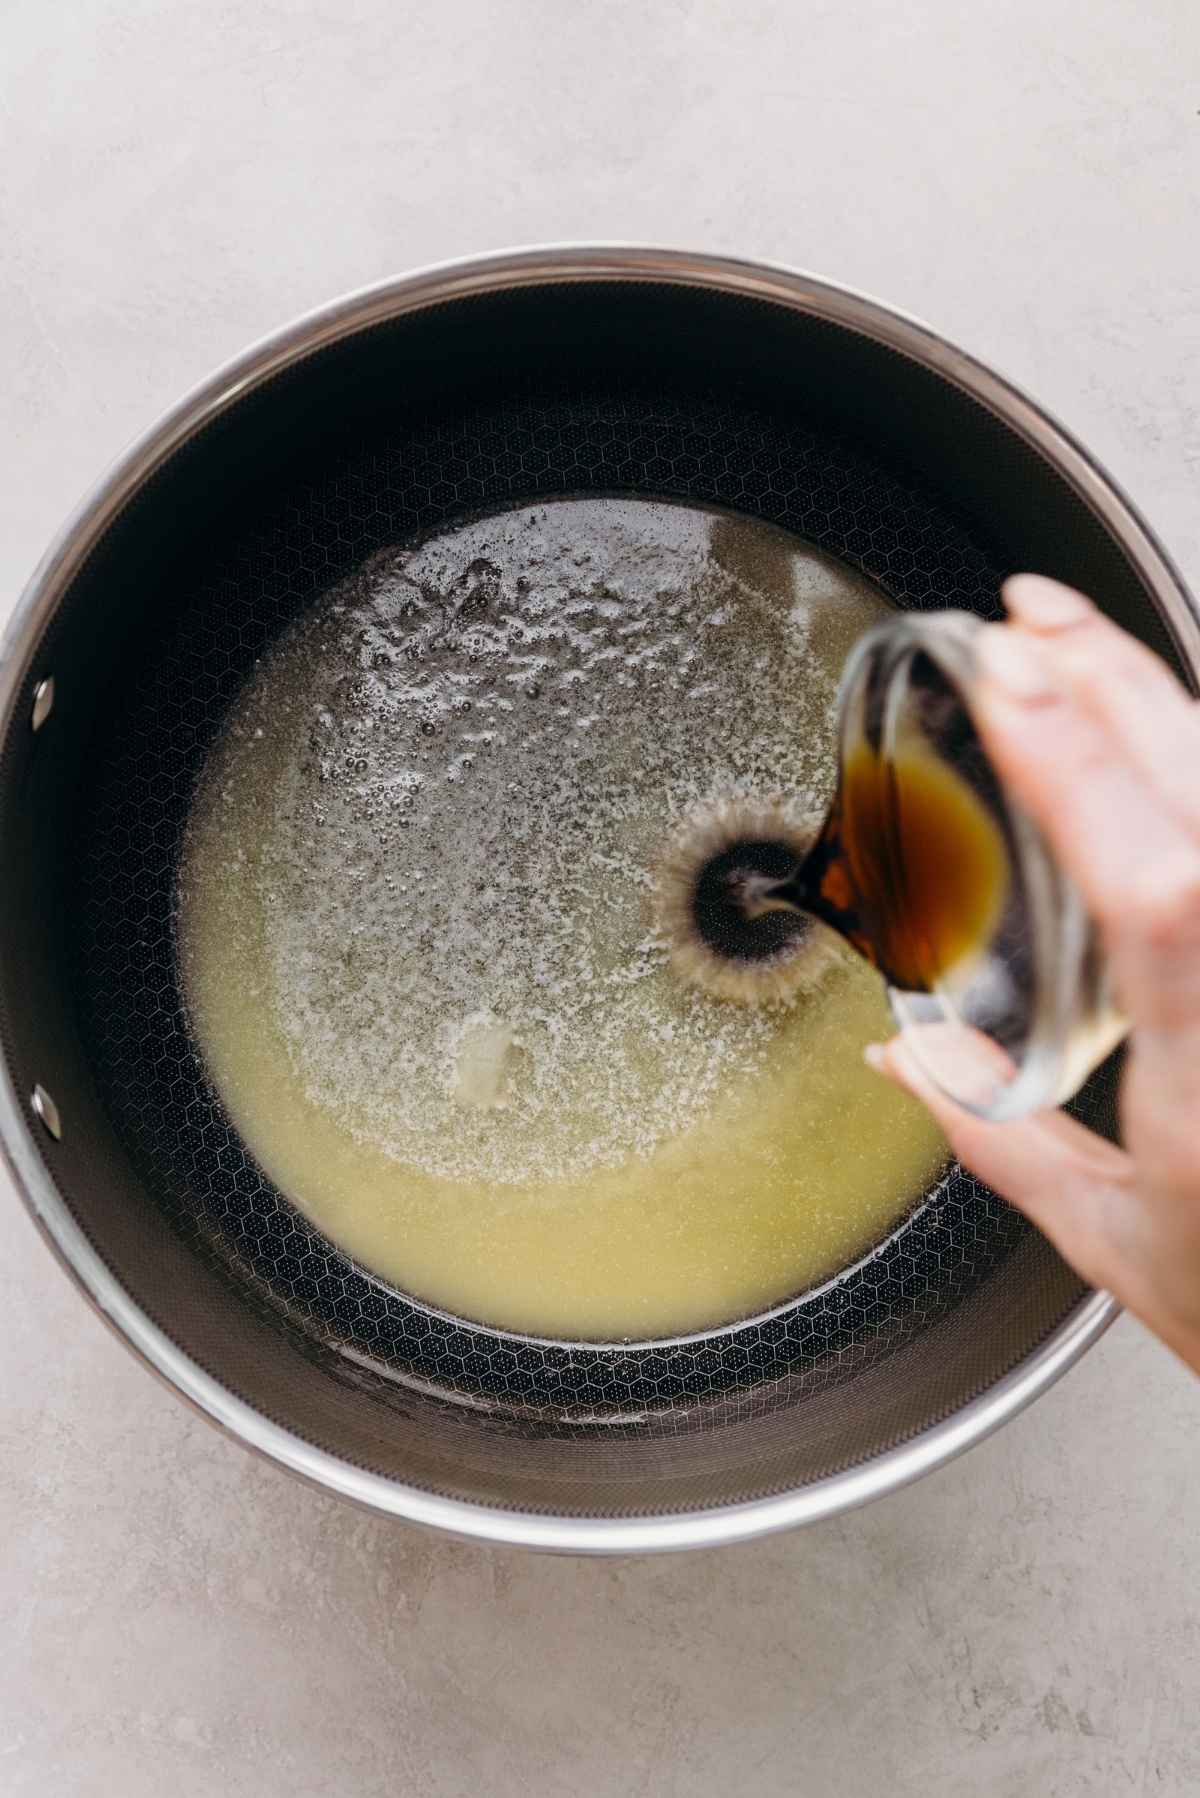
Step 2. Add in the vanilla extract and salt. If using salted butter, omit the salt in this step.
Step 3. Reduce the heat and stir in 1 1/2 bags of mini marshmallows. Reserve the remaining 1/2 bag for the end.
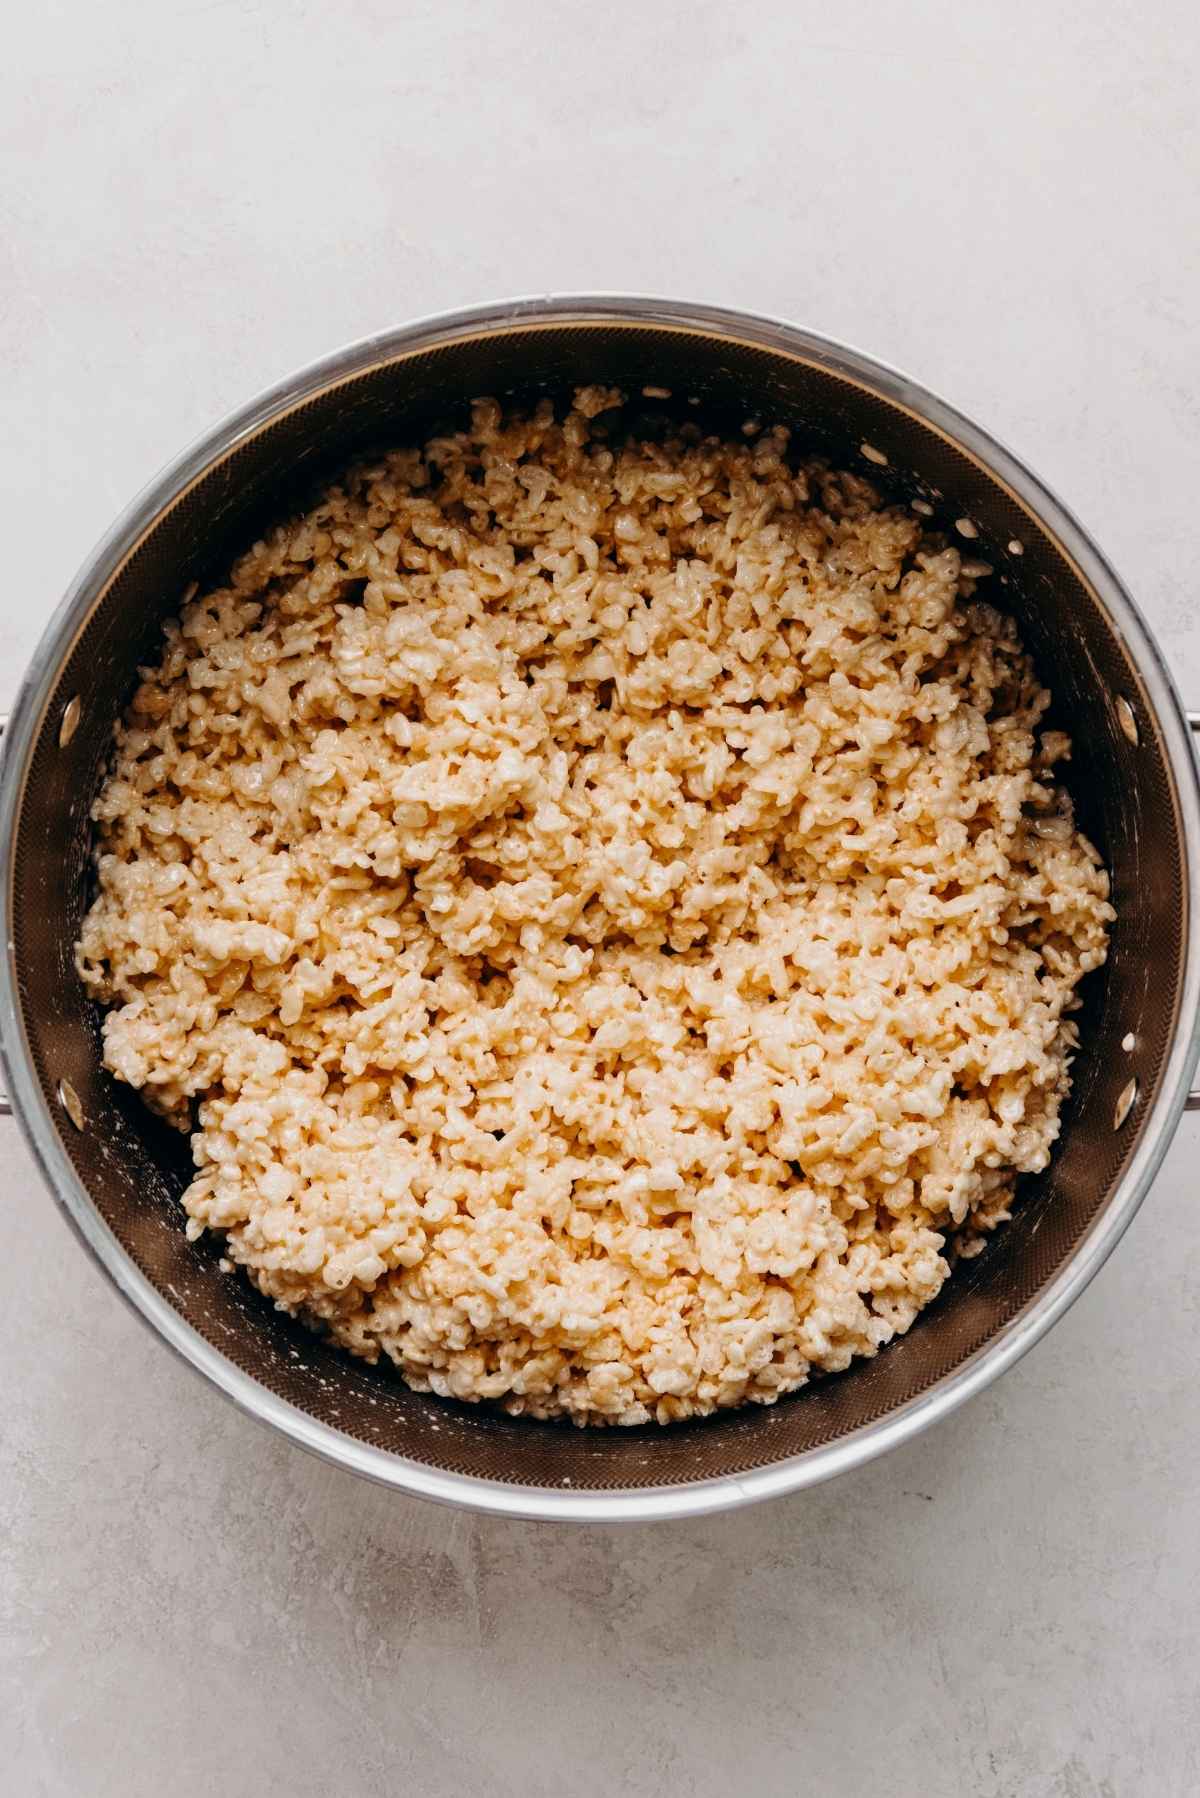
Step 4. Remove from heat and stir in the Rice Krispies cereal. Mix until it’s fully combined.
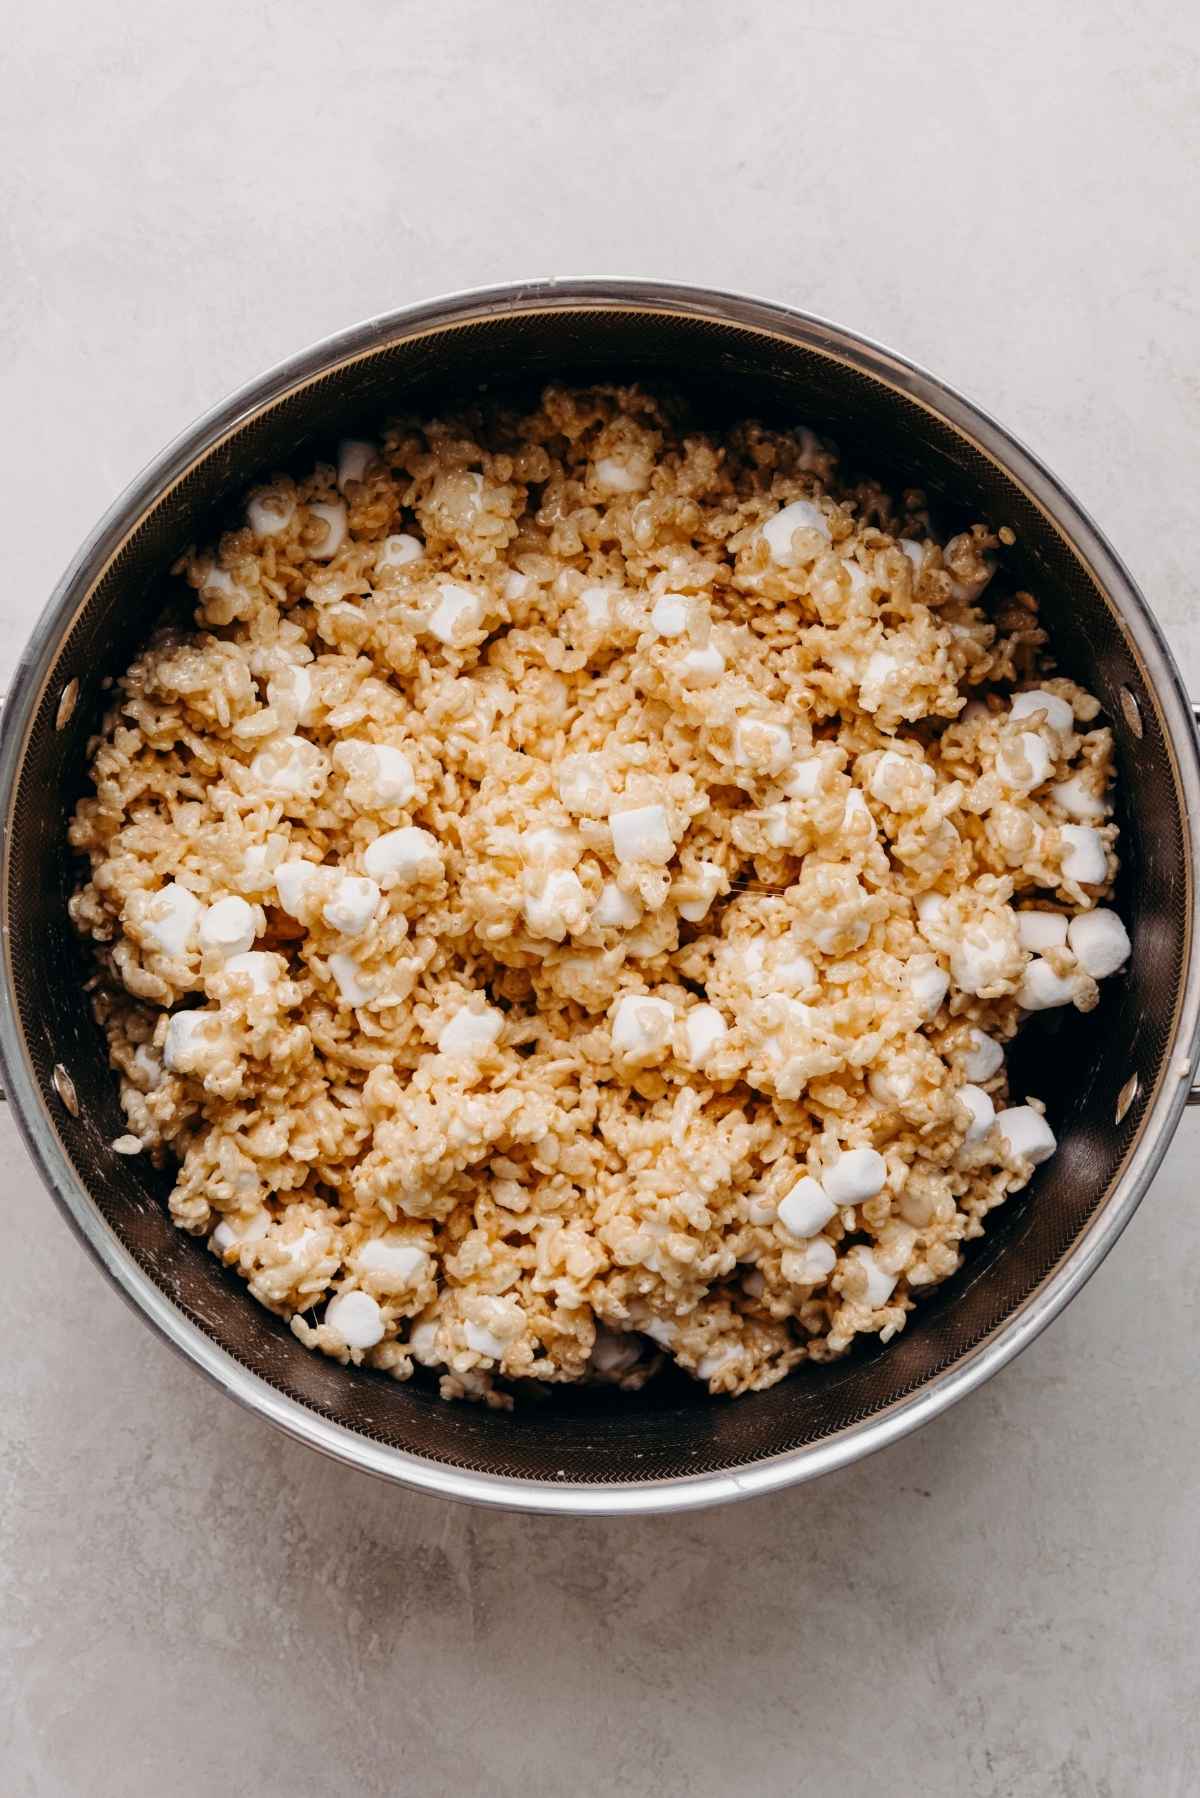
Step 5. Stir in the remaining 1/2 bag of mini marshmallows until they’re evenly distributed throughout the mixture. Do not stir until they’ve fully melted. You want to see the mini marshmallows!
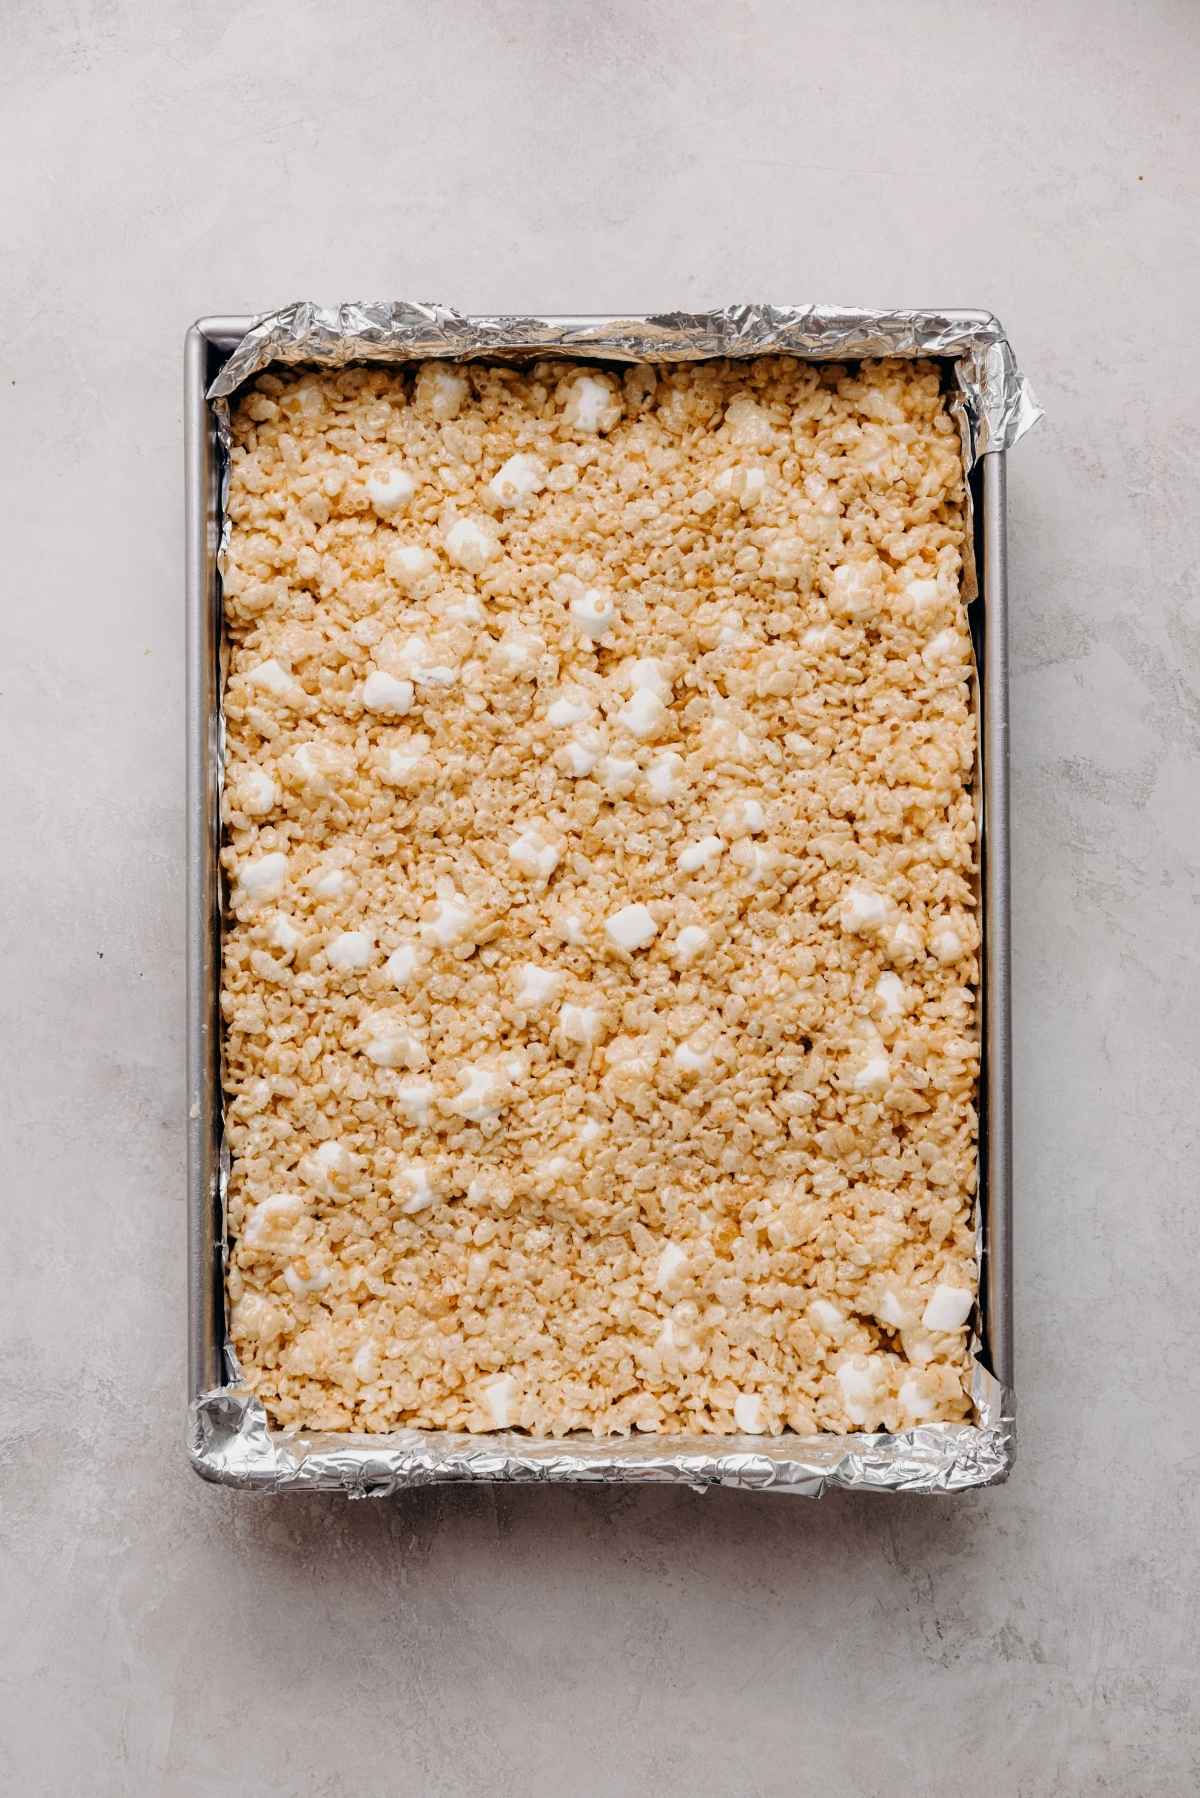
Step 6. Transfer the mixture into the prepared pan. Press it down and smooth out until level. Let it sit for at least 1 hour, then cut into slices and enjoy!
Storage
After slicing the rice krispie treats into squares, keep them stored in an airtight container for up to 5 days at room temperature. I recommend wrapping each one individually in plastic wrap, as they’ll stay soft this way.
They can be kept in the refrigerator for a few more days, but I don’t really recommend it because they’ll get rock-hard.
Recommended Tools
These are the tools I swear by whenever I make my rice krispie treats recipe!
- 9″ x 13″ Rectangular Baking Pan. I have a few rectangular baking pans, but my favorite is my Nordic Ware pan. It’s inexpensive, durable, and comes with a lid (which also doubles as a small cookie sheet if needed), and I love its vintage look.
- Aluminum Foil / Parchment Paper/ or Wax Paper. I prefer placing overlapping sheets of non-stick aluminum foil inside the pan when making this rice krispies treat recipe, but you can also line the pan with parchment paper or wax paper. Whatever you decide to use, it will help with removing them.
- Large-size Pot or Sauce Pan. You’ll need something that can hold a good amount of crispy rice cereal!
- Large Spoon. I’ve used both wooden and silicone spoons. Both work equally well.
- Spatula. After I’ve mixed everything together and scooped it into the foil-lined rectangular pan, I like to use a spatula to press the rice krispie treats mixture down and level everything out.
Helpful Tips
- For a slightly more buttery taste. Reduce the crispy rice cereal to 8 cups.
- Remaining 1/2 bag of mini marshmallows. Stir these into the mixture at the end until they’ve been evenly distributed. Do not stir until they have fully melted. You want to see the mini marshmallows!
- Prepping your pan. I recommend placing overlapping sheets of non-stick aluminum foil, parchment paper, or wax paper inside the pan. If you’re using parchment paper, I recommend lightly spraying the paper. You don’t have to go crazy; you just want enough to make the parchment paper come off easier later, after you’ve lifted the treats from the pan.
- Use a spatula to press the rice krispie treats into the pan. Some people like to use their hands. I prefer to use a spatula. It pushes the rice krispie treats down well and evenly across the top.
- Spray the bottom of the spatula. To prevent the rice krispie treat mixture from sticking to the spatula while pressing it into the rectangular pan, spray the bottom of it with a little flour-based baking spray. Using the spray keeps all that ooey-gooeyness in the pan, rather than all over your spatula. If you don’t have any baking spray, rubbing some butter along the bottom of the spatula will work too.
- Let them sit. The rice krispie treats need to sit at room temperature for at least 1 hour before being removed from the pan and cut into squares.
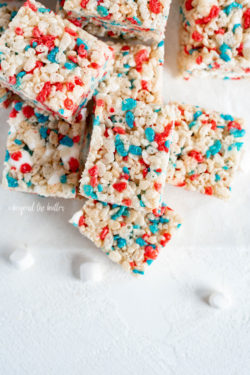
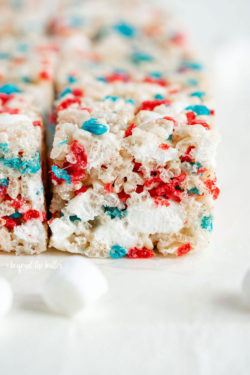
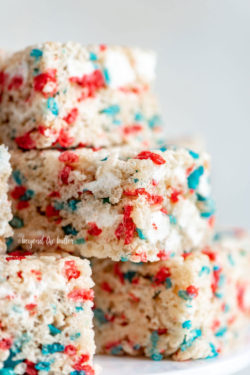
Alternative Holiday Version
You can swap out the original Rice Krispies cereal for any of their holiday-themed versions to make this recipe, like their 4th of July red, white, and blue cereal! Don’t forget to add the extra mini marshmallows!
Recipe FAQs
Yes! Using salted butter can further cut down on the sweetness. If you use salted butter, omit the salt called for in the recipe.
It’s best to use fresh mini marshmallows as stale ones can make your treats feel tough and hard to chew. Save the stale ones to use for s’mores or hot cocoa!
Yes! For thicker rice krispie treats, like you sometimes see at certain chain restaurants, you can use an 8-inch or 9-inch square pan. Use a spatula to press the mixture into the pan.
If you tried this Rice Krispie Treats recipe or any other recipe on my website, please leave a 🌟 star rating and let me know what you thought in the 📝 comments below. Thanks for visiting!
Best Rice Krispie Treats
Equipment
Ingredients
- 8 tbsp Unsalted Butter, melted
- 2 tsp Vanilla Extract
- 1/8 tsp Salt
- 21 oz Mini Marshmallows (2, 10.5 oz bags), divided (1 1/2 bags for the initial mixture, the remaining 1/2 bag for the end)
- 9 cups Rice Krispies Cereal
Instructions
- Line a 9" x 13" baking pan with aluminum foil, then butter or spray the inside with a little baking spray. Set aside.
- In a large-size pot, melt the unsalted butter over medium heat. Stir in the vanilla extract and salt. Note: 1/8 tsp salt = a pinch of salt.8 tbsp Unsalted Butter, 2 tsp Vanilla Extract, 1/8 tsp Salt
- Reduce the heat and stir in 1 1/2 bags (15.75 oz.) of mini marshmallows until completely melted.21 oz Mini Marshmallows (2, 10.5 oz bags)
- Remove from heat and add in the rice krispies cereal, stirring until the mixture is fully combined.9 cups Rice Krispies Cereal
- Add in the remaining 1/2 bag of mini marshmallows and stir until they’ve been evenly distributed through out the mixture. Do not continue to stir these until they’ve full melted. You want to have the mini marshmallows showing in the rice krispie treats after cutting them into squares.
- Scoop the rice krispie treats mixture into the aluminum foil-lined and buttered pan and, using a spatula, press down on the mixture and smooth out until level and all the corners have been filled in.
- Allow the rice krispie treats to set for a minimum of 1 hour before removing them with the foil from the pan and cutting them into squares.
- Keep them stored in an airtight container at room temperature for up to 5 days. You can also individually wrap them in plastic wrap to help preserve the softness (or if giving out to friends).
Video
Notes
Nutrition
Nutritional information provided above is an estimate only and will vary based on specific ingredients used. See Nutritional Disclaimer for more info.


Best ever!!!
These are worthy of being called “The Best”! My go-to Rice Krispies Treat recipe now. Love the vanilla and salt and extra butter. Plus they are a chunky size which is so yummy. I shared them with my coworkers and they are a huge hit!
Thank you, Emily!🥰
These look like all my childhood dreams realized. Also, yes to the tip about stale marshmallows! I have been down that road more than once!
Aw thanks Jo! ❤️