
This easy homemade Chocolate Peanut Butter Fudge recipe is the perfect no-bake treat for any chocolate-peanut butter lover in your life! It’s creamy and delicious, requires only six ingredients, and can be made in less than 15 minutes!
I am always a fan of an easy no bake dessert, like my Easy Blender Chocolate Mousse, Homemade Chocolate Truffles, and my Easy Chocolate Peanut Butter Fudge recipe is no exception! It’s a nostalgic treat I grew up loving that’s super easy to make! When you want to please a small crowd, you can’t go wrong with this recipe!
And if you enjoy my Chocolate Peanut Butter Fudge recipe, you’ll definitely want to check out my No Bake Chocolate Cream Pie, Chocolate Covered Peanut Butter Hearts, Homemade Peppermint Patties, or my Chocolate Marshmallow Tart!
Table of Contents
Ingredients Needed
The list is short here—only the following six ingredients are needed to make this super easy chocolate peanut butter fudge recipe.
- Semi-Sweet Chocolate Chips. Or you can use a good quality 60% or 70% dark chocolate. I used Ghirardelli’s semi-sweet chocolate chips.
- Peanut Butter. It’s best to use a creamy, no-stir type of peanut butter. I prefer either Wegman’s creamy peanut butter or Jif’s natural peanut butter.
- Sweetened Condensed Milk. You’ll need a full 14-ounce can of this sweet stuff. Do not confuse this with evaporated milk. It is not the same thing!
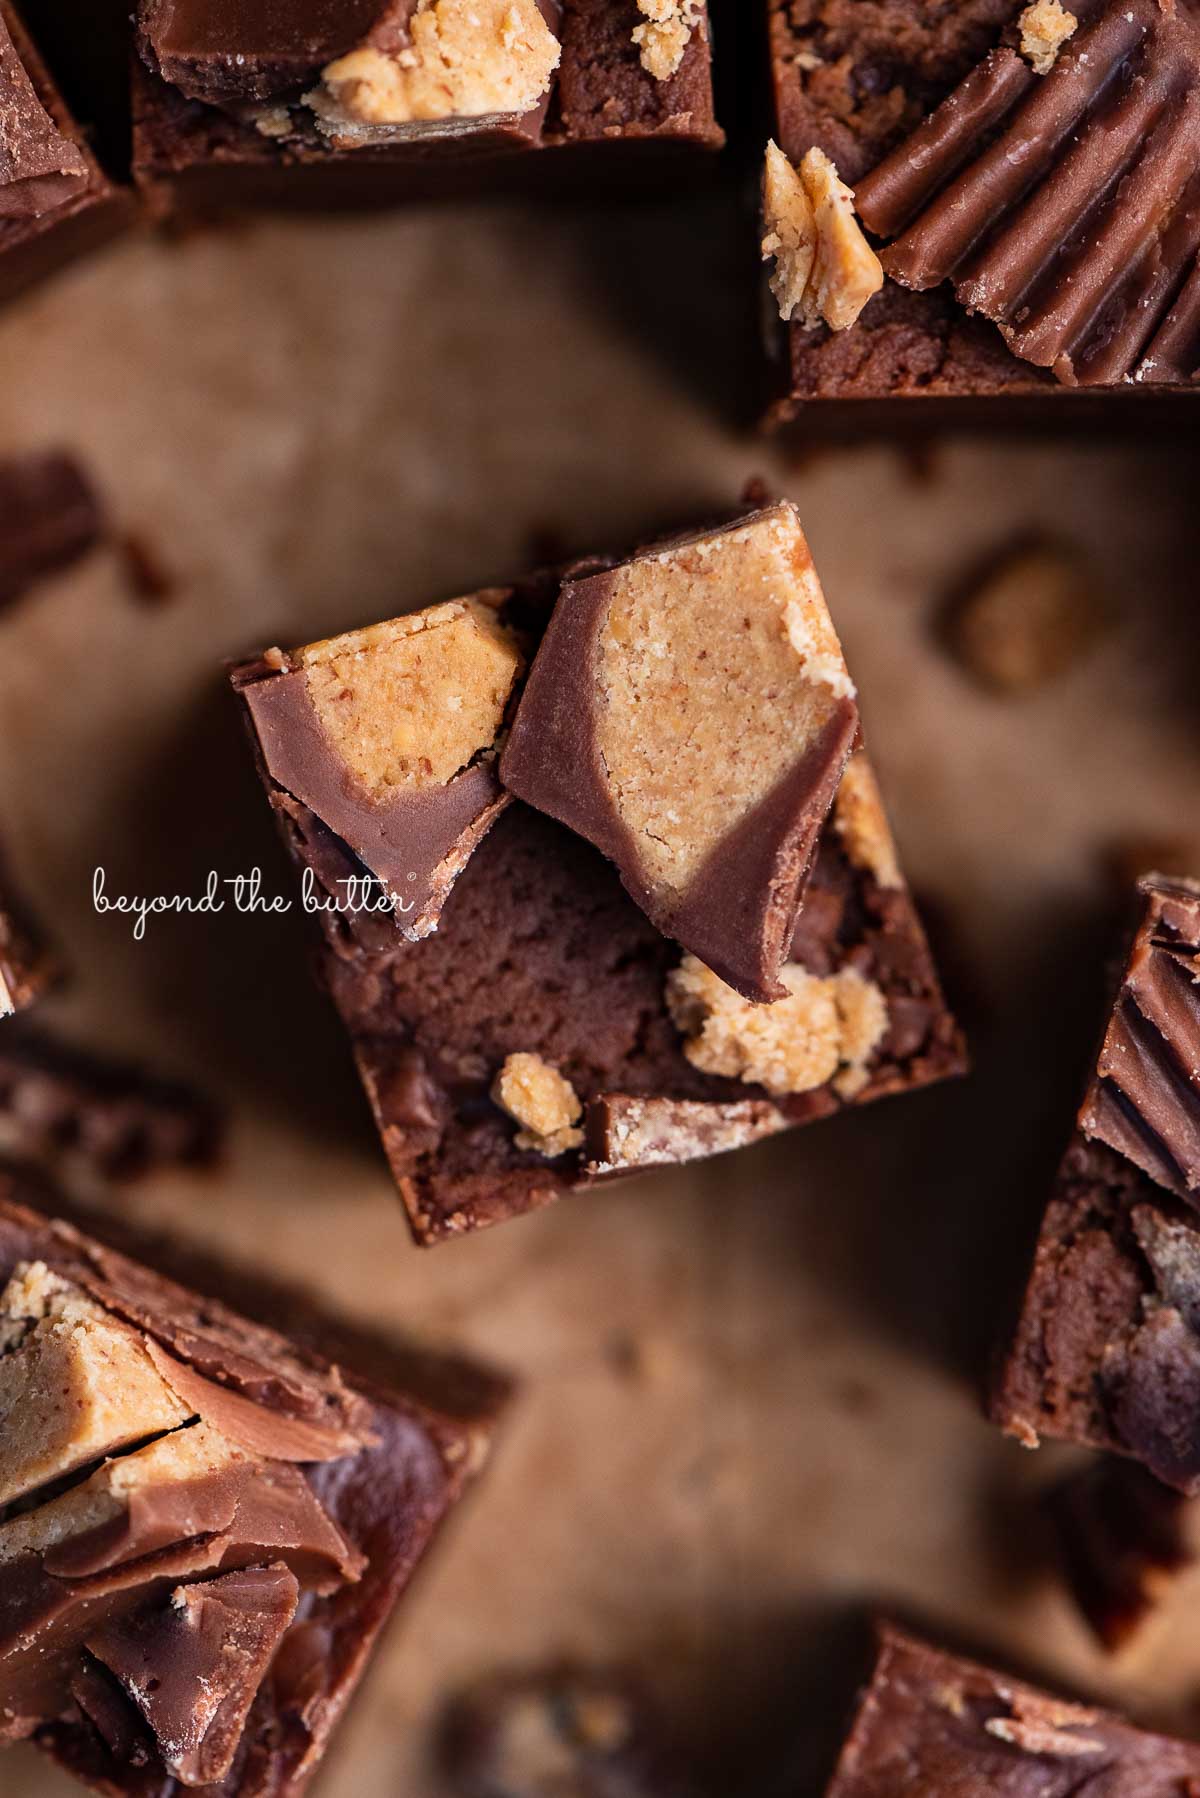
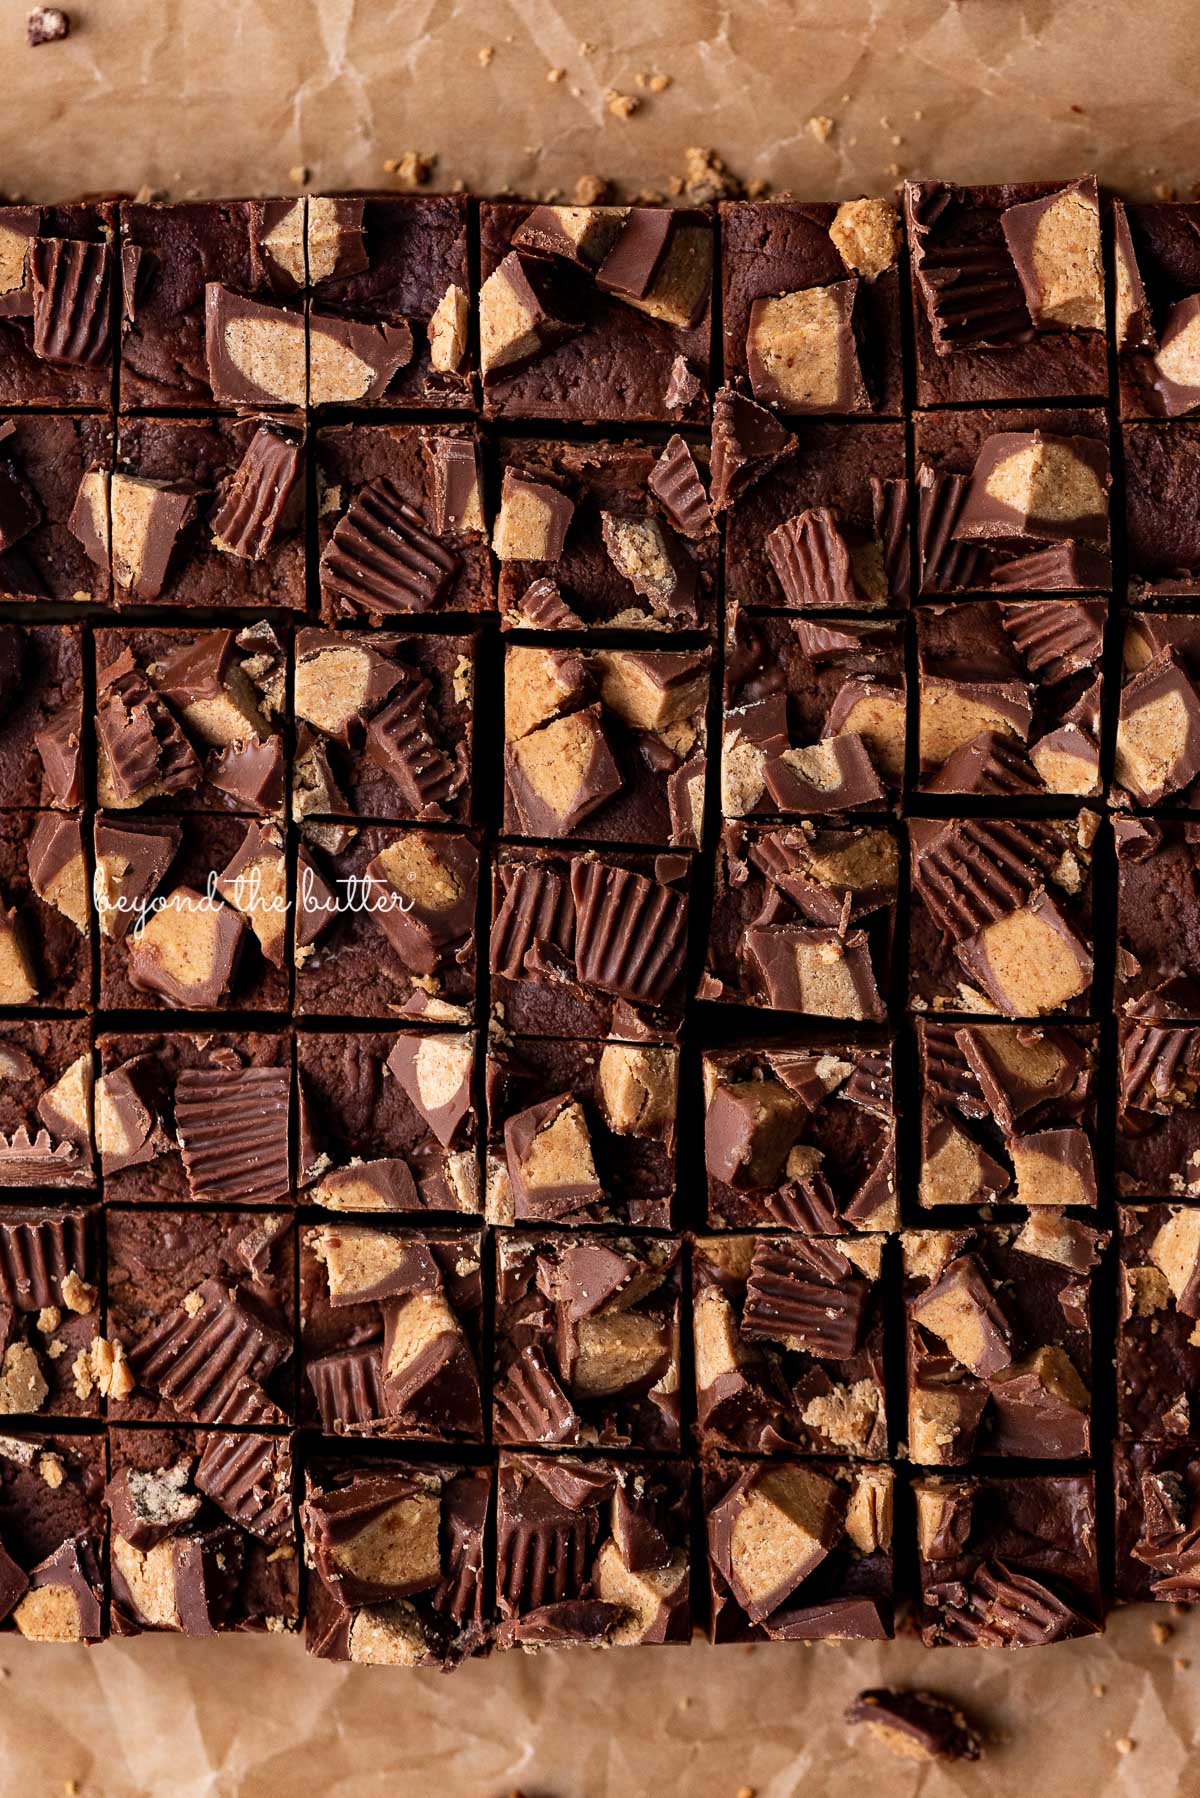
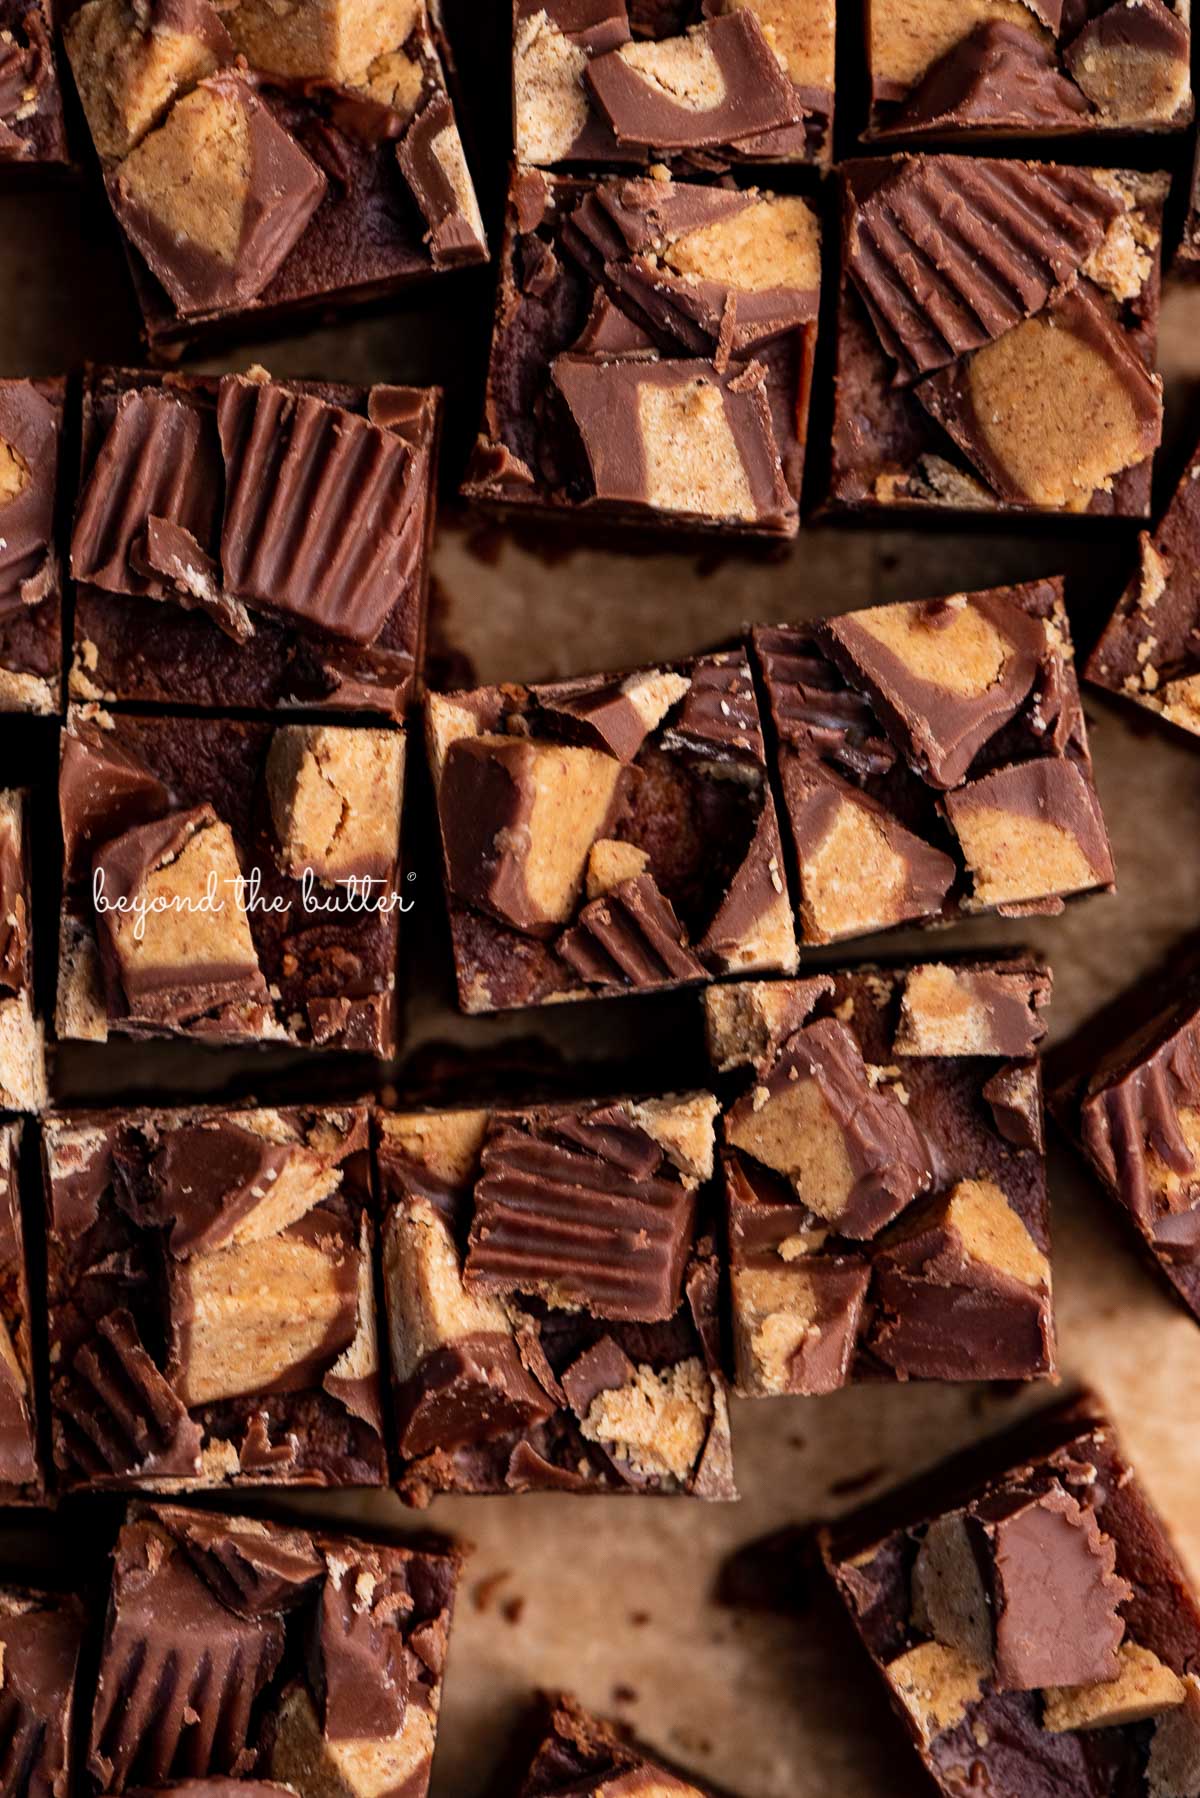
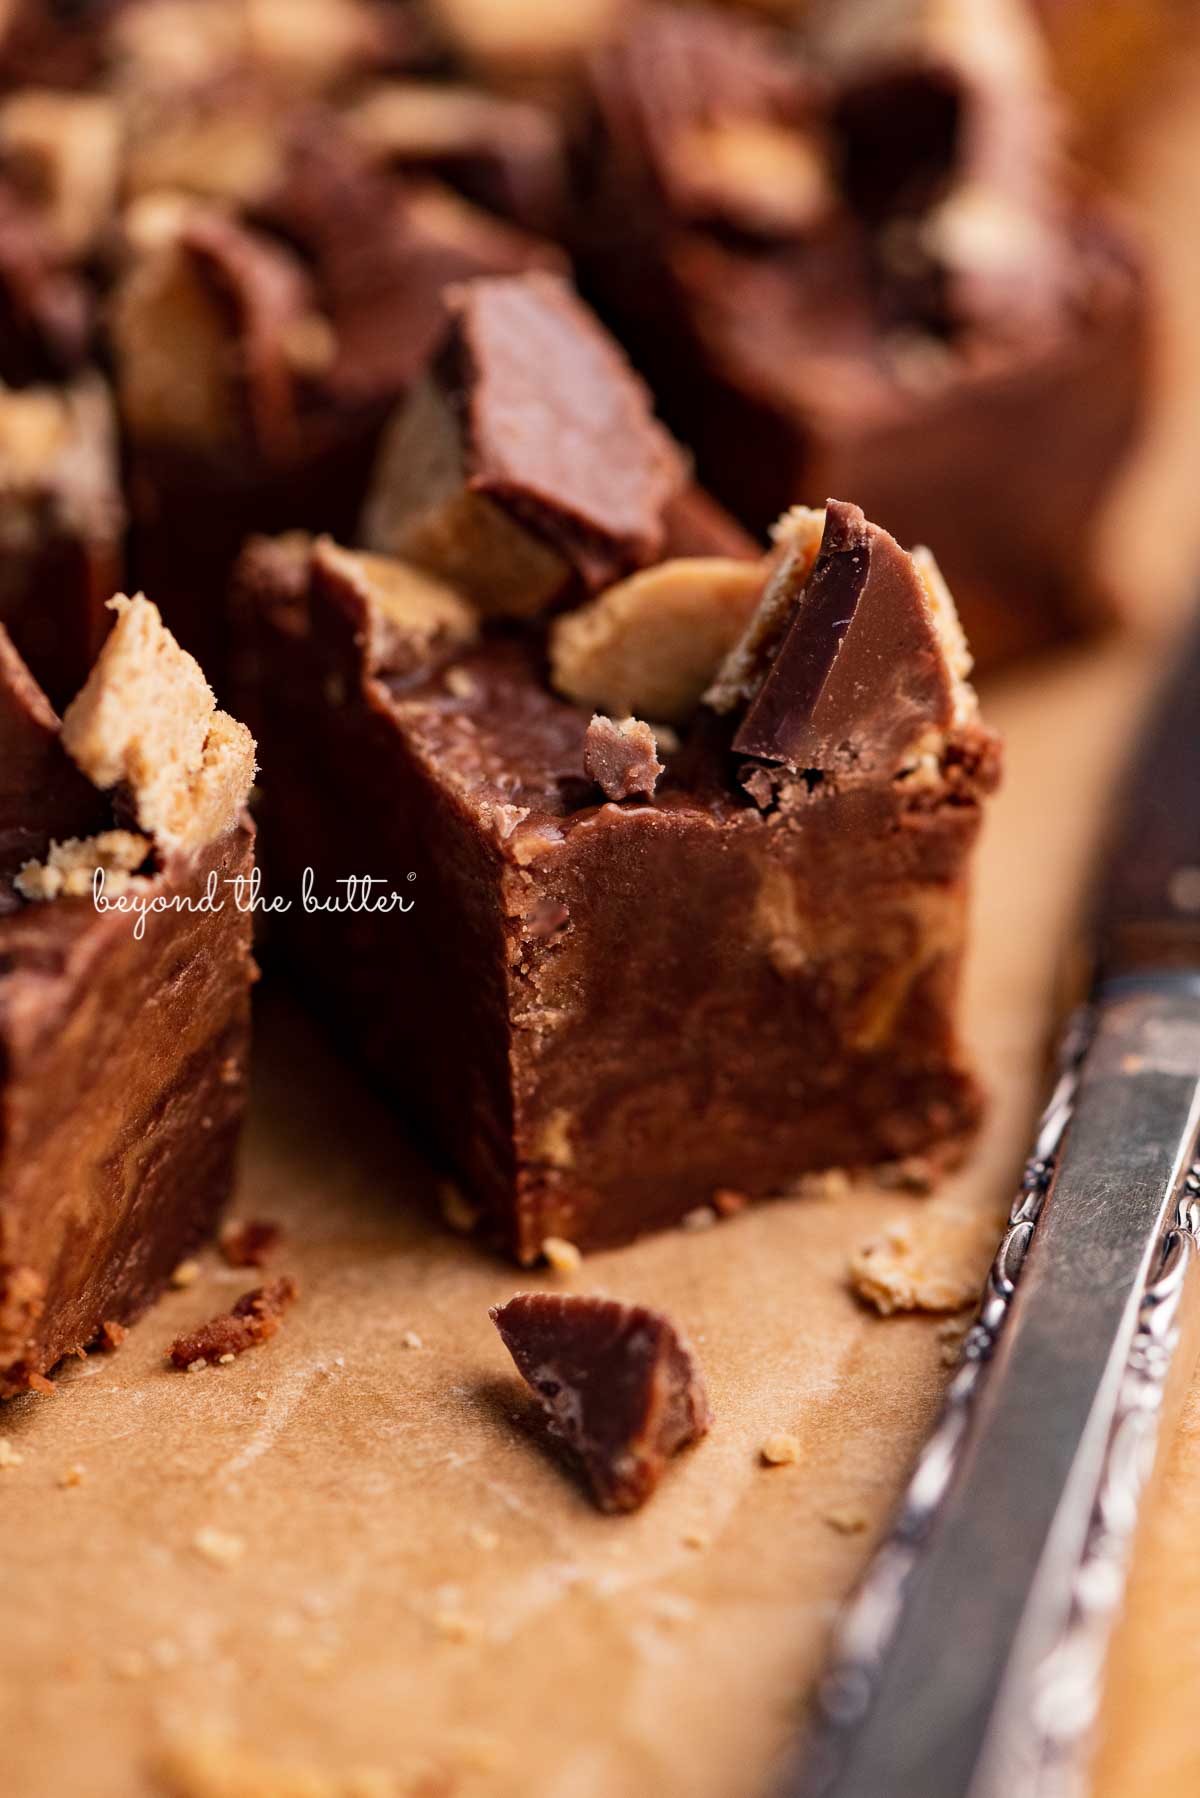
- Mini Peanut Butter Cups. They’ll get chopped up and used as the topping! Reese’s is always a good bet, but ALDI makes them as well, and they are AMAZING.
- Vanilla Extract and Salt. You’ll also need vanilla extract and salt to balance the sweetness and round out the flavors.
I did not try this recipe using any other ingredients or methods. If you’d like to see a different method for making fudge using heavy cream, check out my Cookies and Cream Fudge recipe!
How to Make the Recipe
Step 1. Chop up the mini peanut butter cups. I chopped up almost a full bag of mini peanut butter cups. Set aside—you’ll use these as the topping in a few minutes!
Step 2. Melt the chocolate chips with the sweetened condensed milk. Use a large glass mixing bowl to heat the two ingredients together. I recommend heating them up for 1 minute at full power, stirring them together until most chocolate chips have melted into the sweetened condensed milk. Then heat again for 30 seconds at 60% power.
Step 3. Add in the peanut butter. I went with 1 3/4 cups of creamy peanut butter. If you want more chocolate flavor than peanut butter, you can reduce this amount to 1 1/2 or even 1 cup. Add in the vanilla extract and salt, then stir it all together—leaving some swirls of the peanut butter, too, is okay.
Step 4. Transfer to the pan. Once transferred, level and smooth it out with a spatula. Top with the mini peanut butter cups you chopped up a few minutes prior. Gently push them into the top of the fudge, which will already start to set.
Step 5. Chill the fudge. The minimum time needed is 1 hour, but leaving it in the refrigerator overnight is fine. You can also freeze it too (for up to 3 months).
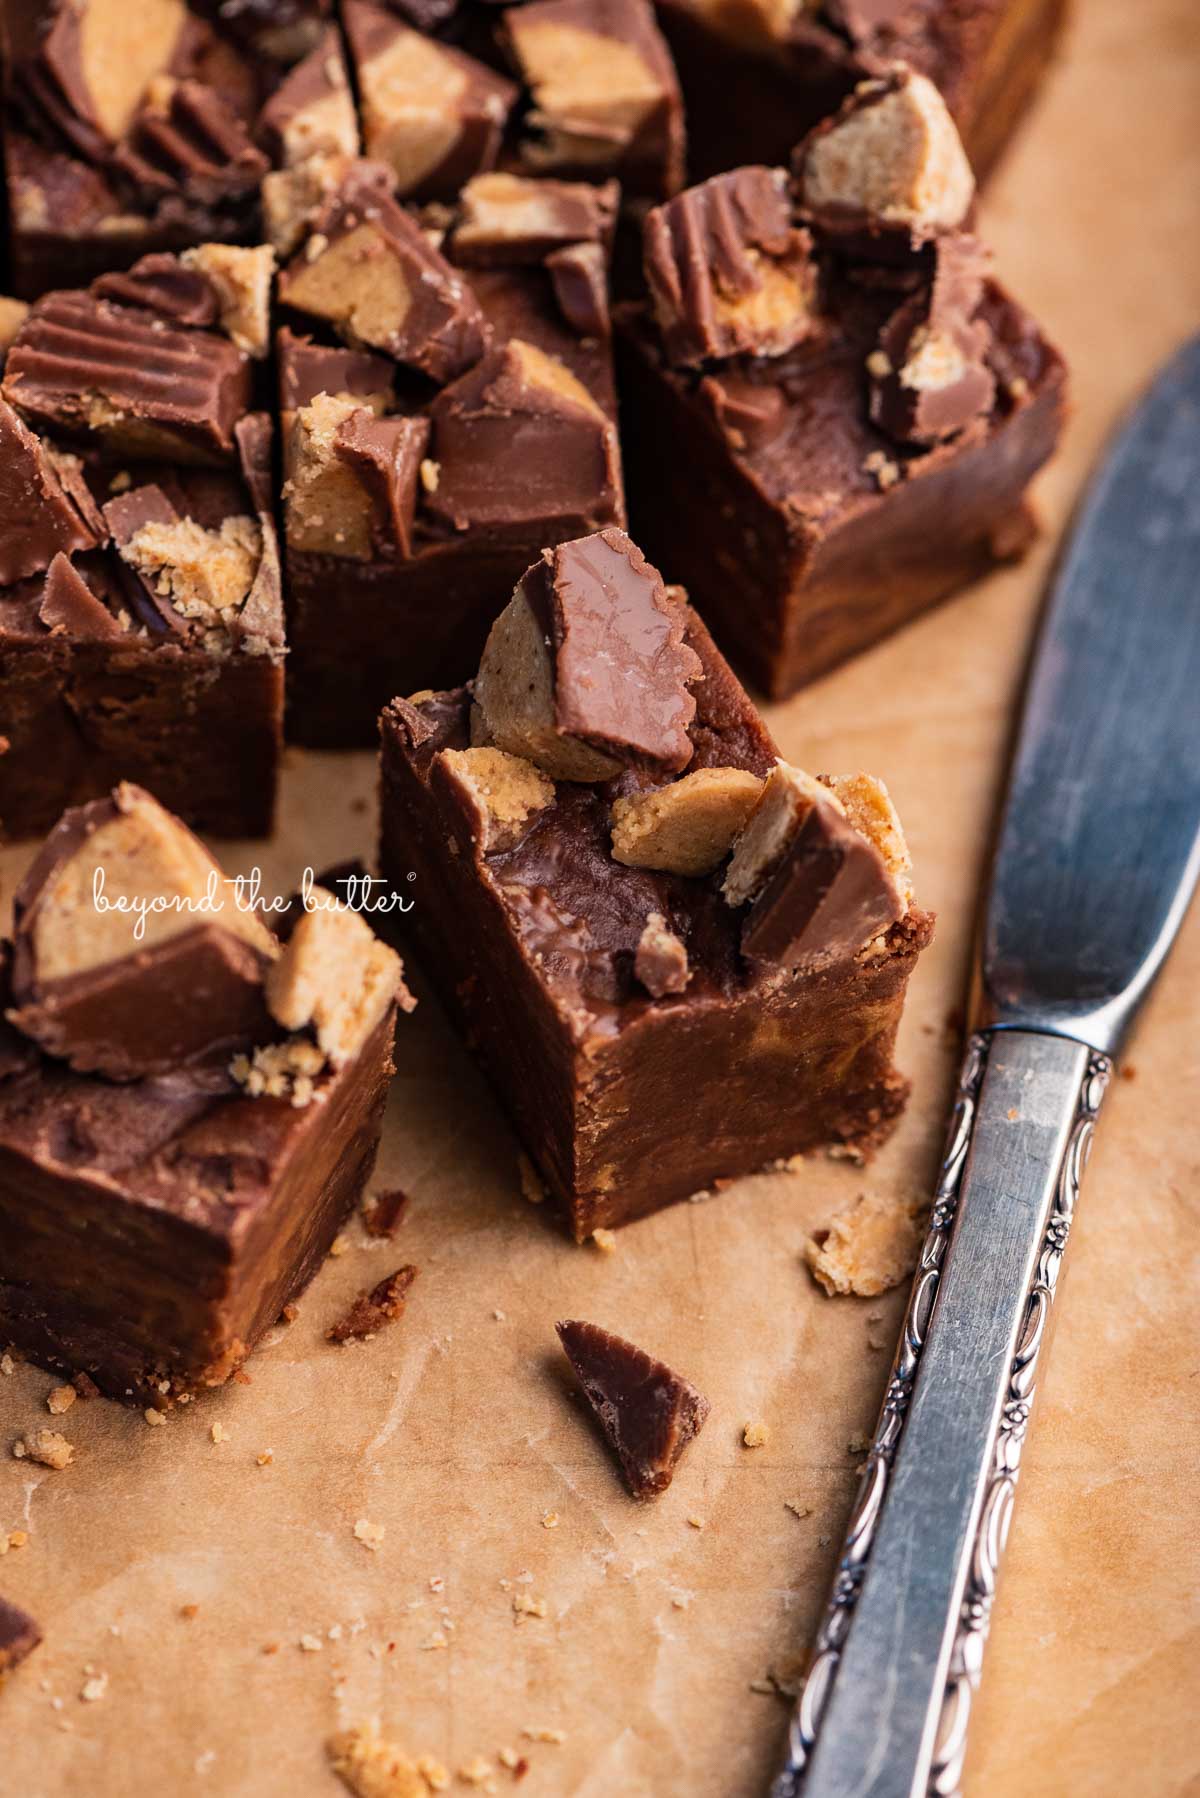
Quick Tip: For clean slices of chocolate peanut butter fudge, run the knife under hot water, dry off the knife with a clean kitchen towel, and then make the cut.
Helpful Baking Tools
The list of what tools you’ll need to make this easy chocolate peanut butter fudge is almost as short as the list of ingredients!
- 9-inch Square Baking Pan. I used my Wilton 9-inch pan for this recipe, but you can also use an 8-inch square baking pan for a slightly thicker fudge. For a thinner fudge, you can use a small jelly roll pan or baking sheet (with a 1-2 inch edge).
- Aluminum Foil or Parchment Paper. I recommend using either a non-stick aluminum foil for this fudge recipe or parchment paper. You’ll need this to cover the bottom and sides of the pan. You can skip it if you want, but it’s easier to cut the fudge when it is outside the pan.
- Large Glass Mixing Bowl. Only one is needed to mix up all of the ingredients (minus the mini peanut butter cups).
- Whisk and Spatula. The only brand I really love is GIR—or Get it Right. They’re so well made and come in the best colors!
- Microwave. No stove top needed for heating the chocolate and sweetened condensed milk together. We’re going for easy here!
- Cutting Board and Knife. This will come in handy for when you cut up the mini peanut butter cups and again for when you cut the fudge into squares.
Recipe FAQs
I used my Wilton 9-inch baking pan for this recipe. I love my Nordic Ware pans, but they have rippled sides and bottoms and, for this recipe, I did not want to have that marking left on the fudge.
You can also use an 8-inch baking pan for a slightly thicker layer of fudge.
Unless you stir the peanut butter really well—I’m talking no visible oil left—I do not recommend it. It’s best to stick to the creamy, no-stir kind.
The best way to store fudge is to keep it in the refrigerator in an air-tight container with wax paper placed in between so the fudge does not stick together.
Yes, absolutely! Wrap it tightly in plastic wrap and (optionally) aluminum foil, then place it in an air-tight container where it will keep in the freezer for up to 3 months. Let it come to room temperature before cutting it into squares (if you left it as one 9-inch square).
Enjoy These Other Chocolate Peanut Butter Treats!


Chocolate Peanut Butter Fudge

Ingredients
- 25-30 Mini Peanut Butter Cups, chopped into small bits
- 14 oz Sweetened Condensed Milk
- 12 oz Semi-Sweet Chocolate Chips
- 1 3/4 cups Creamy Peanut Butter
- 1 tsp Vanilla Extract
- 1/8 tsp Salt
Instructions
- Line the bottom and side of a 9-inch square pan with either parchment paper or aluminum foil. Set to the side.
- Chop the mini peanut butter cups into small bits, then set to the side.25-30 Mini Peanut Butter Cups
- Combine the sweetened condensed milk and semi-sweet chocolate chips in a large microwaveable bowl. Microwave for 1 minute on full power. Stir and continue to heat for 30-45 second increments at 60% powder until the chocolate has melted with the sweetened condensed milk.14 oz Sweetened Condensed Milk, 12 oz Semi-Sweet Chocolate Chips
- Add in the peanut butter, vanilla extract, and salt, stirring until well blended and smooth.1 3/4 cups Creamy Peanut Butter, 1 tsp Vanilla Extract, 1/8 tsp Salt
- Transfer the mixture to the prepared 9-inch square pan, then top with chopped peanut butter cup bits. The fudge will already start to set as you place the peanut butter bits on top.
- Place in the refrigerator uncovered for a minimum of 1 hour to set. Longer is always better though!
- Remove from the pan and cut into squares. I cut my chocolate-peanut butter fudge into small 1 inch squares, but you can always cut them bigger!
- Chocolate peanut butter fudge can be kept stored in an airtight container at room temperature or in the refrigerator (use wax paper for layering) for up to 2 weeks. You can also freeze it, tightly wrapped in plastic wrap and kept in an airtight container, for up to 3 months.
Notes
Nutrition
Nutritional information provided above is an estimate only and will vary based on specific ingredients used. See Nutritional Disclaimer for more info.


Good, easy recipe. My microwave is lame so I did it on top of the stove. Just be sure to use really low heat and stir it constantly until the chips are completely melted. Also, I used metric measurements. The peanut butter I used was a new jar which had 454 g. The recipe calls for 452g. I used the whole jar without measuring. Worked fine and wasn’t left with 2 g peanut butter!
Silly question and maybe I’m reading it too quickly and missed it but do you add the pb cup pieces right before you chill it?
No worries! It’s in step 5, “Transfer the mixture to the prepared 9-inch square pan, then top with chopped peanut butter cup bits. The fudge will already start to set as you place the peanut butter bits on top.” Then in step 6, you place it into the refrigerator to chill.